Cabbage is a versatile, nutritious vegetable enjoyed in many dishes, from fresh salads to hearty soups and stir-fries. While traditionally grown in garden plots, cabbage also thrives in buckets and other containers, making it an excellent option for urban gardeners or anyone with limited space. With the right setup and care, you can produce large, crisp, and healthy cabbage heads right on your balcony, patio, or small backyard.
Why Grow Cabbage in Buckets?
Container gardening offers several benefits for cabbage growers:
-
Space-saving: Ideal for small spaces, buckets let you grow cabbage where ground planting isn’t possible.
-
Mobility: Containers can be moved to sunnier areas or sheltered from harsh weather.
-
Soil control: Buckets allow you to create nutrient-rich, pest-free soil for optimal cabbage growth.
-
Reduced weeds and pests: Elevated containers often experience fewer weeds and soil-borne insects.
This method is both practical and rewarding, giving you control over your plants’ growing environment.
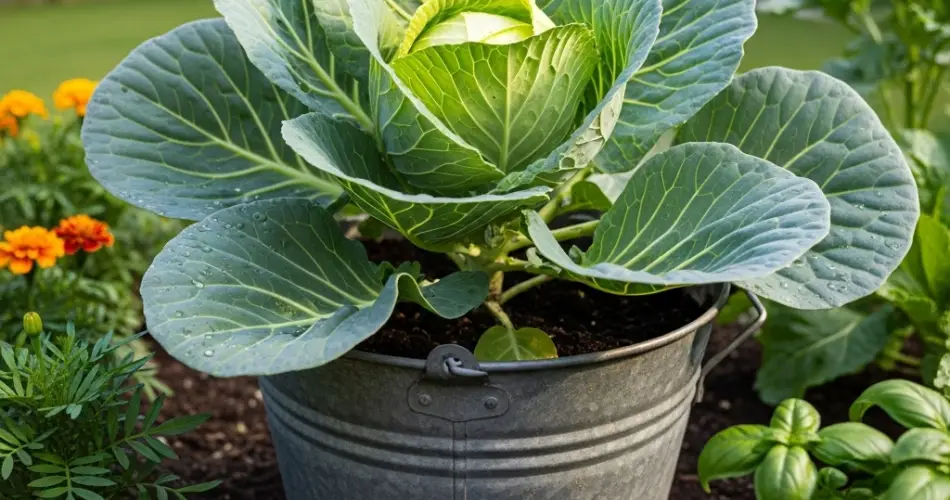
Step 1: Choosing the Right Bucket
The size of the bucket matters when growing cabbage.
-
Capacity: Select a bucket that is at least 5 gallons in size. Bigger buckets (10–15 gallons) give roots more room to spread, resulting in larger, healthier heads.
-
Drainage: Drill 5–8 holes in the bottom to prevent excess water from sitting in the soil. Proper drainage is essential to avoid root rot.
-
Material: Plastic buckets work well because they retain moisture, while fabric grow bags are excellent for air circulation around the roots.
Always raise buckets slightly off the ground using bricks or stands to improve drainage.
Step 2: Selecting Cabbage Varieties
Different cabbage types suit different container gardening needs.
-
Compact varieties: Smaller cabbages such as Golden Acre, Copenhagen Market, and Mini Express are perfect for bucket growing.
-
Savoy cabbages: These have crinkled leaves and a delicate flavor, performing well in containers with good soil.
-
Red cabbages: Varieties like Red Express add color to your garden and plate while fitting nicely in medium buckets.
When choosing, consider your climate, space, and cooking preferences.
Step 3: Preparing the Soil
Cabbage is a heavy feeder, requiring nutrient-rich soil.
-
Base mix: Use high-quality potting soil instead of heavy garden soil.
-
Nutrients: Mix in compost or aged manure for organic matter.
-
Drainage aids: Add perlite, sand, or coco coir to balance moisture retention and aeration.
The goal is a fertile, well-draining medium that supports steady growth.
Step 4: Planting Cabbage in Buckets
You can grow cabbage either from seeds or seedlings.
-
From seeds: Sow 2–3 seeds about half an inch deep in the center of the bucket. After germination, thin to the strongest seedling.
-
From seedlings: Place one healthy transplant per bucket, ensuring it sits at the same depth as in its starter pot.
-
Spacing: One plant per bucket is best, as cabbage needs room to form a firm head.
-
Watering: After planting, water thoroughly to settle the soil around the roots.
Proper planting gives your cabbage the best start.
Step 5: Sunlight and Temperature Needs
Cabbage thrives in cool weather but still requires plenty of light.
-
Light: Position buckets where they receive at least 6 hours of direct sunlight daily.
-
Temperature: Cabbage grows best between 55–75°F (13–24°C). It tolerates light frost, making it suitable for early spring or fall planting.
If temperatures rise too high, provide shade during the hottest part of the day to prevent bolting.
Step 6: Watering and Fertilizing
Consistent care keeps cabbage healthy.
-
Watering: Keep the soil evenly moist. Dry spells can cause heads to split, while soggy soil may lead to root problems. Water deeply whenever the top inch feels dry.
-
Fertilizing: Apply a balanced liquid fertilizer every 2–3 weeks. Once heads begin to form, switch to a fertilizer higher in potassium and phosphorus to encourage firmness.
-
Mulching: Adding a thin mulch layer helps retain moisture and regulate soil temperature.
Balanced feeding and steady watering lead to tight, crisp cabbage heads.
Step 7: Supporting Plant Growth
Cabbage plants can sometimes become top-heavy.
-
Use short stakes to help stabilize the plant in windy conditions.
-
Remove lower yellowing leaves to improve air circulation and prevent disease.
-
Watch for crowding if you have multiple buckets—space them apart for healthy airflow.
Support and maintenance ensure steady, healthy growth.
Step 8: Pest and Disease Management
Cabbage is prone to certain pests and diseases, but container growing reduces the risks.
-
Common pests: Look out for cabbage worms, aphids, and flea beetles. Handpick or use organic sprays like neem oil if infestations occur.
-
Diseases: Prevent fungal issues by avoiding overhead watering and ensuring good airflow.
-
Rotation: If reusing buckets, change soil each season to reduce the risk of soil-borne diseases.
Proactive care keeps your cabbage strong and productive.
Step 9: Harvesting Cabbage
Harvesting at the right time is key for taste and texture.
-
Timing: Cabbage is ready when heads are firm and compact, usually 70–90 days after planting (depending on variety).
-
Method: Use a sharp knife to cut the head at the base, leaving outer leaves and roots in place. These may produce smaller secondary heads for an extended harvest.
-
Storage: Freshly harvested cabbage keeps well in a cool place or refrigerator for weeks.
Regular checks help you harvest at peak quality.
Conclusion
Growing cabbage in buckets is an easy and rewarding way to produce fresh, homegrown food even in small spaces. With the right bucket, nutrient-rich soil, and consistent care, you can harvest firm, healthy cabbage heads perfect for your kitchen. Container gardening makes it possible to enjoy this classic vegetable year-round, proving that even with limited space, a bountiful harvest is within reach.


