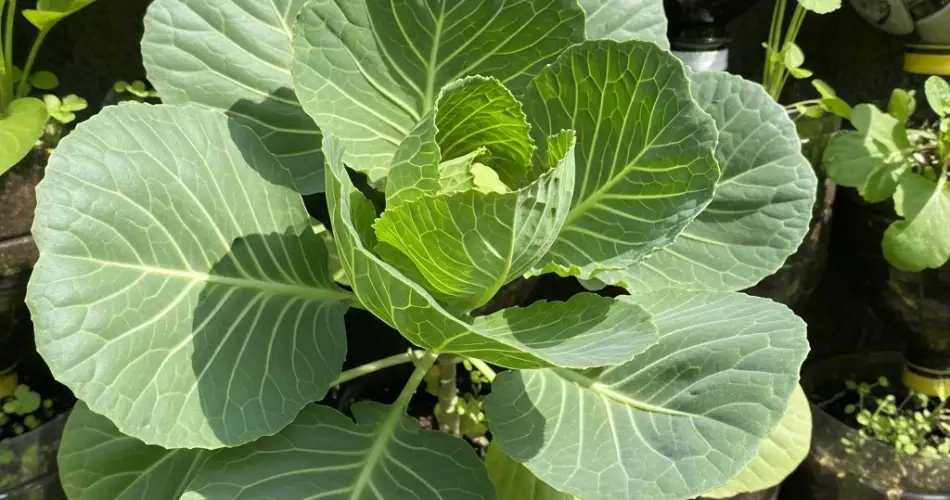
Cabbage is a cool-weather favorite known for its tightly packed heads and nutritional value. While it’s often grown in spacious garden beds, you can actually grow cabbage successfully in a vertical wall garden using recycled plastic bottles. This method saves space, promotes sustainability, and turns ordinary walls into productive, leafy green walls.
Whether you’re working with a tiny balcony, a fence, or a bare wall in your backyard, plastic bottle wall gardening makes cabbage cultivation accessible and visually appealing. It’s a great option for urban gardeners and anyone looking to grow more in less space.
Why Grow Cabbage in Bottle Wall Gardens?
Using plastic bottles for vertical gardening brings several advantages, especially when growing larger vegetables like cabbage:
-
Maximizes vertical space – Perfect for small yards, patios, and balconies
-
Reduces waste – Reuses bottles that would otherwise end up in landfills
-
Improves air circulation – Keeps plants healthy and helps prevent disease
-
Organized planting – Makes maintenance and harvesting easier
-
Customizable setup – Bottles can be arranged to suit your available space
-
Appealing aesthetics – Turns plain walls into lush green displays
Even though cabbage is a heavier crop compared to herbs or lettuces, it still thrives when supported in a well-designed vertical garden system.
Best Cabbage Varieties for Bottle Gardens
Compact or early-maturing cabbage varieties are ideal for vertical growing in bottles. These types form smaller heads that fit comfortably in limited soil space:
-
Golden Acre – A compact variety that matures quickly
-
Copenhagen Market – Small, round heads with tight leaf structure
-
Pixie – Bred for small gardens and containers
-
Savoy Express – A crinkled-leaf type that is compact yet flavorful
-
Red Acre – A colorful option that grows well in containers
Avoid large-headed cabbages that need deep soil and wide space.
Materials You’ll Need
To build your vertical cabbage bottle garden, gather the following supplies:
-
2-liter plastic bottles (clean and with caps)
-
Sharp scissors or a utility knife
-
High-quality potting mix (with compost and perlite or coco coir)
-
Cabbage seeds or seedlings
-
Screws, strong string, or wire for mounting
-
Wall, fence, or wooden pallet for support
-
Optional: mulch (like straw or dry leaves) to retain soil moisture
Step 1: Prepare the Bottles
-
Clean bottles thoroughly and remove any labels.
-
Cut a wide planting window on one side, roughly 5–6 inches long and 3–4 inches wide.
-
Puncture small drainage holes at the bottom and near the cap.
-
Create mounting holes at the top and bottom of the bottle to attach it to a vertical surface using string, wire, or screws.
-
Optional: Add a thin layer of gravel or small stones for better drainage.
Step 2: Add Soil and Plant Seeds or Seedlings
Fill each bottle with a loose, well-draining potting mix. A mix containing compost, perlite, or coco coir works best to support root development and water retention.
Sow 1–2 seeds about ¼ inch deep. If using seedlings, transplant one healthy cabbage per bottle, keeping the roots covered and stable.
Water gently to settle the soil and ensure good contact with the roots or seeds.
Step 3: Mount the Bottles on a Sunny Wall
Choose a location that receives 4–6 hours of direct sunlight per day, ideally with some afternoon shade during hotter seasons. Mount your bottles securely on a vertical frame, wooden panel, or fence using wire, screws, or sturdy string.
Space bottles at least 10–12 inches apart vertically and horizontally to allow the cabbage heads to expand and receive adequate airflow.
Step 4: Watering and Feeding
Cabbage needs consistent moisture to develop tender, healthy leaves. Check the soil daily and water when the top inch feels dry. Bottles dry out faster than traditional beds, so regular watering is essential.
Feed every 2–3 weeks with an organic liquid fertilizer rich in nitrogen during early growth, then switch to a balanced formula to support head formation. Compost tea or diluted fish emulsion works well.
Step 5: Maintenance and Pest Control
Cabbage can attract pests like aphids and cabbage loopers. Inspect leaves regularly and remove any pests by hand or spray with a natural solution like neem oil.
As the cabbage matures, remove any yellowing or damaged outer leaves to keep the plant healthy. Mulching the top of the bottle with straw or dried leaves can help conserve moisture and regulate temperature.
Step 6: Harvesting
Depending on the variety, cabbage heads are ready to harvest 60–90 days after transplanting. Check if the head feels firm and compact when squeezed gently.
To harvest, cut the head at the base with a sharp knife. Leave the outer leaves and roots in place if you’d like a smaller second harvest (called a cabbage sprout) from the same plant.
Step 7: Replant and Refresh
After harvesting, remove the root base and refresh the soil with compost before replanting. You can rotate in other crops like leafy greens or herbs to maintain soil health and avoid nutrient depletion.
Final Thoughts
Growing cabbage in plastic bottle wall gardens is a sustainable, efficient, and visually rewarding way to produce healthy, homegrown food. With just a few basic tools and a sunny wall, you can enjoy compact cabbage heads fresh from your vertical garden.
This method proves that even larger vegetables can thrive in a bottle—bringing fresh produce to your wall, one leafy head at a time.


