Growing hot chilies at home is a rewarding and enjoyable experience, especially for those who love a little spice in their meals. Starting your chili plants from seeds doesn’t require a greenhouse or expensive tools. In fact, you can easily germinate chili seeds using plastic bottles right at home. This method is affordable, eco-friendly, and ideal for small spaces like balconies, windowsills, or kitchen counters.
Why Germinate Chili Seeds in Plastic Bottles?
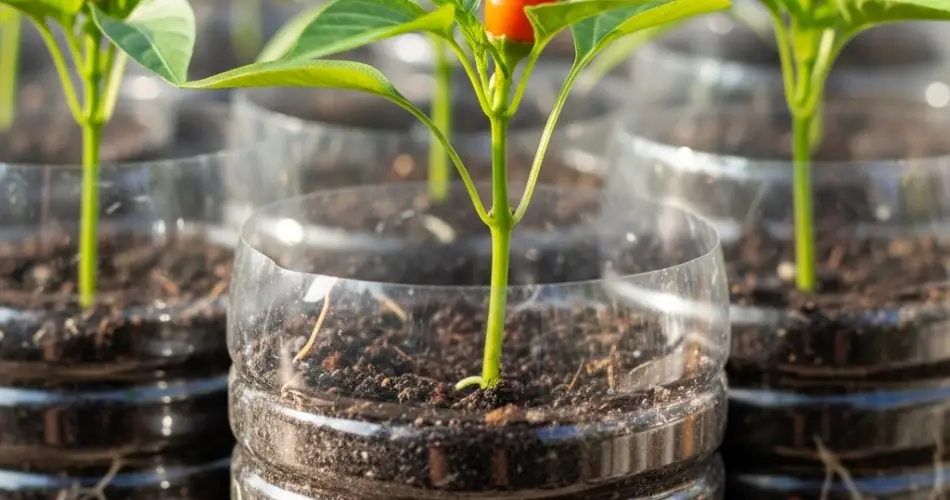
Plastic bottles work like miniature greenhouses, providing the warm and humid conditions that chili seeds need to sprout. Chilies, especially hot varieties, require consistent heat and moisture for germination. Bottles help trap warmth and retain humidity, creating a perfect microclimate for seed starting.
Using plastic bottles is also a great way to recycle materials, reducing waste while growing your own food. It’s an ideal method for urban gardeners or anyone looking to start seeds indoors before transferring seedlings to larger containers or outdoor beds.
What You Need
-
1.5- or 2-liter clear plastic bottles
-
Sharp scissors or a craft knife
-
Chili seeds (any hot variety you prefer)
-
Potting soil or seed-starting mix
-
Water spray bottle
-
A tray or shallow container to catch drips
-
Marker or label (optional)
Step-by-Step Guide to Bottle Germination
1. Prepare the Bottles
Start by rinsing the bottles thoroughly to remove any residue. Cut the bottles horizontally about two-thirds from the bottom. This creates a base for the soil and a top cover to act as a humidity dome.
Poke 3 to 5 drainage holes in the bottom of the lower half using a sharp object. This prevents waterlogging, which could rot your seeds.
2. Fill with Soil
Use a light, well-draining seed-starting mix. Fill the bottom half of the bottle with moist soil, leaving about 2–3 cm from the top edge. The soil should be damp but not soaking wet.
3. Plant the Seeds
Make small holes in the soil about 0.5 cm deep using a stick or pencil. Place one or two seeds in each hole and cover them lightly with soil. Gently press down to ensure good contact between the seeds and the soil.
Mist the surface with water to settle the soil and hydrate the seeds.
4. Create a Greenhouse Effect
Place the top half of the bottle back over the bottom half. If needed, tape the two halves together loosely. Leave the bottle cap on during the initial stages to keep humidity high. This creates a warm, enclosed space ideal for germination.
Place the bottle in a warm, bright spot out of direct sunlight—such as near a window, under a grow light, or on top of a refrigerator. The key is maintaining a consistent temperature of 25–30°C (77–86°F), which is optimal for chili seed germination.
5. Wait and Watch
Chili seeds can take anywhere from 7 to 21 days to germinate, depending on the variety and temperature. Check the soil daily to make sure it remains moist. Use a spray bottle to mist if it begins to dry out. Avoid overwatering, as excess moisture can lead to fungal growth or rotting.
Once seedlings appear, remove the bottle cap to improve airflow and prevent mold. After a few more days, when the seedlings grow their first true leaves, you can remove the top half of the bottle during the day to start hardening them off.
Caring for Chili Seedlings
When seedlings are about 5–7 cm tall and have developed a couple of sets of true leaves, they are ready for transplanting.
Tips for Healthy Seedlings:
-
Lighting: Place seedlings in a sunny spot or under a grow light for 12–14 hours a day. Insufficient light causes leggy, weak plants.
-
Watering: Keep the soil consistently moist but not soggy. Water from the bottom by placing the bottle on a tray with a small amount of water.
-
Air Circulation: Ensure good airflow around the seedlings to reduce the risk of damping-off disease.
Transplanting
Once your seedlings are strong and healthy, you can transplant them into larger pots or directly into your garden, depending on your space and climate.
Choose containers at least 20–30 cm deep or prepare garden beds with compost-rich soil. Transplant on a cool day or in the evening to reduce transplant shock. Water thoroughly after transplanting.
Space your chili plants 30–45 cm apart to allow them room to grow and produce plenty of fruit.
Final Thoughts
Germinating hot chili seeds in plastic bottles is a simple, space-saving method that anyone can try at home. It’s especially useful for gardeners working in limited spaces or those who want to get a head start on the growing season. With a bit of care and patience, your plastic-bottle seedlings will soon grow into robust chili plants, ready to spice up your garden—and your cooking.


