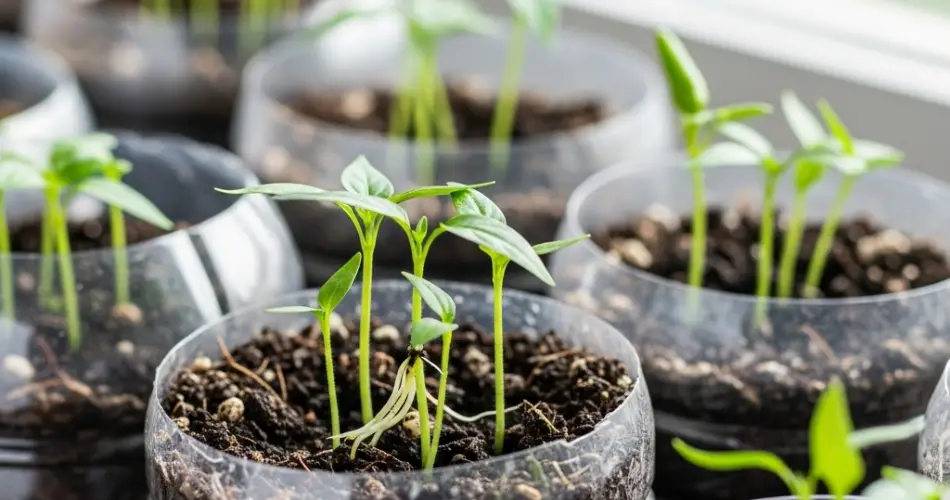
Growing chili peppers at home can be incredibly rewarding, especially when you use simple, recycled materials to start your seedlings. One of the most effective and space-saving methods is using cut plastic bottles to create mini greenhouses for propagation. These DIY chili propagation bottles create the perfect humid environment that encourages faster sprouting and stronger seedling growth, even in limited spaces like balconies, patios, or small gardens.
Here’s a detailed, easy-to-follow guide on how to propagate chili peppers using plastic bottles:
Materials Needed:
-
Chili seeds (any variety: hot, sweet, or ornamental)
-
1.5- or 2-liter clear plastic bottles
-
Utility knife or scissors
-
Seed-starting mix or light potting soil
-
Spray bottle or watering can
-
Marker and labels (optional)
-
Compost or organic fertilizer (optional)
Step 1: Choose and Prepare the Bottles
Start by selecting clear plastic bottles. Rinse them thoroughly to remove any residue. Using a utility knife or strong scissors, cut each bottle in half. The bottom part will serve as the planting container, while the top half will act as a humidity dome.
Poke a few small holes in the bottom of each bottle to allow for drainage. This step is important to prevent water from accumulating and causing the seeds or seedlings to rot.
Remove any labels from the bottles so that as much light as possible can reach the seeds during germination.
Step 2: Prepare the Growing Medium
Fill the bottom half of each bottle with a light, well-draining seed-starting mix. If you don’t have seed-starting mix, you can use potting soil mixed with sand, coco coir, or perlite to improve drainage.
Moisten the soil with water before planting the seeds. The soil should be damp but not soaking wet.
Step 3: Plant the Chili Seeds
Make a small indentation in the center of the soil using your finger or a stick. Place 2 to 3 chili seeds in each bottle to increase the chances of germination. Lightly cover the seeds with a thin layer of soil or simply press them down so they make good contact with the moist soil.
Label each container if you’re planting multiple chili varieties. This will help you keep track as they grow.
Step 4: Create the Mini Greenhouse
Place the top half of the bottle (with the cap on) over the bottom to create a mini greenhouse. This setup traps warmth and moisture, creating an ideal microclimate for seed germination.
Put the propagation bottles in a warm, bright area. Chili seeds germinate best in temperatures between 25–30°C (77–86°F). A sunny windowsill, balcony, or shaded outdoor space works well. Avoid placing the bottles in direct, harsh sunlight during the hottest part of the day to prevent overheating.
Step 5: Monitor and Maintain
Check your bottles daily. Condensation on the inner walls of the bottle indicates high humidity—perfect for chili seed sprouting. If you don’t see any condensation, open the dome, lightly mist the soil with a spray bottle, and close it again.
Depending on the chili variety and temperature, seeds typically germinate in 5 to 14 days.
As soon as the seedlings emerge, remove the cap from the bottle during the day to allow air circulation and avoid mold growth. Continue to monitor soil moisture and mist as needed to keep the environment balanced.
Step 6: Thinning and Hardening Off
When the seedlings have grown two or more true leaves, thin them out by snipping the weaker ones at soil level, leaving the strongest plant in each bottle. This gives the remaining plant more space and nutrients to develop.
Gradually begin hardening off the seedlings by removing the plastic dome for a few hours each day. This helps them adjust to outdoor conditions, preparing them for transplanting.
Step 7: Transplant to Larger Containers or Garden Beds
After 3 to 4 weeks, when the seedlings are about 10–15 cm tall and have a healthy set of leaves, they are ready for transplanting. Carefully remove them from the bottle base and transplant into larger pots or directly into your garden.
Choose a sunny spot with well-drained soil. Chili peppers thrive in full sun and warm temperatures, so ensure they get at least 6 hours of sunlight daily. Water well after transplanting and continue to feed with organic fertilizer or compost every couple of weeks to support growth and flowering.
Extra Growing Tips
-
Use neem oil or garlic spray to deter aphids and other pests.
-
Stake the plants once they grow tall to prevent them from bending or breaking.
-
Pinch off early flowers if you want the plant to grow bushier before fruiting.
Conclusion
Using DIY chili propagation bottles is a fantastic way to get a head start on the growing season while making use of everyday plastic waste. These mini greenhouses provide warmth and humidity that chili seeds love, leading to faster sprouting and stronger, healthier seedlings. With a bit of care and consistency, you’ll be well on your way to harvesting fresh, homegrown chili peppers in no time.


