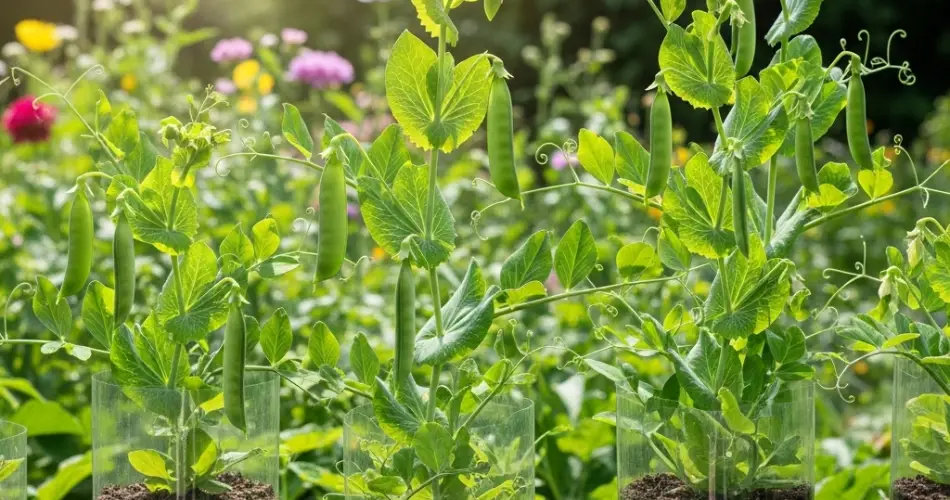
Growing peas at home doesn’t require a big garden or expensive planters. In fact, with a few recycled plastic bottles and some basic materials, you can enjoy a productive and space-saving pea garden right from your balcony, wall, or kitchen window. This eco-friendly method allows anyone—even in the smallest urban spaces—to grow sweet, fresh peas from scratch.
Peas are cool-weather crops, fast-growing, and highly rewarding. With proper care and support, they thrive in vertical and container settings, making them ideal for this bottle-based gardening method.
Why Grow Peas in Plastic Bottles?
Reusing plastic bottles as planters is not only budget-friendly but also an excellent way to reduce waste. Bottles are lightweight, easy to modify, and fit perfectly into vertical gardening systems. Whether you’re growing on a windowsill, balcony railing, or outdoor wall, plastic bottles provide an efficient and clean solution for compact gardening.
Advantages include:
-
Saves space – perfect for apartments and small homes
-
Recycles household waste – reduces plastic pollution
-
Customizable – easily adapted to different spaces and plant types
-
Portable – move them to catch better sunlight or avoid extreme weather
What You’ll Need
To begin your bottle-grown pea garden, gather the following materials:
-
1.5- to 2-liter plastic bottles
-
Sharp scissors or utility knife
-
Heated nail or drill (for drainage holes)
-
Garden string, rope, or wire for hanging
-
Potting mix or a homemade soil blend
-
Pea seeds (sugar snap, snow peas, or garden peas)
-
Wooden skewers, sticks, or mini trellis for climbing support
-
Sunny location (at least 4–6 hours of direct sunlight)
Preparing the Bottles
-
Clean the Bottles: Remove labels and wash the bottles thoroughly to eliminate any residue.
-
Cut the Openings: Cut a large rectangular window into the side of the bottle for planting access. If hanging horizontally, cut on one broad side. If using upright, cut near the top or use the opening as the planting hole.
-
Drainage Holes: Create 4–5 small holes at the bottom of each bottle to allow water to drain and prevent root rot.
-
Hanging Setup: If you plan to hang your bottles, punch two holes near the neck and base, then thread rope or wire through to make a loop or hanger.
Soil and Planting
Peas prefer loose, well-draining soil that retains moisture but doesn’t stay soggy. A good homemade mix includes:
-
2 parts compost
-
1 part coconut coir or peat moss
-
1 part sand or perlite
Planting Steps:
-
Fill the bottle with soil up to 1–2 inches below the rim or planting opening.
-
Sow 2–3 pea seeds per bottle about 1 inch deep. Gently press the soil over them.
-
Water lightly to moisten the soil.
-
Place the bottles in a location that receives 4–6 hours of sunlight each day.
-
Insert small sticks or skewers inside the bottles as support for the young pea vines. For larger plants, set the bottles near a mesh or wire trellis.
Care and Maintenance
-
Watering: Keep the soil evenly moist. Peas don’t like dry soil, especially when flowering and forming pods. Check containers daily, particularly in warm or windy conditions.
-
Sunlight: Position bottles in areas with ample light, such as a balcony, windowsill, or porch railing.
-
Feeding: While peas don’t require heavy feeding, a compost tea or light organic fertilizer every 2–3 weeks will boost growth and pod production.
-
Support Growth: Pea vines love to climb. Use twine, netting, or nearby supports to encourage upward growth and prevent plants from trailing on the ground.
-
Pruning: Pinch off dead or yellowing leaves to maintain airflow and prevent disease.
Common Pests and How to Manage Them
-
Aphids and whiteflies can occasionally bother pea plants. A simple spray of diluted dish soap or neem oil helps deter these pests.
-
Powdery mildew is more common in humid conditions. Ensure good airflow between plants and avoid overhead watering.
Harvesting Peas
Depending on the variety, peas are ready to harvest 55–70 days after planting. Harvest pods when they’re plump, bright green, and tender.
-
Snap peas: Pick when pods are full but before they become tough.
-
Snow peas: Harvest when pods are flat but crisp, before seeds fully develop.
-
Garden peas: Wait until pods are swollen with peas inside but still tender.
Use scissors or pinch pods gently to avoid damaging the vines. Regular harvesting encourages more pod production.
Replanting and Rotation
Pea plants complete their cycle quickly. Once a crop is harvested, remove old plants, refresh the soil mix, and start a new batch. Rotating with leafy greens or herbs helps maintain soil health in your bottle garden.
Final Thoughts
Growing peas in plastic bottles is a creative and sustainable way to enjoy fresh, homegrown vegetables, even with limited space. This method blends eco-friendly recycling with productive gardening, proving that you don’t need a big garden to grow your own food.
Whether you’re looking to turn your balcony into a green corner or introduce kids to gardening at home, this technique is fun, practical, and rewarding—from bottle to harvest.


