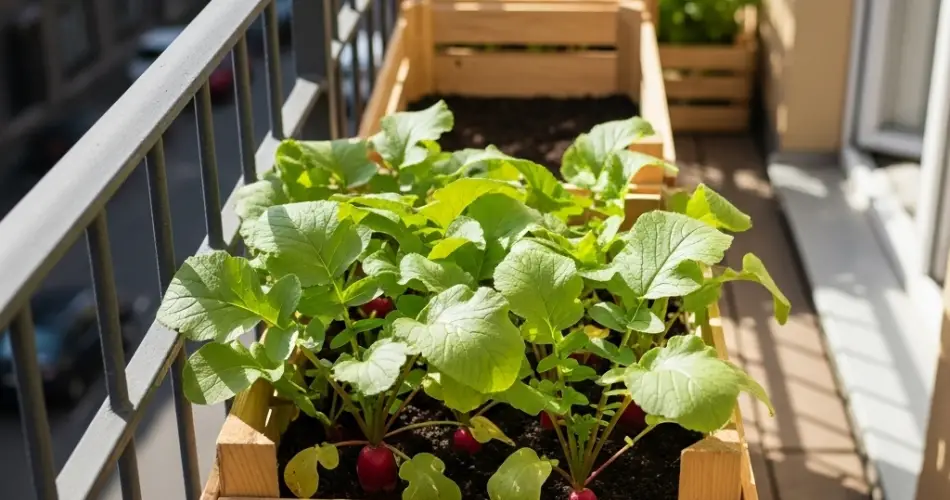
Radishes are among the quickest and easiest vegetables to grow, making them ideal for beginner gardeners and those short on space. With just a crate, some soil, and a sunny balcony, you can harvest crisp, peppery radishes in a matter of weeks.
This method of crate gardening is perfect for urban dwellers who want fresh produce without a backyard. Crates are lightweight, easy to set up, and can fit into the smallest outdoor areas—allowing you to turn your balcony into a productive mini-garden.
Why Grow Radishes in Crates?
Radishes thrive in containers because they don’t require deep soil or much maintenance. Here’s why they’re perfect for crate gardening:
-
Fast growth – Some varieties mature in just 3–4 weeks
-
Small footprint – Great for compact spaces like balconies
-
Easy care – Minimal fertilizing and pest control needed
-
Cool-season crop – Perfect for spring or fall planting
-
Dual-purpose – Both roots and leaves are edible
-
High success rate – Ideal for beginners
If you’re looking for a quick win in your balcony garden, radishes are a smart choice.
Best Radish Varieties for Containers
Look for quick-maturing and compact radish varieties when growing in crates:
-
Cherry Belle – Classic round red radishes ready in 22–28 days
-
French Breakfast – Oblong, pink with white tips, mild flavor
-
Sparkler – Crisp white flesh with red skin, perfect for salads
-
Easter Egg – A colorful mix of red, purple, and white radishes
-
White Icicle – Slender and mild, ideal for shallow containers
These varieties grow well in small spaces and produce flavorful results quickly.
What You’ll Need
To get started, gather the following supplies:
-
A wooden or plastic crate (8–10 inches deep)
-
Landscape fabric or newspaper to line the bottom
-
High-quality potting mix with compost and perlite or coco coir
-
Radish seeds
-
A small hand trowel or spoon for planting
-
Watering can or spray bottle
-
Optional: mulch such as straw or dried leaves
Be sure your crate has good drainage to prevent soggy soil, which can cause radish roots to rot.
Step 1: Prepare the Crate
Line the inside of the crate with landscape fabric or a few layers of newspaper. This keeps soil in while allowing excess water to drain out.
Set the crate in a location on your balcony that gets at least 4–6 hours of sunlight daily. Radishes prefer cooler temperatures and partial sunlight but still need light to form healthy roots.
Step 2: Add Soil and Sow Seeds
Fill the crate with well-draining potting mix up to an inch below the rim. Avoid compacted or heavy garden soil, which can interfere with root development.
Sprinkle radish seeds about 1 inch apart in rows or across the surface. Cover with about ½ inch of soil and water gently.
You can sow new seeds every 7–10 days for a continuous harvest over several weeks.
Step 3: Watering and Feeding
Keep the soil consistently moist but not soggy. Radishes grow quickly and don’t tolerate long dry spells. Water lightly every day or two, depending on weather and container size.
Fertilizing is optional if your potting mix contains compost, but if needed, use a diluted organic liquid fertilizer once during the growing cycle.
Avoid high-nitrogen fertilizers, as they encourage leaf growth at the expense of root development.
Step 4: Thinning and Maintenance
Once seedlings are about 2 inches tall, thin them to about 2 inches apart. This gives each root space to expand.
Use scissors to snip out extra seedlings at the soil line—pulling can disturb nearby roots.
Check regularly for pests like aphids or flea beetles. Radishes are usually pest-resistant, but early detection and natural remedies like neem oil or insecticidal soap help prevent infestations.
Step 5: Harvesting Your Radishes
Most radish varieties are ready for harvest in 3 to 5 weeks. Check the size of the root by gently brushing away a little soil at the base of the leaves.
Harvest when the roots are about 1 inch in diameter. If left too long, they can become woody or bitter.
Pull gently from the base of the plant. Trim the tops and rinse the roots—your crunchy, peppery radishes are ready to eat.
You can also enjoy young radish greens in salads or sautés.
Step 6: Replant for More Harvests
Radishes are a fast turnaround crop, so you can replant right after harvesting. Mix in a little fresh compost, sow new seeds, and repeat the process.
In cooler months, you can get multiple rounds from the same crate. In hotter weather, choose heat-tolerant varieties or grow them in partial shade.
Rotate radishes with quick leafy greens or herbs to keep the soil productive and healthy.
Final Thoughts
Growing radishes in crates on your balcony is one of the simplest and most satisfying ways to enjoy fresh vegetables at home. With minimal supplies and effort, you can enjoy rapid results and harvests every few weeks.
Whether you’re new to gardening or just looking for a quick-growing crop to add to your space, radishes are a tasty, colorful, and efficient solution for small-space growers.


