Aloe vera is a versatile and low-maintenance succulent known for its healing properties, making it a great addition to any indoor or balcony garden. If you’re looking to grow this beneficial plant in a sustainable way, creating planters from used plastic bottles is an excellent choice. Not only do you reduce plastic waste, but you also give your aloe plant a cozy home using simple, cost-effective materials.
This guide walks you through growing aloe vera in plastic bottles—from cutting and preparing the container to caring for the plant—while embracing an eco-friendly lifestyle.
Why Aloe Vera is Perfect for Bottle Gardening
Aloe vera is an ideal plant for upcycled containers because it doesn’t require much space or frequent watering. Its fleshy, moisture-retaining leaves make it drought-tolerant and well-suited for container life. The plant thrives with minimal attention and serves both ornamental and practical purposes. Whether you want to use the gel for skincare or just enjoy its fresh green appearance, aloe vera fits beautifully in a bottle garden.
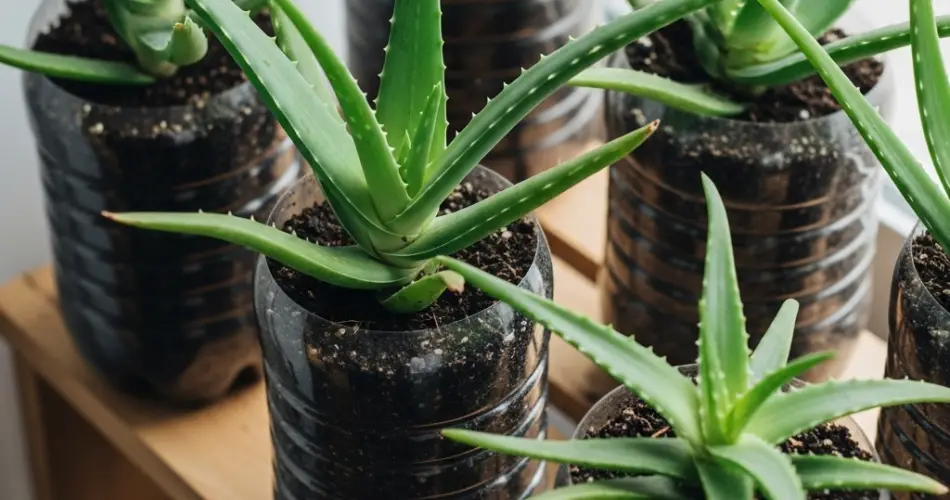
Choosing and Prepping the Bottle
Start with a sturdy plastic bottle—1.5 or 2-liter soda bottles work best. These containers are tall enough to support the plant’s roots while being easy to cut and shape.
How to prepare your bottle:
-
Wash and dry the bottle to remove labels, residue, or lingering liquid.
-
Cut it horizontally: Use a cutter or scissors to slice the bottle about one-third of the way from the top. The bottom part will be your planter.
-
Create drainage holes: Poke 3–5 small holes in the bottom to allow excess water to escape and prevent root rot.
-
Optional base or stand: If the bottle is wobbly, you can place it in a recycled cup or decorate the base for stability and aesthetics.
Cover the outside of transparent bottles with paint, twine, or cloth to block light and protect the roots from exposure.
Soil Requirements for Aloe Vera
Aloe vera thrives in loose, well-draining soil. Use a cactus or succulent mix, or make your own with the following blend:
Avoid moisture-retaining soils like those meant for ferns or tropical plants. Aloe prefers to dry out between waterings, and poor drainage can quickly lead to root rot.
Planting Your Aloe in a Bottle
Whether you’re starting from a store-bought plant, an offshoot (pup), or a stem cutting, aloe vera is easy to transplant.
Steps to plant:
-
Add a layer of small stones or gravel at the bottom for added drainage.
-
Fill the bottle two-thirds full with your soil mix.
-
Place the aloe vera plant in the center, ensuring the roots are buried but the base of the leaves remains above soil level.
-
Add more soil around the base and press lightly to stabilize the plant.
-
Water lightly to moisten the soil, but do not drench it.
Light and Location
Aloe vera needs bright, indirect sunlight to thrive. Place your bottle planter near a sunny window or on a balcony where it can receive at least 4–6 hours of filtered sunlight per day.
Avoid harsh direct afternoon sun through glass, which can scorch the leaves. If growing outdoors, make sure the plant is sheltered from heavy rain or prolonged exposure to cold temperatures.
Watering Tips
Aloe vera is a desert plant, so less is more when it comes to watering. Allow the soil to dry out completely between waterings.
-
In warmer months, water every 2–3 weeks.
-
In cooler seasons, water once a month or less.
-
Always check the soil with your finger—if the top 2 inches are dry, it’s time to water.
-
Never let the planter sit in a pool of water.
Fertilization and Growth
Aloe vera doesn’t require much feeding. However, a light dose of fertilizer during the growing season (spring and summer) can support leaf development.
-
Use a diluted liquid cactus or succulent fertilizer once a month.
-
Avoid over-fertilizing, as this can damage the roots or cause soft, weak growth.
Repotting and Propagating
Over time, your aloe may outgrow the plastic bottle or produce pups (baby plants) around the base. When this happens, carefully remove the mother plant and separate the pups for replanting.
To propagate:
-
Gently twist or cut off the pups with a clean knife.
-
Allow them to dry for 1–2 days to form a callus.
-
Plant each pup in its own prepared bottle planter.
Final Touches: Decoration and Sustainability
Enhance your aloe vera bottle planter by wrapping it in jute rope, burlap, or recycled fabric. You can even label each plant with hand-painted tags or stickers for a personalized touch.
Bottle gardening is not only practical but also an environmentally conscious step toward reducing waste. By repurposing used materials, you turn everyday items into functional, beautiful containers for green living.
Conclusion
Growing aloe vera in plastic bottles combines the best of sustainability and simplicity. With minimal care, these hardy succulents bring health benefits and a splash of green to any indoor or outdoor space. Whether you’re gardening on a windowsill, a balcony, or a compact shelf, aloe vera in recycled containers proves that eco-friendly gardening can be beautiful and effective—even in small spaces.