Kale is a nutritious leafy green, celebrated for its high vitamin, mineral, and antioxidant content. Growing kale at home is not only rewarding but also ensures a fresh, constant supply for salads, smoothies, and cooking. For gardeners with limited outdoor space, bucket gardening provides a simple and effective way to cultivate kale. With the right care, bucket-grown kale can produce abundant leaves for multiple harvests.
Why Grow Kale in Buckets?
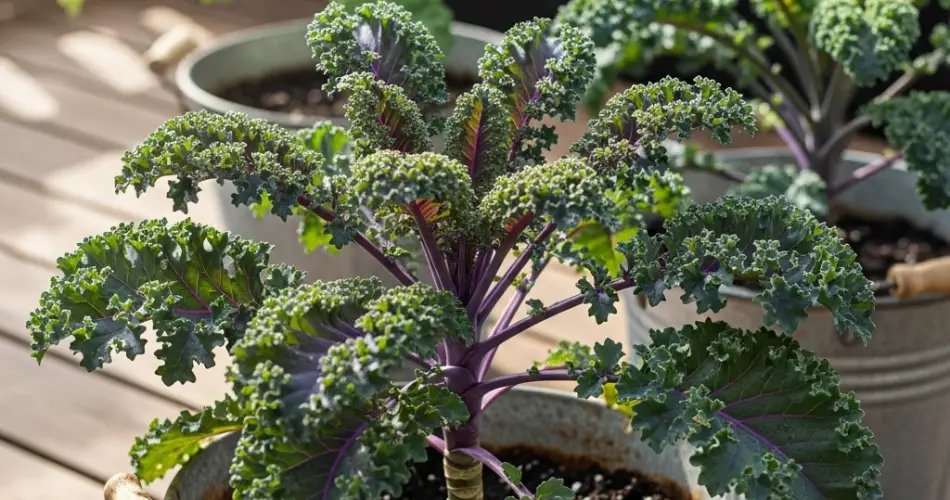
Container gardening offers several advantages for growing kale:
-
Space efficiency – Buckets make it possible to grow kale on balconies, patios, or small yards.
-
Soil control – You can provide nutrient-rich, well-draining soil tailored specifically for leafy greens.
-
Mobility – Buckets can be moved to follow sunlight patterns or protect plants from harsh weather.
-
Pest management – Containers make it easier to monitor and control pests such as aphids and caterpillars.
Bucket gardening allows even small-space gardeners to enjoy a productive kale harvest.
Step 1: Choosing the Right Bucket
Selecting an appropriate container is crucial:
-
Size – A bucket holding at least 5 gallons (19 liters) of soil works best. Kale has a fairly deep root system, so larger containers support healthier plants and higher yields.
-
Drainage – Drill multiple holes in the bottom to prevent water from accumulating and causing root rot.
-
Material – Plastic, metal, or clay buckets are suitable as long as they are sturdy and can hold soil and water.
Proper container selection promotes healthy root growth and sturdy plants.
Step 2: Preparing the Soil
Kale grows best in fertile, well-draining soil:
-
Soil mix – Combine garden soil, compost, and perlite or coarse sand in equal parts. This mix ensures moisture retention while providing adequate drainage.
-
Soil pH – Aim for slightly acidic to neutral soil, with a pH of 6.0–7.0.
-
Fertilization – Incorporate a slow-release balanced fertilizer before planting to support vigorous leaf growth.
Well-prepared soil sets the stage for healthy, nutrient-rich leaves.
Step 3: Planting Kale
Kale can be grown from seeds or seedlings:
-
Seeds – Sow seeds 1/4–1/2 inch deep directly into the container. Keep the soil consistently moist until germination, which usually occurs within 7–14 days.
-
Seedlings – Transplant 3–4 week-old seedlings into the bucket, spacing them 8–12 inches apart to allow room for mature leaves.
-
Succession planting – Sow new seeds every 3–4 weeks for continuous harvests throughout the season.
Proper spacing ensures airflow and prevents overcrowding, which can reduce disease risk.
Step 4: Watering
Consistent moisture is essential for kale:
-
Initial watering – Water thoroughly after planting to settle soil around the roots.
-
Ongoing routine – Keep soil evenly moist but avoid waterlogging. Check daily, especially during warm or dry periods.
-
Watering technique – Water at the soil level to prevent wet leaves, which can lead to fungal issues.
Balanced watering ensures tender, crisp leaves and sustained growth.
Step 5: Sunlight and Placement
Kale prefers full sun but tolerates partial shade:
-
Light requirements – Place the bucket where the plant receives 4–6 hours of sunlight daily. In hotter climates, partial shade can prevent leaves from becoming tough or bitter.
-
Temperature – Kale grows best in temperatures between 55–75°F (13–24°C). Cooler temperatures improve leaf texture and flavor.
Proper light and temperature encourage strong, flavorful leaves.
Step 6: Fertilization and Maintenance
Maintaining nutrients supports continuous leaf production:
-
Feeding – Apply a balanced liquid fertilizer every 2–3 weeks to encourage leafy growth.
-
Mulching – Use organic mulch to retain soil moisture and regulate temperature.
-
Pest monitoring – Inspect leaves regularly for aphids, cabbage worms, or slugs. Remove pests promptly to protect the crop.
Regular care ensures vigorous plants and high-quality harvests.
Step 7: Harvesting Kale
Harvesting correctly promotes multiple yields:
-
Cut-and-come-again method – Trim outer leaves as needed, leaving the central leaves intact. This allows the plant to continue producing new leaves.
-
Timing – Pick leaves when they are young and tender for the best flavor and texture.
-
Frequency – Regular harvesting stimulates continued growth and prevents flowering, which can reduce leaf quality.
With proper harvesting, bucket-grown kale can provide fresh greens for weeks to months.
Final Thoughts
Bucket gardening is an effective and convenient method to grow kale at home. By selecting suitable containers, preparing nutrient-rich soil, maintaining consistent watering, monitoring sunlight, and practicing proper care, gardeners can enjoy abundant and continuous harvests.
Even in small spaces, bucket-grown kale allows you to access fresh, nutrient-packed leaves year-round. With these best care tips, your home can provide a sustainable source of delicious, healthy greens for salads, cooking, and smoothies.


