Cabbage is one of the most reliable and nutritious vegetables to grow in a home garden, but like many cool-season crops, it requires careful attention during the early stages of development. Young cabbage seedlings can be sensitive to fluctuating temperatures, excess moisture, and pests. To give them the best possible start, a simple and resourceful method involves using recycled plastic bottles as mini greenhouses. These DIY bottle starters create a controlled environment for early cabbage growth, ensuring stronger seedlings that are easier to transplant.
This technique is cost-effective, eco-friendly, and ideal for gardeners with limited space. Whether you are working with a backyard garden, balcony containers, or even a windowsill, bottle starters can help you grow healthy cabbage plants right from the start.
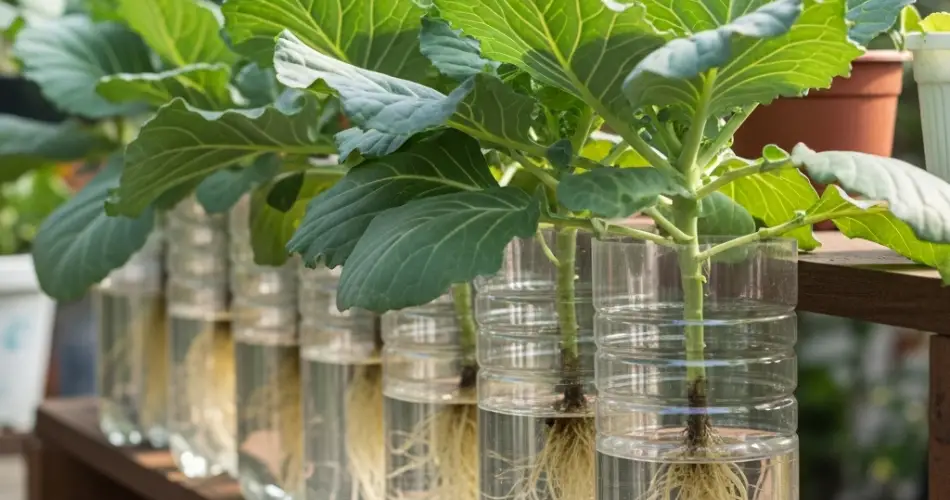
Why Use Bottles for Cabbage Propagation?
Plastic bottles are readily available, easy to repurpose, and perfect for creating a protected space for young seedlings. Here are the main benefits of this method:
-
Mini Greenhouse Effect – The clear plastic traps warmth and moisture, speeding up germination and encouraging vigorous seedling growth.
-
Moisture Retention – Bottles help maintain consistent soil moisture, reducing the risk of seedlings drying out.
-
Protection Against Pests – Bottles act as barriers against insects, slugs, and birds that might otherwise damage fragile plants.
-
Space-Saving – This method works well for urban gardeners with small growing areas.
-
Eco-Friendly – Recycling bottles reduces plastic waste while offering a useful gardening tool.
By simulating greenhouse conditions, bottle starters give cabbage seeds the boost they need to establish healthy roots and sturdy leaves.
Preparing Bottle Starters for Cabbage
Setting up a bottle starter is simple, requiring only a few household items.
Materials You’ll Need:
-
Clear plastic bottles (1.5 to 2 liters are ideal)
-
A utility knife or scissors
-
Seed-starting mix or light potting soil
-
Cabbage seeds
-
A spray bottle for watering
Step-by-Step Setup:
-
Cut the Bottle – Slice the bottle horizontally about two-thirds of the way up, keeping both top and bottom parts.
-
Make Drainage Holes – Poke small holes in the bottom half to allow excess water to escape.
-
Fill with Soil – Add seed-starting mix, which is light and well-draining. Avoid compacted garden soil at this stage.
-
Plant the Seeds – Place two or three cabbage seeds about 1 cm deep, then lightly cover with soil.
-
Moisten the Soil – Use a spray bottle to dampen the soil evenly.
-
Reattach the Dome – Place the top of the bottle back onto the base to form a greenhouse. Leave the cap off for air circulation.
This setup creates a warm, moist environment perfect for germination, while still allowing airflow to prevent fungal growth.
Caring for Cabbage Seedlings in Bottles
Once the seeds sprout, they need consistent care to grow into strong seedlings.
-
Light – Place bottles where seedlings receive at least 6 hours of sunlight daily. If indoors, a sunny windowsill or grow light works well.
-
Watering – Keep soil evenly moist but not waterlogged. The bottle retains humidity, so check before watering.
-
Ventilation – Open the dome for a few hours daily to allow fresh air and reduce the risk of mold.
-
Thinning – If multiple seeds germinate, thin to one strong seedling per bottle by snipping weaker plants at the base.
These simple steps ensure that seedlings grow strong roots and healthy leaves before being moved outdoors.
Transplanting Cabbage Seedlings
After about 4–6 weeks, or once seedlings have developed at least three to four true leaves, they are ready for transplanting.
-
Harden Off – Gradually acclimate seedlings to outdoor conditions over a week. Place them outside for a few hours daily, increasing exposure over time.
-
Choose a Spot – Select a location with full sun and rich, well-draining soil. Cabbage thrives in fertile soil with steady moisture.
-
Spacing – Plant seedlings 12–18 inches apart, depending on the cabbage variety. This spacing ensures heads have room to develop.
-
Plant Carefully – Gently remove seedlings from the bottle, keeping as much soil around the roots as possible. Plant them at the same depth as they grew in the bottle.
-
Water Thoroughly – After transplanting, water generously to help seedlings settle in and reduce transplant shock.
Bottle-grown cabbage seedlings typically adapt quickly, showing strong growth once in the garden.
Tips for Successful Cabbage Growth
-
Start Early – Use bottles to germinate seeds indoors before outdoor conditions are ideal.
-
Mulch the Soil – Once transplanted, add mulch around plants to retain moisture and keep weeds down.
-
Fertilize Lightly – Feed seedlings with a diluted organic fertilizer after they develop true leaves.
-
Protect from Pests – Watch for common cabbage pests like caterpillars and aphids. Row covers can help shield young plants.
-
Rotate Crops – Avoid planting cabbage in the same spot each year to prevent soil-borne diseases.
Final Thoughts
Using DIY bottle starters is a simple yet highly effective way to give cabbage seedlings a strong start. This method creates the perfect conditions for germination and early growth, offering protection, warmth, and consistent moisture. Once transplanted outdoors, these healthy young plants are well-equipped to thrive and develop into full, crisp cabbage heads.
By turning waste into a resource, this approach not only helps reduce plastic pollution but also ensures a productive and sustainable gardening experience. With bottle starters, you can confidently grow cabbages that will reward you with fresh, homegrown harvests right from your garden or balcony.


