Carrots are one of the most rewarding root vegetables to grow at home, especially when you can control the soil quality and depth. While these crisp, sweet vegetables typically need loose and deep garden beds, it’s entirely possible to grow them in containers—if the containers are deep enough. Making your own DIY deep containers is a cost-effective and space-saving way to enjoy a regular harvest of healthy carrots, even without a traditional garden plot.
This article will guide you through choosing or building the right container, selecting suitable carrot varieties, and caring for your plants from seed to harvest.
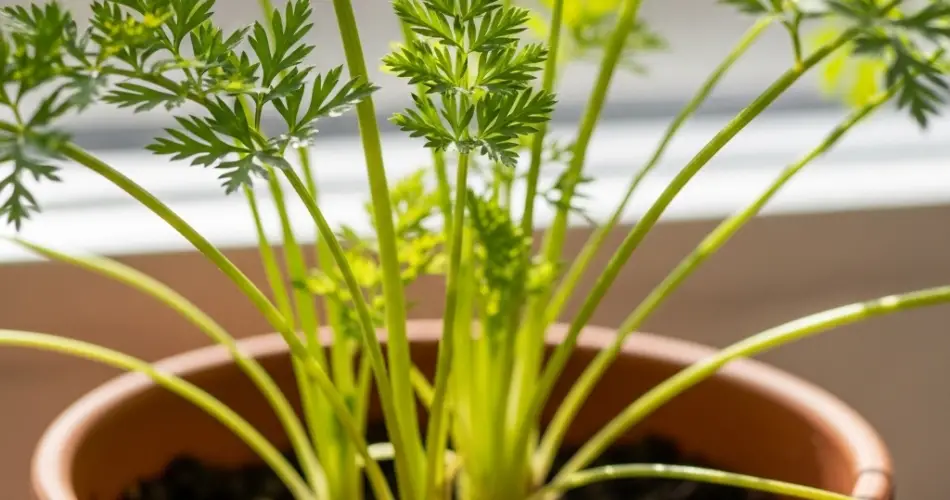
Why Carrots Need Deep Containers
Carrots develop long, tapered roots that need room to grow straight and smooth. When grown in shallow, compacted, or rocky soil, the roots become stunted or forked. DIY deep containers solve this problem by offering:
-
Adequate root depth
-
Improved soil control
-
Reduced pest issues
-
Space flexibility for small patios, balconies, or walkways
-
Better drainage for healthier root development
Creating your own deep planter also allows you to customize the size based on available space and desired harvest volume.
Choosing or Building the Right Container
To support healthy carrot growth, your container should be at least 12 to 16 inches deep. Here are a few easy DIY options:
1. Stacked Buckets
Repurpose two large plastic buckets. Cut the bottom off one and stack it securely inside another, using brackets or screws to stabilize the structure. Drill drainage holes in the bottom.
2. Plastic Storage Bins
Tall storage containers can be turned into excellent deep planters. Just drill drainage holes at the base and sides (near the bottom) for air circulation.
3. Wooden Crates or Boxes
Build or repurpose wooden crates into deep planters. Line the inside with landscape fabric or thick plastic with drainage holes to hold the soil while allowing excess water to escape.
4. Old Barrels or Drums
Cut a plastic or wooden barrel in half vertically, drill holes at the bottom, and use it as a large-capacity deep container.
Make sure your chosen material is food-safe and not previously used for chemicals. Elevate the container slightly off the ground using bricks or wooden planks to improve drainage.
Soil Preparation for Container-Grown Carrots
Carrots need loose, sandy, and well-draining soil to grow straight and flavorful roots. A compact mix can result in twisted or forked carrots.
Ideal soil mix:
-
60% high-quality potting soil
-
30% compost or aged manure
-
10% perlite or coarse sand for drainage
Avoid heavy clay soils or those rich in undecomposed organic matter, which can block root development.
Best Carrot Varieties for Deep Containers
While many carrot types can thrive in containers if the depth is sufficient, certain varieties are particularly well-suited for deep planters:
-
Danvers – A classic, slightly tapered carrot that performs well in deeper soils.
-
Nantes – Cylindrical, sweet, and ideal for containers with at least 12 inches of depth.
-
Chantenay – Shorter but thick carrots that adapt well to confined spaces.
-
Imperator – Long, tapered carrots that require deep, soft soil to grow properly.
Planting Carrot Seeds in DIY Containers
-
Fill your container with pre-moistened soil mix, leaving about 1 inch from the top.
-
Sow seeds directly into the soil, spacing them about ½ inch apart in rows or scattered evenly.
-
Cover lightly with a thin layer of soil—no more than ¼ inch thick.
-
Water gently using a spray nozzle or watering can to avoid disturbing the seeds.
Keep the soil moist during germination, which usually takes 10 to 20 days. If needed, cover the container with a damp cloth or cardboard to retain moisture until seedlings appear.
Caring for Carrot Plants in Containers
-
Sunlight: Provide at least 6 hours of full sun daily. Carrots grown in partial shade will take longer to mature.
-
Watering: Maintain consistent moisture without overwatering. Uneven watering can cause roots to crack.
-
Thinning: Once seedlings reach about 2 inches tall, thin them to 2–3 inches apart. This ensures enough space for each root to develop.
-
Feeding: If your compost is rich, you may not need fertilizer. Otherwise, apply a low-nitrogen organic fertilizer once during the growing season.
Harvesting Homegrown Carrots
Carrots are usually ready for harvest 60–80 days after sowing, depending on the variety.
To check maturity:
-
Brush aside some soil at the base of the greens and inspect the diameter of the carrot top.
-
Carrots are typically ready when they’re about ¾ to 1 inch thick.
To harvest:
-
Grasp the greens at the base and pull straight upward.
-
If the soil is firm, use a trowel to loosen it gently before pulling.
Don’t leave mature carrots in the soil too long, or they may become woody or bitter.
Final Tips for Continuous Harvest
Carrots are a great candidate for succession planting. After harvesting your first crop, refresh the soil by mixing in compost and replant a second batch. This way, you can enjoy fresh carrots throughout spring, summer, and early fall.
Conclusion
DIY deep containers are a smart solution for growing carrots in limited spaces. With proper depth, loose soil, and regular care, you can grow flavorful, crisp carrots even without a garden bed. Whether you’re gardening on a patio or balcony, deep container planting brings homegrown goodness right to your doorstep.


