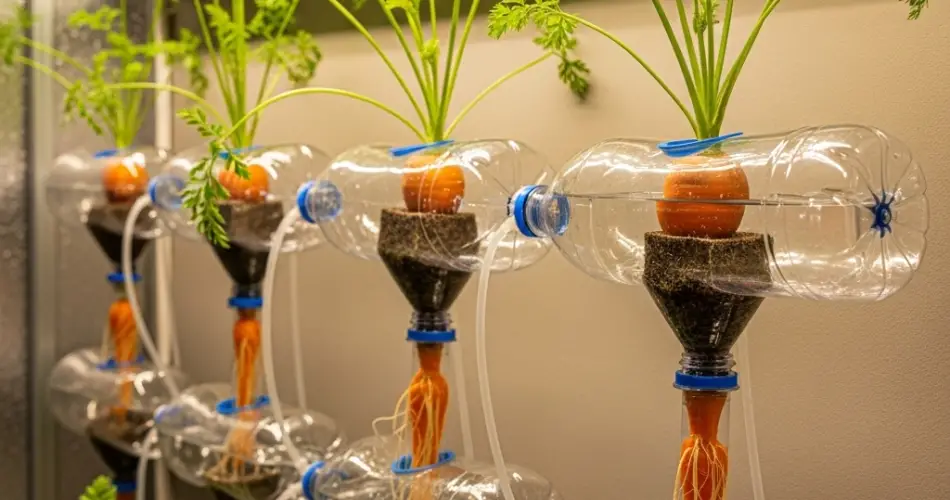
Carrots are a staple in home gardens thanks to their sweet flavor, versatility, and nutritional benefits. However, they can sometimes be slow to germinate and grow, especially in cooler climates or short growing seasons. One innovative solution is to use a DIY bottle greenhouse made from recycled plastic bottles to give your carrot seeds a head start. This simple technique creates a warm, controlled environment that encourages quicker germination and stronger seedlings, enabling an earlier and more successful carrot harvest.
Why Use a Bottle Greenhouse for Carrots?
Starting carrots indoors or in cold conditions can be challenging due to their preference for consistent warmth and moisture during germination. The DIY bottle greenhouse method offers several advantages:
-
Improved germination rates: Bottles trap warmth and humidity, speeding up seed sprouting.
-
Protection: Seedlings are sheltered from harsh weather, pests, and heavy rains.
-
Sustainability: Reusing plastic bottles reduces waste and cuts gardening costs.
-
Space-saving: Ideal for gardeners with limited space or those wanting to start seedlings early indoors.
-
Easy monitoring: Transparent bottles allow you to observe soil moisture and seedling growth.
Materials Needed
-
Clear plastic bottles (1.5 to 2 liters)
-
Sharp scissors or utility knife
-
Potting soil or seed-starting mix
-
Carrot seeds
-
Water spray bottle or gentle watering can
Preparing Your Bottle Greenhouse
-
Select your bottles: Choose clear plastic bottles for maximum light transmission. Bottles around 1.5 to 2 liters provide enough space for seedlings and soil.
-
Cut the bottle: Using scissors or a utility knife, carefully cut the bottle about two-thirds from the bottom. The bottom section will serve as the planter, and the top portion will act as the greenhouse lid.
-
Create drainage holes: Poke several small holes in the bottom of the planter section to allow excess water to drain. This prevents waterlogging and root rot.
-
Prepare ventilation: You can remove the bottle cap to allow air circulation or drill a small hole in it to maintain some humidity while providing ventilation.
Preparing the Soil Mix
Carrots require loose, well-draining soil that encourages straight root growth. Use a seed-starting mix or a light potting soil mixed with sand or perlite to improve drainage.
-
Recommended mix: 50% potting soil + 50% coarse sand or perlite.
-
Avoid heavy or clay soils that can stunt carrot root development.
-
Lightly moisten the soil before filling the bottle planter.
Planting Carrot Seeds
Carrot seeds are tiny, so handle them carefully:
-
Fill the planter: Add soil to the bottom section of the bottle, leaving about an inch from the top to allow space for the lid.
-
Sow seeds: Scatter seeds evenly over the soil surface. Aim for light coverage by gently pressing them into the soil or covering with a very thin layer (about ¼ inch) of soil.
-
Water gently: Use a spray bottle or a watering can with a fine rose to moisten the soil without displacing the seeds.
-
Cover with the lid: Place the top section of the bottle upside down over the planter to trap humidity and warmth, creating the greenhouse effect.
Ideal Conditions for Germination
Carrot seeds usually take 10 to 21 days to germinate, depending on temperature and moisture. The bottle greenhouse will help provide ideal conditions:
-
Temperature: Keep the bottle in a warm location with temperatures between 60°F and 75°F (15°C to 24°C).
-
Light: Place near a bright window with indirect sunlight. Avoid direct hot sun, which can overheat the seedlings.
-
Moisture: Monitor soil moisture daily. Keep the soil evenly moist but avoid waterlogging.
-
Ventilation: Open the bottle lid daily for a short period to prevent mold and fungal growth.
Caring for Seedlings Inside the Bottle
Once seeds have sprouted:
-
Gradually increase airflow: Start removing the bottle lid for longer periods during the day to acclimate seedlings to normal air circulation.
-
Water carefully: Continue to keep the soil moist but not soggy.
-
Thin seedlings: When seedlings grow to about 2 inches tall, thin them by snipping weaker plants at the soil level. Aim for spacing seedlings about 2-3 inches apart to allow roots to develop properly.
Transplanting Seedlings to the Garden or Larger Containers
After seedlings develop strong roots and several true leaves, they’re ready to be moved outdoors or into larger pots.
-
Hardening off: Gradually expose seedlings to outdoor conditions over 5 to 7 days to reduce transplant shock.
-
Prepare the garden bed or container: Use loose, well-draining soil, free of stones or debris.
-
Transplant: Gently remove seedlings from the bottle planter, trying to keep as much of the root system intact as possible. Plant them at the same depth they were growing.
-
Water thoroughly: Water immediately after transplanting to help seedlings establish.
Benefits of the Bottle Greenhouse Method
-
Early start: Get a jump on the growing season, especially useful in cooler climates.
-
Higher success rates: Consistent moisture and warmth reduce the risk of seed failure.
-
Eco-conscious gardening: Reduce plastic waste by repurposing bottles.
-
Portability: Easily move seedlings to optimize sunlight and temperature.
Troubleshooting Common Issues
-
Mold or fungal growth: Ensure proper ventilation and avoid overwatering.
-
Leggy seedlings: If plants stretch and become thin, increase light exposure.
-
Slow germination: Check seed viability and soil temperature.
Final Thoughts
Using a DIY bottle greenhouse to sprout carrots is a simple, sustainable, and effective way to accelerate germination and improve seedling health. This method is especially useful for gardeners facing short growing seasons or limited outdoor space. By providing carrots with a warm, moist environment early on, you set the stage for a bountiful and timely harvest. With just a few recycled bottles and basic gardening supplies, you can enjoy fresh, homegrown carrots from seed to table.