Fennel (Foeniculum vulgare) is a beautifully aromatic herb known for its feathery leaves, licorice-like flavor, and many culinary and medicinal uses. This hardy, versatile plant can be used from bulb to seed, making it an attractive addition to any home herb garden. While fennel is often grown in garden beds, it can also thrive in containers—including repurposed plastic bottles.
Bottle gardening offers a sustainable, space-saving way to grow herbs at home, especially if you’re short on outdoor space. In this guide, you’ll learn how to grow fragrant fennel in upcycled plastic bottles, turning household waste into productive mini gardens right on your windowsill or balcony.
Why Grow Fennel in Plastic Bottles?
Growing fennel in plastic bottles has both environmental and practical advantages:
-
Eco-conscious: Repurposes single-use plastics, reducing environmental waste.
-
Affordable: Eliminates the need for expensive containers or garden beds.
-
Compact: Suitable for small spaces, including apartment balconies and windowsills.
-
Portable: Easy to move to chase sunlight or protect from harsh weather.
-
Efficient: Supports fennel’s deep taproot when the bottle is cut to the right depth.
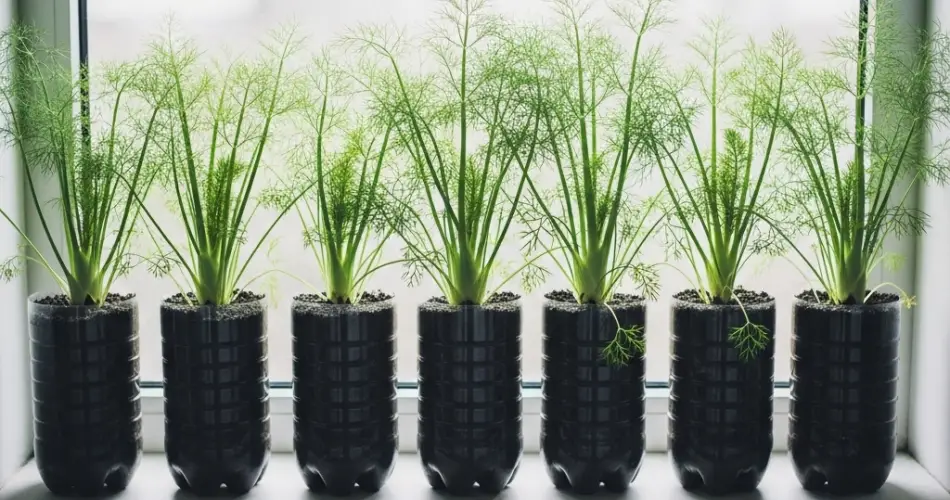
Fennel, especially the leaf-producing variety (herb fennel or bronze fennel), does well in containers with enough depth, making a tall plastic bottle a perfect fit.
What You’ll Need
Here’s what you need to start your DIY fennel bottle garden:
-
1 clean plastic bottle (2-liter size or taller preferred)
-
Sharp scissors or utility knife
-
Marker for cutting guidelines
-
Fennel seeds (preferably herb fennel, not bulb fennel, which needs more space)
-
Potting soil with good drainage
-
Perlite or coarse sand (optional, to improve aeration)
-
A small piece of mesh or coffee filter (for drainage lining)
-
Nail or skewer (to poke drainage holes)
-
Spray bottle or small watering can
-
Twine or wire (optional, for hanging or decorating)
Step-by-Step Instructions
Step 1: Prepare the Bottle
Wash the bottle thoroughly and let it dry. Remove the label.
Using a marker, draw a line about one-third from the bottom of the bottle. Cut along this line carefully with scissors or a craft knife. You will use the bottom part of the bottle as the planter.
Alternatively, if you’d like a horizontal planter, cut a rectangular window along the side and lay the bottle on its side with drainage holes on the opposite side.
Step 2: Create Drainage Holes
Using a hot nail or pointed object, poke several holes in the bottom of the bottle. This is essential to prevent root rot from excess moisture. Place a piece of mesh, fabric, or a coffee filter inside to cover the holes and keep soil from leaking out.
Step 3: Prepare the Soil
Fennel prefers light, fertile, well-draining soil with a slightly alkaline pH. A good mix might include:
-
2 parts potting soil
-
1 part perlite or coarse sand
-
Optional: 1 part compost or worm castings
Fill the bottle planter with the soil mix, leaving about an inch at the top for watering space.
Step 4: Sow the Fennel Seeds
Fennel has a long taproot and doesn’t transplant well, so sow seeds directly into the container.
-
Moisten the soil lightly before planting.
-
Sow 2–3 fennel seeds in the center of the bottle planter, about ¼ inch deep.
-
Lightly cover with soil and gently pat it down.
-
Mist with water using a spray bottle.
Place the planter in a sunny area with good warmth. Fennel prefers full sun and will germinate in 7–14 days.
Step 5: Provide the Right Conditions
Sunlight: Fennel requires 6–8 hours of direct sunlight daily. Place the planter on a bright windowsill, balcony, or patio.
Watering: Keep the soil evenly moist but not soggy. Plastic bottles retain moisture, so monitor the soil and water when the top inch feels dry.
Thinning: Once seedlings are about 3 inches tall, thin them by cutting the weakest seedlings at the base. Keep the strongest one to allow healthy development.
Ongoing Care
-
Fertilizing: Feed the plant with a diluted organic liquid fertilizer every 3–4 weeks to encourage leafy growth.
-
Pruning: Snip fronds as needed once the plant is 8–10 inches tall. Always cut from the outside, allowing new central growth to flourish.
-
Pest Control: Fennel is usually pest-resistant, but keep an eye out for aphids. A light spray of water can knock them off, or use neem oil if necessary.
Harvesting Fennel
You can begin harvesting fennel leaves (fronds) as soon as the plant reaches a good height and looks bushy. Use clean scissors to snip off the outer leaves for cooking, garnishing, or drying.
If you let the plant mature and flower, it will produce seeds that can be harvested for cooking or future planting. Be mindful, however, that fennel can self-seed and may not remain compact if left unchecked.
Decorating Your Bottle Planter
Give your upcycled planter a unique touch:
-
Paint it with eco-friendly paints or natural tones.
-
Wrap the outside with jute rope or fabric for a rustic look.
-
Add labels or tags with plant names for easy identification.
-
Hang the planter using twine for vertical herb displays.
Final Thoughts
Growing fragrant fennel in a plastic bottle is a simple, rewarding way to bring greenery and flavor into your home while practicing sustainable gardening. This low-cost method allows you to grow herbs almost anywhere—no garden required.
With just a bottle, a handful of seeds, and a sunny spot, you can enjoy the beauty, aroma, and culinary magic of fresh fennel year-round. Whether on a balcony, kitchen windowsill, or vertical garden setup, your bottle-grown fennel will prove that eco-friendly gardening can be both functional and beautiful.


