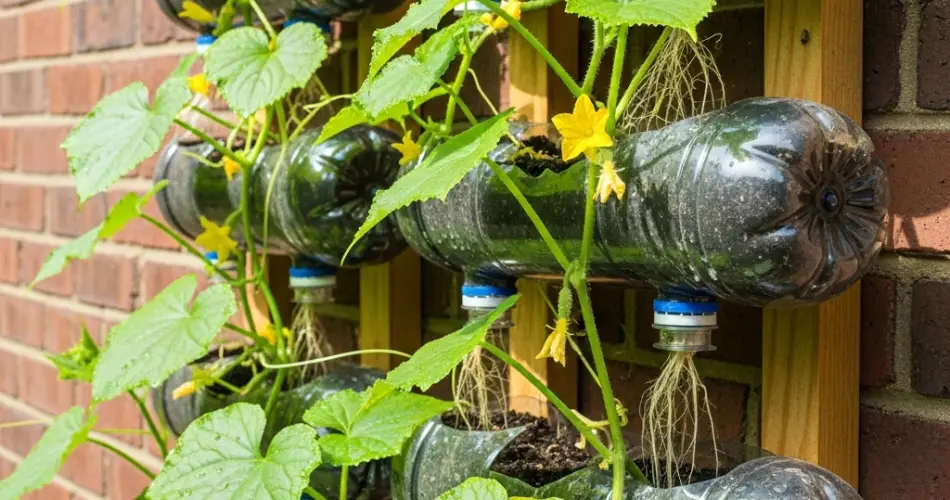
Cucumbers are among the most rewarding vegetables to grow in a home garden. They mature quickly, produce abundantly, and add refreshing flavor to meals. Yet, their early growth stage can be sensitive, with seedlings vulnerable to temperature changes, pests, and transplant shock. One clever solution is propagating cucumbers in recycled plastic bottles. This method not only reduces waste but also creates a mini greenhouse that helps cucumbers germinate faster and grow stronger before transplanting them into garden beds or containers.
Whether you are cultivating cucumbers in a backyard or on a balcony, bottle propagation is a space-saving and eco-friendly technique that ensures success. Here’s how to do it and the best tricks for keeping your seedlings healthy.
Why Use Bottles for Propagation?
Plastic bottles offer a unique advantage for starting cucumbers because they provide both protection and visibility. Here are some reasons why bottles are particularly effective:
-
Controlled Microclimate – The clear bottle traps heat and moisture, simulating greenhouse conditions ideal for germination.
-
Moisture Retention – Bottles reduce water loss through evaporation, keeping soil consistently damp without frequent watering.
-
Protection from Pests – Young cucumber seedlings are shielded from insects, slugs, and harsh weather.
-
Recycling at Work – Repurposing bottles reduces waste while serving a functional gardening purpose.
This technique allows cucumbers to establish strong roots before facing outdoor elements.
Preparing Bottles for Cucumber Seeds
The setup is straightforward and requires only a few household items.
Materials You’ll Need:
-
Clear plastic bottles (1 to 2 liters)
-
Sharp scissors or a utility knife
-
A seed-starting mix or light potting soil
-
Cucumber seeds
-
Watering spray bottle
Step-by-Step Instructions:
-
Cut the Bottle – Slice the bottle about two-thirds from the base. Keep both top and bottom portions.
-
Create Drainage – Poke a few small holes in the bottom half to allow excess water to escape.
-
Fill with Soil – Add seed-starting mix. Cucumbers thrive in loose, nutrient-rich, well-draining soil.
-
Plant the Seeds – Place one or two seeds about 1.5 cm deep, cover lightly, and pat the soil down.
-
Water Gently – Mist the soil until it is evenly moist but not soggy.
-
Add the Dome – Place the top half of the bottle back over the base to create a greenhouse dome. Leave the cap off to allow ventilation.
This setup forms a warm, moist environment that speeds up germination while protecting delicate seedlings.
Caring for Cucumber Seedlings in Bottles
Once seedlings begin to sprout, proper care is key to helping them develop into strong, healthy plants.
-
Sunlight – Place bottles where they receive at least 6 to 8 hours of direct sunlight daily. On balconies or indoors, position them near a sunny window or use grow lights.
-
Ventilation – Open the dome for a few hours daily to allow airflow and prevent fungal growth.
-
Moisture – Keep the soil moist but avoid overwatering. The enclosed space holds humidity, so check the soil before watering.
-
Thinning – If both seeds germinate, snip the weaker seedling at the base to let the stronger one thrive.
By carefully balancing light, air, and moisture, you’ll raise sturdy seedlings ready for transplanting.
Transplanting to the Garden or Containers
Cucumbers grow best when transplanted outdoors after the danger of frost has passed and soil temperatures have warmed. At this stage, they are ready to leave their protective bottle environment.
-
Harden Off – Gradually expose seedlings to outdoor conditions over 5–7 days. Place them outside for a few hours each day, increasing the duration and sun exposure.
-
Choose the Spot – Cucumbers love full sun and fertile, well-draining soil. If growing in containers, select a pot at least 12 inches deep.
-
Trellis Support – Install a trellis or stakes at planting time. Cucumbers are natural climbers, and vertical support keeps fruits clean, saves space, and improves airflow.
-
Transplant with Care – Slide the seedling out of the bottle gently, keeping as much soil around the roots as possible. Place it into the prepared bed or container and water thoroughly.
Bottle-grown seedlings typically suffer less transplant shock, making them quick to adapt and begin climbing.
Tips and Tricks for Success
-
Start Early – Use bottles to begin seeds indoors before the outdoor season starts, giving cucumbers a head start.
-
Avoid Overcrowding – One strong seedling per bottle ensures plenty of space for root development.
-
Reuse and Recycle – After transplanting, wash bottles and reuse them for the next batch of seeds.
-
Fertilize Gradually – Once seedlings develop true leaves, provide a diluted organic fertilizer to encourage steady growth.
-
Watch for Pests – After transplanting, keep an eye out for cucumber beetles and aphids, as young plants are especially vulnerable.
Final Thoughts
Cucumber propagation in bottles is a simple, effective, and eco-friendly method that benefits both beginner and experienced gardeners. By using bottles as mini greenhouses, you provide the warmth, humidity, and protection cucumbers need to germinate and establish strong roots. Once transferred to garden beds or containers with proper trellis support, these plants will reward you with an abundant harvest of crisp, delicious cucumbers.
With just a little creativity and care, a discarded plastic bottle can become the perfect starting point for a healthy cucumber crop. This small gardening hack not only reduces waste but also maximizes your chances of success in growing one of summer’s most refreshing vegetables.


