Fresh green beans are a garden favorite, prized for their crisp texture, sweet flavor, and versatility in the kitchen. The good news? You don’t need a large backyard or raised beds to enjoy homegrown green beans. With just a few buckets, some soil, and a sunny spot, you can grow a productive crop of green beans right on your balcony, patio, or doorstep.
Whether you’re new to gardening or just looking for a compact, low-maintenance way to grow your own food, bucket gardening is a fantastic solution. Here’s how to grow green beans in buckets for small-space harvests that pack a big punch.
Why Grow Green Beans in Buckets?
Green beans are an ideal crop for container gardening. Here’s why:
-
Compact and Productive: Many green bean varieties are compact and produce high yields in a small space.
-
Quick Growing: Green beans grow fast—many are ready to harvest in just 50–60 days.
-
Low Maintenance: They don’t need much fertilizing and are generally pest-resistant.
-
Perfect for Beginners: Green beans are forgiving and thrive with basic care.
Plus, growing green beans in buckets allows you to control the soil quality, manage pests more easily, and place your plants in the best possible sun exposure.
Choosing the Right Variety
There are two main types of green beans: bush beans and pole beans.
-
Bush Beans are short, compact plants that do not require support. They’re perfect for buckets and small containers.
-
Pole Beans are climbing varieties that grow tall and require a trellis or stake for support. While they produce more beans over time, they need more vertical space.
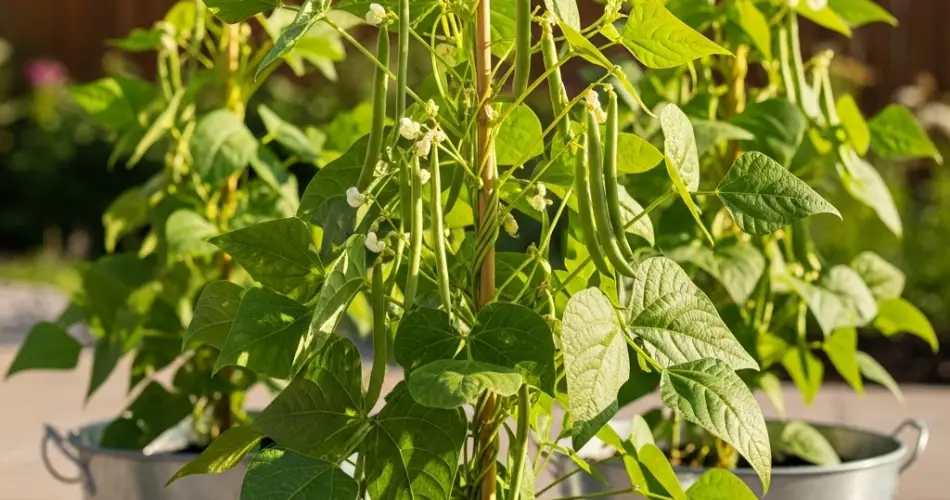
For bucket gardening, bush varieties like ‘Provider,’ ‘Contender,’ or ‘Blue Lake 274’ are ideal. If you have vertical space and want a longer harvest period, pole varieties like ‘Kentucky Blue’ can also thrive in buckets with proper support.
Materials You’ll Need
To grow green beans in buckets, gather the following:
-
5-gallon bucket or similar container (with drainage holes)
-
High-quality potting mix
-
Organic compost or all-purpose fertilizer
-
Green bean seeds
-
Watering can or hose
-
Mulch (optional)
-
Stakes or small trellis (for pole beans)
How to Plant Green Beans in Buckets
Step 1: Prepare the Bucket
Start by drilling several holes in the bottom of the bucket for drainage. Place a few small rocks or broken pottery pieces at the bottom to help water drain freely.
Step 2: Fill with Soil
Fill the bucket with a mix of potting soil and compost. Avoid using garden soil, which can be too heavy for container use and may not drain well.
Step 3: Sow the Seeds
Plant the seeds about 1 inch deep and 3–4 inches apart. A 5-gallon bucket can typically support 3–5 bush bean plants comfortably.
If planting pole beans, limit to 2–3 seeds per bucket and insert a small trellis or stake in the center for support.
Step 4: Water Thoroughly
After planting, water the soil gently but thoroughly. Keep the soil moist but not waterlogged throughout the growing season.
Caring for Your Green Beans
Sunlight
Green beans need full sun—at least 6–8 hours per day. Place your buckets in the sunniest spot you have to encourage strong growth and high yields.
Watering
Buckets dry out faster than garden beds. Water regularly, especially during hot weather, to prevent the plants from becoming stressed. Try to water in the early morning or late afternoon.
Fertilizing
Green beans are light feeders, especially since they are legumes and fix nitrogen in the soil. If your potting mix includes compost or a slow-release fertilizer, you may not need additional feeding. Otherwise, a light application of liquid fertilizer every few weeks will help keep plants healthy.
Supporting Growth
For bush beans, no support is needed. For pole beans, be sure the trellis or stake is tall enough (at least 4–6 feet) and sturdy enough to hold mature vines.
Harvesting Green Beans
Green beans are ready to harvest about 50–60 days after planting. Pick beans when they are firm, crisp, and about the size of a pencil. Don’t wait too long—overripe beans can be tough and stringy.
To encourage continued production, harvest regularly. The more you pick, the more the plant will produce.
Tips for a Better Harvest
-
Succession Planting: Plant new seeds every 2–3 weeks during the growing season for a steady supply.
-
Rotate Containers: If you’re using the same buckets for different crops, rotate crops each season to avoid soil nutrient depletion and disease.
-
Watch for Pests: Beans are generally resistant, but aphids or spider mites can appear. Spray with soapy water or use neem oil if needed.
Enjoying Your Green Bean Harvest
Freshly picked green beans are a joy to eat. They’re crisp, flavorful, and packed with nutrients. Use them in:
-
Stir-fries
-
Salads
-
Roasted vegetable medleys
-
Steamed side dishes
-
Pickled for long-term storage
You’ll be amazed at the flavor difference between homegrown and store-bought beans.
Final Thoughts
Growing green beans in buckets is a simple, space-saving way to enjoy a delicious harvest, even if you don’t have a traditional garden. With minimal effort, you can produce crisp, tender beans throughout the growing season—right from your patio or balcony. Whether you’re a gardening novice or a seasoned grower, bucket-grown green beans offer a satisfying and productive gardening experience.


