Chili peppers are among the most versatile crops to grow at home. They don’t need much space, they adapt well to pots, and their colorful fruits add both beauty and spice to your kitchen. Whether you want to grow fiery hot varieties or mild peppers for everyday cooking, container gardening makes it possible—even if you only have a balcony or small patio. With the right setup, compact chili peppers can thrive in containers, offering a rewarding harvest in limited spaces.
Why Choose Containers for Chilies?
Containers provide flexibility and control, making them a practical choice for chili growing. You can move pots to follow the sun, protect plants from heavy rain, or bring them indoors during cooler weather. Containers also allow you to manage soil quality more effectively, reducing the risk of pests and soil-borne diseases common in traditional garden beds. For those living in apartments or urban areas, pots make fresh chili peppers accessible right outside the door or on a windowsill.
Best Container Size and Type
When growing chilies in containers, pot size matters. While compact chili plants don’t require huge containers, a minimum size of 10–12 inches in both depth and width ensures enough room for roots to spread. For larger varieties, opt for a 3–5 gallon container to encourage strong growth.
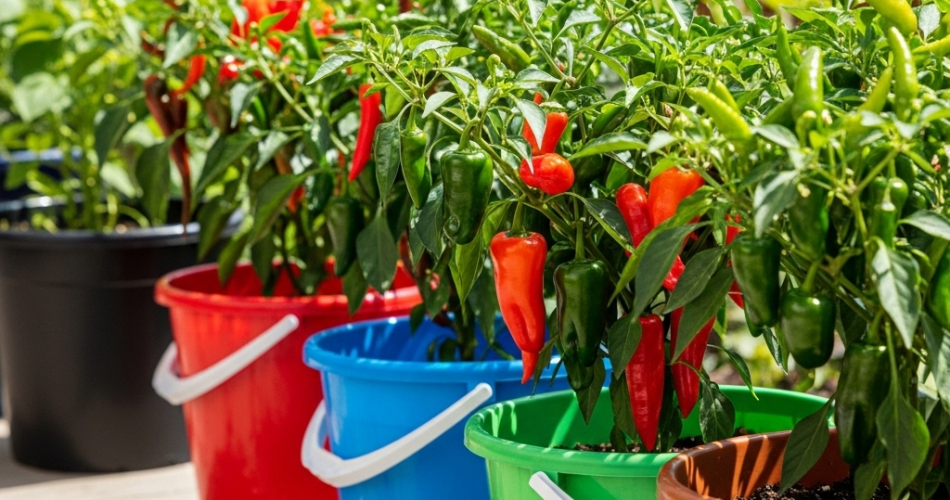
Terracotta and clay pots are excellent choices because they provide natural aeration, but they dry out more quickly. Plastic pots retain moisture longer, making them a good option for hot climates. Whatever container you choose, ensure it has adequate drainage holes—chili plants are sensitive to waterlogging and need well-drained soil to stay healthy.
Soil Preparation
The right soil mix is crucial for container-grown chilies. A light, well-draining medium enriched with organic matter will support root growth and nutrient absorption. A good recipe for chili soil includes:
-
50% quality potting mix as the base
-
30% compost for added nutrients
-
10% perlite or coarse sand for drainage
-
10% coconut coir or peat moss to retain balanced moisture
Mixing in a handful of organic fertilizer or slow-release granules at planting time ensures the young plants start off with enough nutrition.
Choosing Chili Varieties
Some chili varieties are especially well-suited for container growing because of their compact growth habit. Good options include:
-
Jalapeño – Medium heat and versatile in the kitchen
-
Thai Chili – Compact plant with clusters of fiery peppers
-
Cayenne – Prolific producer of slender, spicy fruits
-
Tabasco – Small plants ideal for small pots
-
Bird’s Eye Chili – Decorative and hot, perfect for limited spaces
These varieties don’t take up much room, yet they produce abundantly, making them excellent choices for container gardens.
Planting and Positioning
Chilies thrive in warm conditions and need plenty of sunlight. Place your pots in a spot where they receive at least 6–8 hours of direct sun daily. South-facing balconies or patios are ideal.
If starting from seed, sow indoors 6–8 weeks before the last frost and transplant seedlings once they are strong and the weather is consistently warm. If buying young plants, transplant them into your prepared container, planting at the same depth as in their nursery pot. Water thoroughly after planting to help roots settle.
Watering and Feeding
Chilies in pots dry out more quickly than those in garden beds, so consistent watering is essential. Keep the soil evenly moist but never soggy. Check daily during hot weather, and water deeply until excess drains from the bottom. Avoid shallow watering, which only wets the surface and leaves deeper roots dry.
Fertilization is another key to success. In the early growth phase, use a fertilizer with more nitrogen to encourage leafy growth. Once the plant starts flowering, switch to a balanced fertilizer with more phosphorus and potassium to support flowering and fruit development. Organic options such as compost tea, fish emulsion, or liquid seaweed provide excellent nutrition without overwhelming the plant. Feed every two weeks during the growing season for best results.
Pruning and Support
Although compact chili varieties stay relatively small, they can still benefit from pruning. Pinching off the first flowers encourages stronger growth and more branching, which ultimately leads to better yields. Regularly remove yellowing or damaged leaves to improve airflow and reduce disease risk.
Some plants, even compact ones, may need light support as they begin producing fruits. A small stake or bamboo stick can prevent stems from bending or breaking under the weight of peppers.
Harvesting Your Chilies
Chilies are ready for harvest 60–90 days after transplanting, depending on the variety. You can pick them while they’re still green for a milder flavor or wait until they fully ripen to red, orange, or yellow for maximum heat and sweetness.
Harvest regularly to keep the plant producing new flowers and fruits. Use scissors or garden shears rather than pulling, which can damage stems and reduce productivity.
Conclusion
Growing compact chili peppers in containers is a practical and rewarding gardening project for beginners and experienced growers alike. With the right pot size, soil mix, consistent watering, and proper feeding, you can enjoy a steady supply of colorful, flavorful chilies even in small spaces.
This method proves that you don’t need a garden plot to grow fresh produce. A sunny spot, a few containers, and some care are all it takes to harvest your own fiery peppers and bring homegrown spice to your kitchen.


