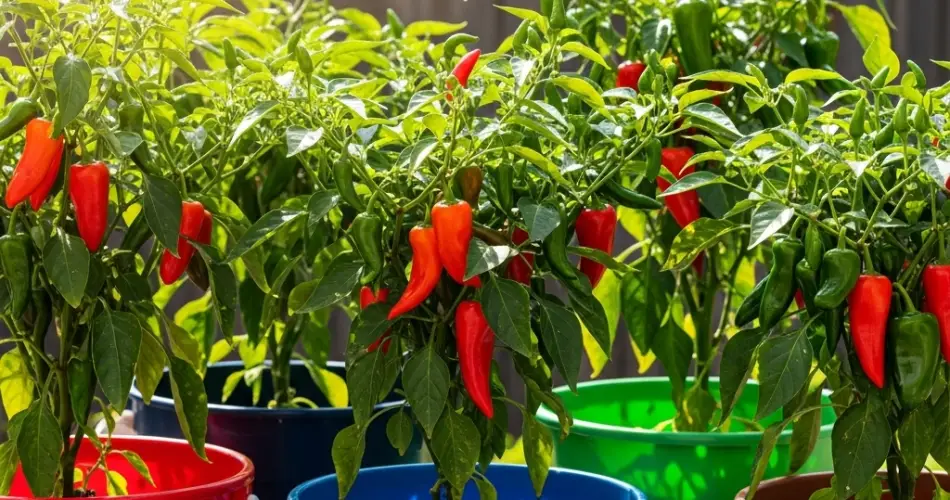
Chili peppers are one of the most rewarding crops to grow in containers. Whether you prefer the mild flavor of jalapeños or the fiery punch of habaneros, chilies thrive in buckets when given the right foundation. The key to success lies in providing them with nutrient-rich soil and the right balance of fertilizers. When grown in buckets, chilies are completely dependent on the soil mix and feeding schedule you provide, making it crucial to get this step right.
Why Soil Quality Matters in Bucket Gardening
Unlike ground gardening, where plants can spread roots into surrounding soil, bucket-grown chilies are confined to a limited space. This makes the soil mix and nutrients far more important. A well-prepared mix ensures proper aeration, retains enough moisture, and supplies essential minerals that the plant needs throughout its growth cycle. Poor soil will result in stunted growth, fewer flowers, and smaller harvests.
The Ideal Soil Mix for Chili Buckets
A chili plant’s roots require both good drainage and steady access to moisture. Too much water leads to root rot, while too little causes wilting and poor fruiting. The ideal mix balances both.
Here’s a recommended soil blend:
-
40% High-Quality Potting Mix: Provides a light, fluffy texture and balanced nutrients.
-
30% Compost or Well-Rotted Manure: Adds organic matter and slow-release nutrients for long-term growth.
-
20% Coco Coir or Peat Moss: Helps retain water while keeping the mix airy.
-
10% Perlite or Sand: Improves drainage and prevents compaction.
This combination creates a fertile, well-draining medium that promotes strong root development.
If you don’t want to mix your own, choose a premium vegetable potting soil and enrich it with compost before planting.
Importance of pH Levels
Chilies grow best in soil that is slightly acidic to neutral, with a pH of 6.0 to 6.8. If the soil is too acidic or alkaline, nutrient absorption becomes difficult, even if fertilizer is present. A simple soil test kit can help you determine and adjust pH. Adding garden lime raises pH, while incorporating organic materials like composted pine needles can lower it.
Fertilizer Needs for Chili Plants
Chilies are heavy feeders, especially in containers. Since nutrients in buckets get used up quickly or leach out with watering, regular fertilization is essential. The best approach is to match fertilizer type to the chili plant’s growth stage.
1. Early Growth Stage
When chilies are young seedlings or just transplanted into buckets, they need nitrogen to develop strong stems and lush green leaves. Use a balanced fertilizer with slightly higher nitrogen content, such as a 10-5-5 ratio. Liquid seaweed extract or fish emulsion also works well at this stage.
2. Flowering Stage
As plants mature and begin forming flower buds, they shift their energy from leafy growth to reproduction. Too much nitrogen at this stage will produce lots of leaves but few flowers. Switch to a phosphorus-rich fertilizer (like 5-10-10) to promote strong flower development and fruit set. Bone meal or rock phosphate are excellent organic options.
3. Fruiting Stage
Once flowers turn into small chilies, potassium becomes the most important nutrient. Potassium helps improve fruit size, color, and flavor. Look for fertilizers with higher potassium levels (such as 5-5-15) or use organic sources like wood ash or banana peel compost.
Organic Fertilizer Options
For gardeners who prefer natural methods, several organic fertilizers work wonders for chilies:
-
Compost Tea: Supplies a broad range of nutrients and beneficial microbes.
-
Worm Castings: Excellent for maintaining steady nutrient levels without risk of burning roots.
-
Epsom Salt: Provides magnesium, which helps with photosynthesis and prevents leaf yellowing.
-
Liquid Seaweed or Kelp: Boosts plant health and improves fruiting.
Applying these in rotation gives chili plants a balanced diet.
How Often to Fertilize
In containers, nutrients wash out faster than in garden beds, so a consistent schedule is important. A good rule of thumb is:
-
Every 2 weeks: Apply liquid fertilizer diluted to half strength.
-
Every month: Add a small amount of compost or worm castings to refresh the soil.
Avoid over-fertilizing, as too much nitrogen can result in leafy growth without peppers.
Watering and Fertilizer Connection
Water and fertilizer go hand in hand. Overwatering flushes nutrients out of the soil, while underwatering stresses the plant and prevents nutrient absorption. Aim to keep the soil evenly moist, not soggy. A layer of organic mulch on top of the bucket helps retain moisture and reduces nutrient loss.
Final Tips for Healthy Chili Buckets
-
Always plant one chili per bucket to avoid overcrowding.
-
Choose buckets at least 5 gallons in size for proper root space.
-
Rotate buckets occasionally to ensure even sunlight exposure.
-
Keep an eye on leaf color: yellowing may indicate nitrogen deficiency, while pale or curled leaves may signal potassium or magnesium shortage.
Conclusion
The success of chili peppers in buckets depends largely on the soil and fertilizer you provide. With the right mix of organic matter, proper drainage, and a balanced feeding schedule tailored to each growth stage, your balcony or patio can become a thriving source of fresh, flavorful chilies. By paying attention to the soil beneath your plants and feeding them consistently, you’ll be rewarded with a long and plentiful harvest of spicy peppers, perfect for cooking, preserving, or enjoying fresh.


