Chives are among the easiest herbs to grow indoors, and they provide a fresh, mild onion flavor that enhances everything from eggs and potatoes to soups, salads, and dips. Growing chives at home doesn’t require a lot of space, soil, or tools—just a little light, water, and creativity. One of the most sustainable and space-saving ways to grow them is in upcycled plastic bottles.
Creating a bottle garden for chives not only helps reduce plastic waste but also allows anyone, even in the smallest of apartments, to enjoy a ready supply of this versatile herb. With minimal maintenance, chives will grow lush and green, and you can simply snip what you need whenever you cook.
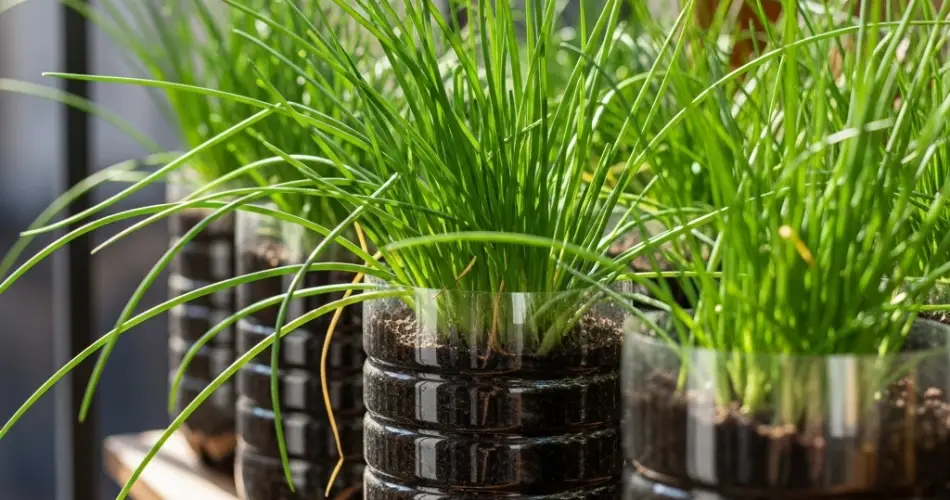
Why Grow Chives in Plastic Bottles?
Plastic bottles make excellent mini herb containers. They’re lightweight, easy to customize, and perfect for growing compact herbs like chives. Chives don’t require deep soil or wide containers, so they adapt well to narrow bottle spaces.
Benefits of bottle-growing chives include:
-
Great use for recycled bottles
-
Requires minimal space—ideal for windowsills or counters
-
Low maintenance with consistent regrowth
-
Keeps herbs fresh and chemical-free
-
Easy access for frequent snipping and cooking
Growing chives in plastic bottles is a simple and eco-friendly way to maintain a fresh herb supply all year long.
What You’ll Need
To begin your chive bottle garden, gather the following items:
-
1 clean plastic bottle (1.5 or 2 liters work well)
-
A sharp pair of scissors or a utility knife
-
Well-draining potting mix (general-purpose or herb mix)
-
Chive seeds or a small clump of existing chives (division)
-
Small stones or mesh (for drainage, optional)
-
Spray bottle or watering can
-
A shallow tray or saucer (to catch drainage)
Preparing Your Bottle Planter
The vertical method (cutting the top off the bottle) is best for growing chives, which grow upright and don’t spread much. This setup is also perfect for placing on windowsills or small ledges.
Step-by-step setup:
-
Clean the bottle thoroughly and remove any labels.
-
Cut off the top third of the bottle to create an open container.
-
Poke drainage holes in the bottom using a sharp tool.
-
Add a thin layer of stones or mesh at the bottom to assist drainage.
-
Fill with potting mix to about an inch below the top.
Use a light, well-draining soil mix. If your soil is heavy, add some sand or perlite to improve airflow and drainage.
Planting Chives
You can grow chives from seed or divide an existing plant. Seeds are economical and germinate fairly quickly under the right conditions.
-
From seeds: Sprinkle the seeds evenly over the surface of the soil. Lightly cover with a thin layer of soil and mist with water. Germination typically takes 7–14 days.
-
From division: If you already have a chive plant, divide a small clump and gently replant it in your bottle planter.
Water lightly after planting and place the container in a sunny, warm location.
Sunlight and Placement
Chives love sunlight and need at least 4–6 hours of bright light daily to thrive. They grow well in east- or south-facing windows or under grow lights if your home doesn’t get much sun.
Tips for success:
-
Place the bottle where it receives direct morning light.
-
Rotate the container every few days to keep growth even.
-
Use a small LED grow light for supplemental lighting during darker months.
Watering and Fertilizing
Chives need regular moisture but should never be waterlogged. Keep the soil consistently moist, especially during germination and early growth.
Watering tips:
-
Use a spray bottle to keep the surface moist until seeds germinate.
-
Once established, water when the top inch of soil feels dry.
-
Avoid overwatering by ensuring proper drainage through holes in the bottle.
Fertilizing:
-
Chives don’t need heavy feeding.
-
Use a diluted liquid fertilizer once every 4–6 weeks.
-
Avoid excessive fertilizer, which can lead to weak, floppy growth.
Pruning and Harvesting
Chives are incredibly easy to harvest and respond well to regular snipping. The more you cut, the more they grow.
Harvesting tips:
-
Wait until the chives are about 6 inches tall before your first harvest.
-
Use clean scissors to cut leaves about 1–2 inches above the soil.
-
Harvest no more than one-third of the plant at a time to avoid stressing it.
-
Trim flower buds if you prefer to keep leaf production going strong.
Chive flowers are edible, too! If allowed to bloom, their purple blossoms add a lovely touch to salads and herb butter.
Common Issues and Troubleshooting
-
Yellowing leaves: Could be due to overwatering or lack of sunlight.
-
Thin, droopy leaves: Usually caused by insufficient light—move to a sunnier spot.
-
Fungus gnats or mold: Ensure good air circulation and avoid soggy soil.
Conclusion
Growing chives in plastic bottles is a smart, sustainable way to enjoy fresh herbs from the comfort of your home. With just a bit of sunlight, water, and patience, you’ll have snip-ready chives at your fingertips. Whether you’re cooking breakfast or adding flavor to dinner, your bottle-grown herb garden will keep your meals fresh and delicious—all while reducing waste and maximizing space.


