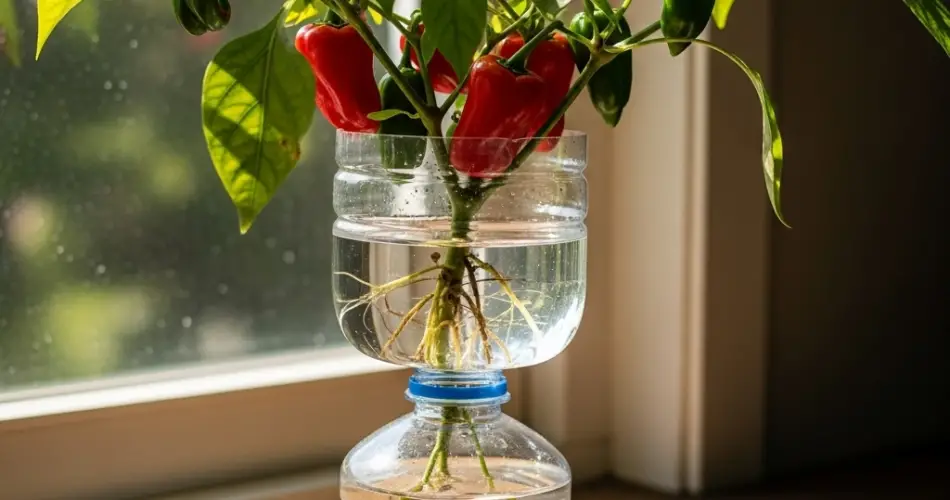
Chili peppers are a favorite among home gardeners because they are compact, productive, and versatile in the kitchen. Whether you enjoy them mild or extra hot, growing your own chilies adds fresh flavor to meals while giving you the satisfaction of harvesting straight from your patio or windowsill. For those with limited gardening space, one of the most creative and sustainable ways to start chili seedlings is by using recycled plastic bottles.
This step-by-step guide shows how to transform ordinary bottles into mini greenhouses that nurture strong seedlings, ready for transplanting into larger pots or outdoor beds.
Why Start Chilies in Bottles?
Plastic bottles make excellent seed-starting containers because they:
-
Recycle waste: Instead of throwing bottles away, you give them a second life in the garden.
-
Create a mini greenhouse: The clear plastic helps trap warmth and humidity, speeding up germination.
-
Save space: Bottles fit neatly on windowsills, balconies, or kitchen counters.
-
Control the environment: You can easily manage moisture, light, and airflow for healthy growth.
This method is ideal for apartment dwellers, patio gardeners, or anyone who wants to start chili plants indoors before moving them outside.
Materials You’ll Need
Gather these simple supplies before you begin:
-
Clear plastic bottles (1- or 2-liter)
-
Sharp scissors or a craft knife
-
Chili pepper seeds (choose a variety you enjoy, such as jalapeño, cayenne, or bird’s eye)
-
Seed-starting mix or light potting soil
-
A tray or shallow container to catch excess water
-
Spray bottle or small watering can
Optional: A permanent marker to label bottles if growing multiple chili varieties.
Preparing the Bottle Planters
-
Clean thoroughly: Wash bottles with warm soapy water to remove any residue.
-
Cut the bottle: Slice it horizontally around the middle. The bottom half will serve as your planter.
-
Add drainage holes: Puncture 2–3 small holes at the bottom to allow excess water to escape.
-
Set up the base: Place the bottom halves on a tray or shallow dish to keep surfaces clean.
You can also use the top half of the bottle as a dome to maintain humidity during germination. Simply invert it and place it back on top once the seeds are sown.
Sowing Chili Seeds
-
Fill with soil: Add seed-starting mix to the bottom section of each bottle, leaving about an inch of space at the top.
-
Plant the seeds: Sow 2–3 seeds about ¼ inch deep per bottle cell. This increases your chances of strong germination.
-
Water gently: Mist the soil with a spray bottle until evenly moist, but avoid waterlogging.
-
Cover (optional): If using the top half as a dome, place it over the base to trap moisture and warmth.
Germination and Early Care
Chili seeds generally take 7–14 days to sprout, depending on the variety and temperature. During this stage:
-
Keep warm: Aim for temperatures between 70–80°F (21–27°C), as chilies germinate best in warmth.
-
Provide light: Once seedlings emerge, place bottles in a sunny spot or under grow lights for 12–14 hours daily.
-
Ventilate: If using a dome, remove it once seedlings appear to prevent mold and fungal issues.
-
Thin carefully: Once the first true leaves form, trim weaker seedlings at soil level, leaving only the strongest plant in each bottle.
Nurturing Seedlings
Healthy seedlings need consistent care to grow strong enough for transplanting:
-
Moisture balance: Keep soil moist but not soggy. Check daily, especially if bottles are in a warm location.
-
Air circulation: Place bottles in an area with good airflow to reduce disease risk.
-
Gradual growth: Don’t rush transplanting—let seedlings develop 3–4 sets of leaves before moving them to larger pots.
Transplanting Chili Seedlings
After 4–6 weeks, seedlings should be strong enough for larger containers. Before moving them outdoors permanently, harden them off:
-
Start with shade: Place seedlings outside in a sheltered, shaded area for a few hours.
-
Increase exposure: Each day, give them more sunlight and time outdoors.
-
Full sun: After about a week, they should be ready for full sun conditions.
When transplanting, choose containers at least 10–12 inches deep with good drainage. Chilies thrive in warm, sunny locations with well-draining soil.
Advantages of Bottle Propagation
For patio gardeners or those with small spaces, this method has clear benefits:
-
Cost-effective: No need to buy seed trays or starter kits.
-
Eco-friendly: Reduces plastic waste while supporting sustainable gardening.
-
Compact design: Bottles fit into tight spaces, making them suitable for urban gardening.
-
Scalable system: You can grow a few plants or dozens, depending on available space.
Common Troubleshooting
-
Leggy seedlings: Usually caused by low light. Move seedlings closer to a light source.
-
Yellowing leaves: May indicate overwatering or nutrient deficiency. Check soil drainage and consider a mild liquid fertilizer.
-
Slow germination: Ensure warmth—chilies need higher temperatures than many other vegetables to sprout.
Final Thoughts
Chili seedling propagation with bottles is a practical and sustainable approach for small-space gardeners. By reusing everyday plastic containers, you create a mini greenhouse system that nurtures healthy seedlings with minimal cost and effort. Once transplanted into pots or garden beds, these seedlings will grow into robust chili plants ready to supply your kitchen with fresh, flavorful peppers.
This step-by-step method is easy for beginners yet effective enough for experienced gardeners, proving that even with limited space and resources, you can enjoy the thrill of homegrown chilies.


