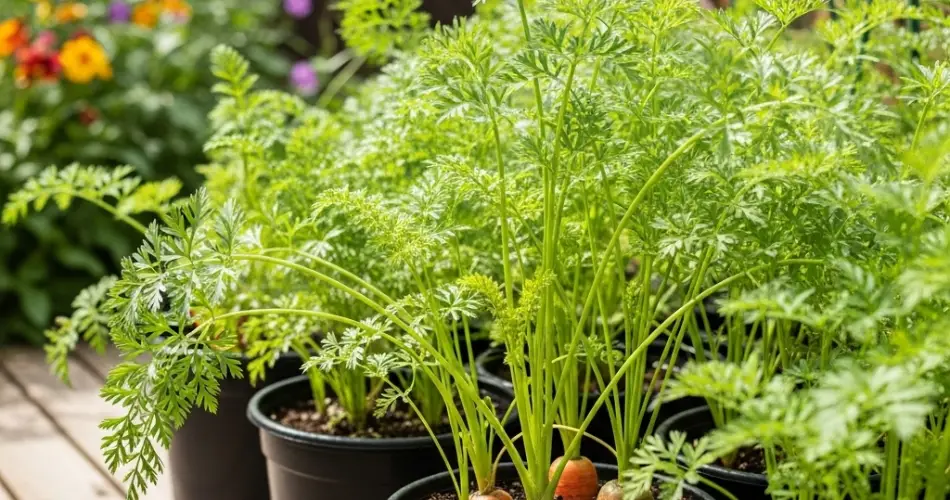
Carrots are a staple in many kitchens, loved for their sweet crunch and versatility. If you think you need a deep garden bed to grow them, think again. Carrots grow exceptionally well in pots—provided the right conditions are met. In fact, container growing can often yield straighter, cleaner, and more tender roots than garden-grown carrots, thanks to the controlled soil environment.
Whether you’re gardening on a balcony, patio, rooftop, or small backyard, growing carrots in pots is a practical and rewarding way to enjoy fresh, homegrown produce.
Why Grow Carrots in Pots?
Growing carrots in containers offers several benefits:
-
Controlled soil – Prevents the rocky, compacted soil that causes crooked roots
-
Fewer pests – Containers are less prone to carrot flies and other soil pests
-
Easy access – Perfect for raised gardening or limited mobility
-
Ideal for small spaces – Great for urban gardeners or apartments
-
Flexible placement – Move pots for better sunlight or shelter from heavy rain
With good soil, proper watering, and patience, container-grown carrots can be just as productive—if not more so—than those grown in the ground.
Choosing the Right Carrot Variety
Not all carrot varieties are created equal, especially when growing in containers. The key is to choose types that perform well in confined spaces. Consider the following container-friendly options:
-
Thumbelina – A round, mini variety perfect for shallow pots
-
Parisian – Small, round carrots that mature quickly
-
Little Finger – Slim and about 3-4 inches long; ideal for containers
-
Nantes – Cylindrical and tender, great for mid-depth containers
-
Short ‘n Sweet – Designed for pots, offering sweet, short roots
Longer carrot varieties can be grown, but they’ll need deeper containers and looser soil to ensure proper development.
What You’ll Need
Before getting started, gather these materials:
-
A container at least 10–12 inches deep with drainage holes
-
High-quality, loose potting mix (free from rocks or clumps)
-
Compost or organic fertilizer
-
Carrot seeds (not seedlings, as carrots don’t transplant well)
-
Watering can or hose with a gentle spray
-
Optional: mulch or lightweight row cover
Step 1: Prepare the Container and Soil
Select a pot that is deep enough to accommodate the length of the carrot variety you’re growing. For round or short carrots, 8–10 inches may suffice. For longer types, opt for 12–16 inches of depth.
Fill the container with a well-draining, fine-textured potting mix. Avoid heavy or clumpy soils, which can hinder root development. Mix in compost or an organic slow-release fertilizer before planting.
Moisten the soil thoroughly before sowing seeds.
Step 2: Planting Carrot Seeds
Carrot seeds are small and slow to germinate, but they’re easy to sow. Sprinkle seeds evenly across the surface and cover them with a thin layer (¼ inch) of soil.
Keep the soil consistently moist until germination, which may take 10–20 days. You can cover the pot with a damp burlap or newspaper to retain moisture until the seeds sprout—just remove it once seedlings emerge.
Step 3: Thinning the Seedlings
Once the seedlings are about 1–2 inches tall, thin them out to allow room for proper root formation. Space the remaining seedlings 1–2 inches apart, depending on the variety. This step is essential to avoid overcrowding and ensure each carrot has room to grow straight and plump.
Use scissors to snip extra seedlings at the base to avoid disturbing the roots of nearby plants.
Step 4: Provide Sunlight and Water
Carrots need 6 to 8 hours of sunlight daily. Place your containers in the sunniest spot available. If the weather is very hot, consider providing light afternoon shade to prevent stress.
Water regularly to keep the soil evenly moist. Inconsistent watering can lead to cracked or deformed roots. Avoid waterlogging, which can cause rot. Container soil dries out faster than garden beds, so check it daily during warm weather.
Step 5: Feeding and Care
If you used compost-rich soil, your carrots may not need additional feeding. Otherwise, apply a balanced, low-nitrogen fertilizer once or twice during the growing season. Too much nitrogen can result in lush tops but poor root development.
Mulching the surface with shredded leaves or straw can help retain moisture and reduce weed growth.
Watch for pests like aphids or leaf miners. While carrots grown in containers are less likely to face these problems, it’s still good to monitor regularly.
Step 6: Harvesting Your Carrots
Carrots are typically ready to harvest 60 to 80 days after planting, depending on the variety. Check the seed packet for maturity dates. You’ll know they’re ready when the tops of the carrots start to push above the soil and reach the expected size.
To harvest, gently loosen the soil around each carrot and pull it up by the base of the green tops. Brush off excess soil and trim the tops if you plan to store them.
You can also harvest baby carrots earlier for tender, bite-sized snacks.
Final Thoughts
Growing carrots in pots is a simple and satisfying way to produce sweet, crisp roots even in the smallest of spaces. By choosing the right container, soil, and carrot variety, you can enjoy homegrown carrots from your patio, balcony, or backyard garden.
Whether you’re a beginner or a seasoned gardener, carrots offer a low-maintenance crop with delicious results. With a little care and patience, you’ll be pulling up beautiful, straight roots in no time.


