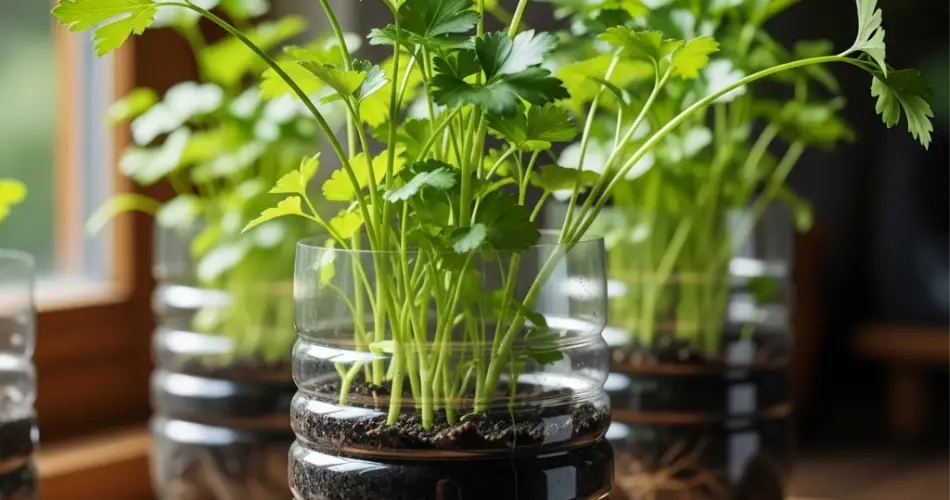
Parsley (Petroselinum crispum) is a versatile and nutrient-rich herb that can brighten up dishes and boost health at the same time. Whether curly or flat-leaf, parsley is a kitchen staple that’s surprisingly easy to grow—even without a garden. One of the most affordable and sustainable methods for growing fresh parsley at home is bottle gardening. By repurposing plastic bottles, you can create compact, functional planters perfect for this popular herb.
This method doesn’t require much space, money, or gardening experience. All you need is a plastic bottle, some soil, and a few parsley seeds. In return, you’ll enjoy a continuous supply of fresh, flavorful parsley just steps from your kitchen.
Why Grow Parsley in Plastic Bottles?
Plastic bottle gardening is perfect for growing parsley for several reasons:
-
Eco-Friendly: It reduces plastic waste by giving used bottles a second life.
-
Budget-Friendly: No need to buy pots—just recycle what you already have.
-
Space-Saving: Ideal for small areas like windowsills, balconies, or countertops.
-
Convenient: Easy to move, water, and monitor herb growth.
-
Effective: Supports parsley’s shallow root system well when the bottle is properly prepared.
Bottle planters are particularly good for herbs like parsley that thrive in containers with well-draining soil and consistent moisture.
Materials You’ll Need
To create your own DIY parsley planter from a bottle, gather the following supplies:
-
1 clean plastic bottle (1.5 to 2-liter size)
-
Scissors or utility knife
-
Potting soil (preferably light and well-draining)
-
Parsley seeds
-
Perlite or sand (optional for better drainage)
-
Nail or skewer (to make drainage holes)
-
Small mesh, coffee filter, or fabric (to line the bottom)
-
Marker (for cutting guide)
-
Spray bottle or small watering can
-
Twine or string (optional for hanging)
Step-by-Step Instructions
Step 1: Prepare the Bottle
Wash the bottle thoroughly and let it dry. Using a marker, draw a horizontal line about one-third of the way from the bottom. Cut along the line with scissors or a craft knife. You’ll use the lower part as the planter base.
For a horizontal layout, cut a window along the side of the bottle instead of cutting it across. This works well for laying the bottle flat and planting several seeds.
Step 2: Add Drainage Holes
Use a skewer, pin, or nail to poke several holes into the bottom of the bottle. This is crucial to allow excess water to drain and prevent waterlogging, which can cause parsley roots to rot.
Place a small piece of mesh, coffee filter, or cloth over the holes to keep soil in while still allowing drainage.
Step 3: Mix and Fill the Soil
Parsley prefers fertile, light soil with good drainage. Mix two parts quality potting soil with one part perlite or sand. Fill your bottle planter about three-quarters full, leaving space at the top for watering.
Step 4: Plant the Parsley
Parsley seeds can take a while to germinate—usually between 14 to 21 days—so patience is key.
-
Sprinkle 5–7 seeds evenly over the surface of the soil.
-
Cover them with a very thin layer of soil (around 1/4 inch).
-
Mist the surface lightly with water using a spray bottle to avoid displacing the seeds.
Place the bottle in a warm, bright area but out of direct sunlight while waiting for germination.
Step 5: Light and Watering Needs
Once the seedlings emerge, move the bottle to a sunny location. Parsley requires at least 5–6 hours of light each day. A south-facing windowsill or balcony works well. If natural light is limited, consider using a grow light.
Water the soil regularly to keep it moist, but not soggy. The top of the soil should feel damp but not saturated. Check daily, especially in warmer weather, as bottles dry out more quickly than traditional pots.
Ongoing Care and Maintenance
-
Thinning: When seedlings are about 2 inches tall, thin them out by removing the weaker ones, leaving the strongest 2–3 plants to continue growing.
-
Feeding: Parsley benefits from occasional feeding. Use a diluted liquid fertilizer every 3–4 weeks during active growth.
-
Pruning: Regular harvesting encourages new leaves. Cut the outer stems at the base, and avoid cutting the center to allow continuous regrowth.
Harvesting Parsley
You can begin harvesting parsley once the plants are about 6 inches tall and have developed several healthy leaves. Cut the outer stems first using clean scissors or pruning shears. This keeps the plant productive and encourages a fuller appearance.
To store harvested parsley, wrap the stems in a damp paper towel and keep them in a container in the fridge. For longer storage, parsley can also be frozen or dried.
Decorating Your Planter
Make your bottle garden attractive with a few simple touches:
-
Paint the bottle in bright colors or earthy tones.
-
Add labels or chalkboard tags for easy identification.
-
Wrap the bottle in burlap or jute for a rustic finish.
-
Create a hanging herb garden by attaching string or wire.
Final Thoughts
Growing parsley in plastic bottles is an accessible and sustainable way to enjoy fresh herbs at home. This budget-friendly method gives you control over your herb supply while contributing to environmental conservation by reducing plastic waste.
With a sunny spot, a little care, and a simple recycled bottle, you can enjoy vibrant, flavorful parsley year-round—right from your own kitchen garden. Whether you’re an experienced gardener or a beginner looking for an easy project, this DIY method proves that you don’t need fancy tools or large spaces to grow something truly useful and beautiful.


