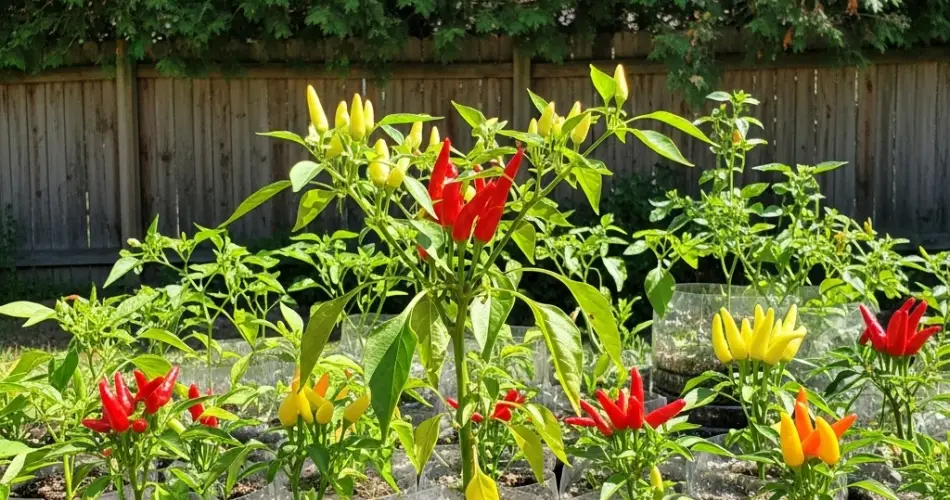
Chili peppers bring vibrant color, heat, and flavor to dishes around the world—and they’re surprisingly easy to grow at home. Even if you don’t have a garden or much outdoor space, you can still cultivate a thriving chili plant using recycled plastic bottles. Bottle gardening is a clever, eco-friendly way to grow your own spicy harvest while making use of limited space and reducing plastic waste.
This method is ideal for apartment dwellers, small-space gardeners, and anyone looking to create a productive mini garden using items they already have at home. With just a few tools and a sunny spot, you’ll be harvesting your own fiery chilis in no time.
Why Grow Chili Peppers in Bottles?
Chili pepper plants are compact, hardy, and well-suited to container gardening. They grow well in warm, sunny locations and don’t require a deep root system, making them ideal candidates for bottle planters. Here are a few advantages of using plastic bottles:
-
Recycling at its best – Repurpose plastic bottles instead of throwing them away
-
Space-saving – Great for balconies, windowsills, patios, and vertical gardens
-
Low maintenance – Chilis thrive with moderate care and watering
-
Portability – Easily move bottles to follow the sun or shelter them from wind
By customizing bottles to suit the plant’s needs, you can grow healthy, fruit-bearing chili plants even in the smallest of spaces.
What You’ll Need
Gather the following supplies to start your chili bottle garden:
-
1.5 to 5-liter plastic bottles (larger ones provide more root space)
-
Chili pepper seeds or seedlings (choose your favorite spicy variety)
-
Potting mix or garden soil mixed with compost
-
Cutter or scissors
-
Screwdriver or nail (for drainage holes)
-
Watering can or spray bottle
-
Organic fertilizer (optional)
-
Bamboo stick or small stake for support (if needed)
Step 1: Prepare the Bottle Planter
1. Clean the Bottle
Remove any labels and rinse the plastic bottle thoroughly. Let it dry completely.
2. Cut the Bottle
Cut off the top third of the bottle horizontally. The bottom portion will serve as your planter. If you’re short on space, consider using the side-planting method: cut a rectangular flap on the side of the bottle to create a horizontal opening for planting.
3. Add Drainage Holes
Poke 4–6 small holes in the bottom of the bottle using a heated nail or screwdriver. Proper drainage helps prevent soggy soil and root rot.
Step 2: Fill with Soil
Use a well-draining potting mix enriched with compost or aged manure. Chilis prefer slightly acidic to neutral soil (pH 6.0–7.0) and benefit from organic nutrients. Fill the bottle with soil up to 2 inches below the rim.
Moisten the soil slightly before planting to help it settle.
Step 3: Plant the Seeds or Seedling
Starting from Seeds:
Plant 2–3 chili seeds about ¼ inch deep in the soil. Water gently. Once the seedlings grow to about 2–3 inches tall, thin them out, keeping the strongest one.
Starting from Seedlings:
If you’re using a young plant, dig a small hole in the center of the soil and place the seedling in. Cover the roots, gently press the soil around the stem, and water immediately after planting.
Step 4: Sunlight and Placement
Chili peppers love warmth and sunlight. Position your bottle planter in a sunny spot where it can receive at least 6–8 hours of direct sunlight each day. A sunny windowsill, patio corner, or balcony railing works well.
If growing indoors, consider rotating the bottle every few days so all sides of the plant get even light exposure.
Step 5: Water and Feed
Water the plant when the top inch of soil feels dry. Chilis don’t like waterlogged conditions but need regular hydration, especially when flowering and fruiting.
To boost growth and yield, feed your plant with a diluted organic fertilizer or compost tea every 2–3 weeks. Look for a fertilizer high in potassium and phosphorus for better fruit development.
Step 6: Support and Maintenance
As the plant grows, it may need support, especially when bearing fruit. Insert a small stick into the bottle and loosely tie the stem to it.
Remove any yellowing leaves and check for pests like aphids or spider mites. You can treat infestations with neem oil or homemade insecticidal soap.
Step 7: Flowering and Pollination
Chili plants are self-pollinating, but gentle shaking of the plant or brushing flowers with a soft paintbrush can help increase fruit set, especially if grown indoors or in low-wind areas.
Step 8: Harvesting
Depending on the variety, chili peppers can be harvested 60–90 days after planting. You can pick them green or wait until they turn red, yellow, or orange—depending on the type—for a spicier flavor.
Use scissors or garden shears to cut the fruits cleanly from the stem. Harvest regularly to encourage more fruit production.
Final Thoughts
Bottle gardening is a sustainable and space-saving way to grow your own chili peppers. With just a plastic bottle, some soil, and sunlight, you can create a thriving mini pepper garden right at home.
Whether you’re a beginner or a seasoned gardener, this method is both practical and rewarding. Not only do you get to enjoy the heat and flavor of fresh chilis, but you also contribute to reducing plastic waste and making the most of small growing spaces.
So grab a bottle, sow some seeds, and let your chili garden take root!


