Growing beans is one of the easiest and most satisfying gardening projects, and you don’t need an outdoor garden to get started. With a simple bottle-based germination method, you can sprout bean seeds in a clean, controlled environment. This approach is perfect for home gardeners who want to start seeds indoors before transplanting or for anyone looking to grow fresh greens in small spaces.
Using bottles for germination has many advantages. They are easy to find, help reduce waste through recycling, and provide a compact, tidy setup that keeps the process mess-free. With a few basic supplies, you can enjoy healthy, strong seedlings that are ready to thrive in soil or continue growing indoors.
Why Choose Bottle Germination?
Traditional soil germination works well, but starting bean seeds in bottles offers unique benefits:
-
Clean and organized – No soil mess in your home.
-
Controlled environment – Protects seeds from pests and fungal problems in the early stages.
-
Water-efficient – Moisture is maintained in a closed container, reducing the need for frequent watering.
-
Transparent sides – Lets you observe root and shoot growth without disturbing the plant.
-
Recycled materials – A sustainable way to reuse plastic bottles.
Selecting Your Bean Seeds
Almost any type of bean can be germinated using this method, including green beans, kidney beans, and runner beans. Choose seeds that are fresh, untreated, and suitable for your growing climate. Check the packaging for germination rates and avoid old seeds that may have reduced viability.
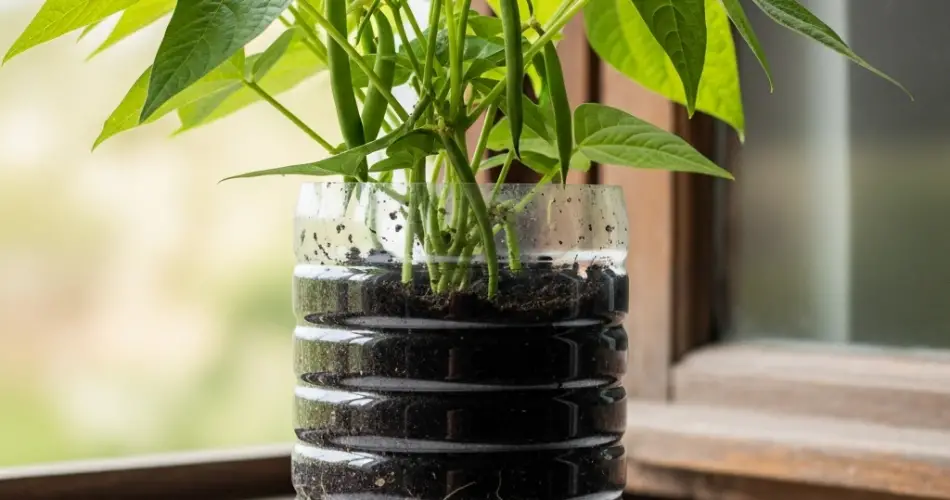
Preparing the Bottles
For each batch of bean seeds, you’ll need a clean plastic bottle. A 1.5- to 2-liter bottle works well for multiple seeds.
-
Wash the bottle thoroughly with warm, soapy water to remove any residues.
-
Cut the bottle in half or just below the neck to create a container.
-
If you want to grow seedlings hydroponically, keep the bottom intact. For soil-based germination, punch a few drainage holes in the base.
-
If using the hydroponic method, you can invert the top portion into the bottom to create a self-watering setup.
The Clean Germination Setup
There are two main approaches: germinating beans on moist paper or in a light, sterile growing medium.
Paper Towel Method
-
Moisten a few sheets of paper towel with clean water. They should be damp but not dripping.
-
Line the inside of the bottle with the damp paper.
-
Place the bean seeds between the paper and the side of the bottle so you can watch them sprout.
-
Cover the bottle loosely to retain moisture but allow some airflow.
With this method, you can easily monitor which seeds germinate and transfer them to soil at the right time.
Light Growing Medium Method
-
Fill the bottle with a sterile seed-starting mix or coco coir.
-
Plant seeds about 2–3 cm deep.
-
Water gently until the medium is evenly moist.
-
Cover lightly with the bottle’s top or a clear plastic bag to create a mini greenhouse effect.
Light and Temperature Requirements
Bean seeds germinate best at temperatures between 20–25°C (68–77°F). Place your bottles in a warm, bright location, such as a sunny windowsill. Avoid direct scorching sunlight during the earliest stages, as this can overheat the container.
If natural light is limited, use a small LED grow light to keep seedlings strong and prevent them from becoming leggy.
Monitoring Growth
Check your bottles daily to ensure the environment stays moist. For the paper towel method, if the towels begin to dry, mist them lightly with water. For the soil method, water sparingly to avoid waterlogging.
In 3–7 days, you’ll see roots emerging from the seeds, followed by shoots. Transparent bottles make it easy to watch the progress, which can be especially fun for children and educational projects.
Transplanting the Seedlings
Once the seedlings have developed their first set of true leaves, they are ready to move to a larger container or outdoor bed.
Steps for transplanting:
-
Gently remove seedlings from the paper towel or growing medium.
-
Take care not to damage the roots.
-
Plant them in nutrient-rich soil, spacing them according to the variety’s requirements.
-
Water immediately after transplanting to help them settle in.
If you prefer, you can allow the beans to continue growing in bottles, especially if you use a soil-filled setup. However, for full-sized plants and maximum yield, transplanting to a larger container or garden bed is recommended.
Benefits of This Method for Beginners
-
High success rate – Easier to control germination conditions.
-
Educational – Observe every stage of growth up close.
-
Minimal mess – Great for indoor projects.
-
Reusability – Bottles can be cleaned and used for multiple germination cycles.
Final Thoughts
Germinating bean seeds in bottles is a simple, clean, and sustainable way to start your gardening journey. Whether you use the paper towel method for quick observation or the light growing medium method for direct planting, you’ll find that this technique produces healthy, vigorous seedlings.
It’s an excellent project for small spaces, urban gardeners, and anyone who enjoys watching plants grow from seed to harvest. With a little preparation and care, your bottle-grown beans will be well on their way to providing fresh, delicious pods for your table.


