If you enjoy growing your own vegetables but have limited space or want to start plants in a controlled environment before moving them outdoors, using bottles for bean sprout propagation is an excellent solution. This method is affordable, requires minimal equipment, and allows you to reuse plastic bottles in a practical, eco-friendly way. Plus, it gives your bean plants a healthy head start, ensuring they establish strong roots before being transplanted into soil.
Why Start Bean Sprouts in Bottles?
Starting bean sprouts in bottles offers several advantages:
-
Controlled Growing Conditions – The enclosed environment maintains consistent humidity and warmth, encouraging rapid germination.
-
Protection from Pests – Seeds are shielded from birds, insects, and rodents that might eat them before they sprout.
-
Space-Saving – Bottles can be placed on windowsills, balconies, or small shelves, making them ideal for apartment gardening.
-
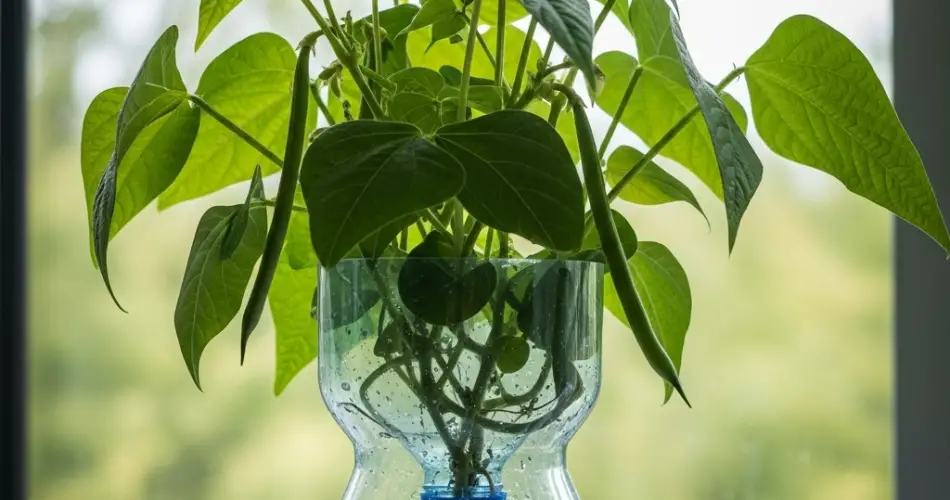
Easy Monitoring – The transparent sides allow you to see root and shoot development without disturbing the plant.
-
Sustainable Practice – Reusing plastic bottles reduces waste and promotes eco-friendly gardening.
Materials You’ll Need
-
1 clear plastic bottle (1.5–2 liters works well)
-
Bean seeds (green beans, kidney beans, or other preferred varieties)
-
Clean water
-
A small amount of potting soil or seed-starting mix (optional for soil-based sprouting)
-
A spray bottle for gentle watering
-
Scissors or a utility knife
Step-by-Step Guide to Growing Bean Sprouts in Bottles
Step 1: Prepare the Bottle
-
Wash and dry the bottle thoroughly to remove any residues.
-
Use scissors or a utility knife to cut the top third off the bottle, creating an opening wide enough for planting and watering.
-
If you plan to grow sprouts hydroponically (without soil), leave the bottle intact but cut a small flap opening to insert seeds and access the sprouts.
Step 2: Pre-Soak the Beans
Most bean seeds benefit from soaking before planting. Place them in a bowl of room-temperature water for 6–8 hours or overnight. This softens the seed coat, speeds up germination, and ensures more uniform sprouting.
Step 3: Planting the Seeds
-
For Soil-Based Sprouting: Fill the lower section of the bottle with 5–7 cm of potting soil or seed-starting mix. Arrange the soaked beans on the surface, spacing them evenly, then cover lightly with 1–2 cm of soil.
-
For Hydroponic Sprouting: Place a piece of damp paper towel or cotton inside the bottle’s base. Spread the soaked beans evenly, ensuring they stay moist but not submerged in water.
Step 4: Maintain Moisture and Warmth
Bean seeds need consistent moisture for germination. Mist the seeds gently with a spray bottle once or twice daily. Place the bottle in a warm spot with indirect sunlight. Direct sunlight at this stage can overheat the bottle and damage the seeds.
Step 5: Monitor Growth
You should see small sprouts within 3–5 days, depending on the bean variety and growing conditions. Roots will grow downward, while shoots stretch upward toward the light. Keep the environment slightly humid but not waterlogged to prevent mold growth.
Step 6: Transplanting the Sprouts
When sprouts are 8–10 cm tall and have at least two sets of true leaves, they are ready for transplanting. Carefully remove them from the bottle, keeping the root system intact. If you grew them in soil, gently loosen the base to avoid damaging the roots. Plant them in prepared garden beds or containers outdoors.
Tips for Successful Bottle Bean Sprouts
-
Avoid Overcrowding – Too many seeds in one bottle will compete for light, air, and nutrients.
-
Rotate the Bottle – Turn it every day so sprouts grow evenly toward the light source.
-
Drain Excess Water – If using soil, ensure the bottle has small drainage holes to prevent root rot.
-
Acclimate Before Transplanting – Gradually expose sprouts to outdoor conditions over 3–5 days to prevent transplant shock.
Benefits of This Method for Home Gardeners
Using bottles for bean sprouting not only gives you a head start on your growing season but also reduces waste by repurposing common household materials. The method works well for many bean varieties and even other fast-germinating vegetables. With minimal effort, you can produce healthy, strong seedlings that adapt quickly to garden soil and produce abundant harvests.
This simple, cost-effective, and environmentally friendly approach is perfect for beginners and experienced gardeners alike. With just a few bottles and a little care, you’ll have thriving bean plants ready to flourish in your garden or containers.


