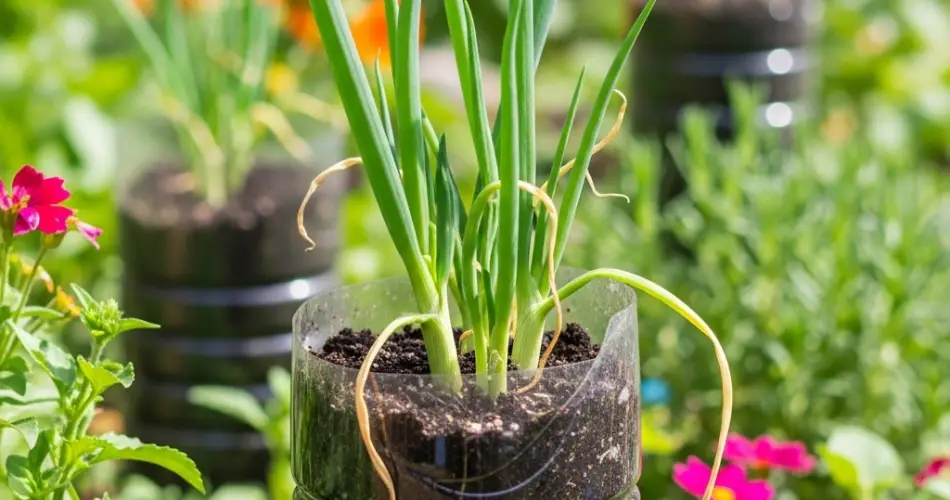
Scallions, also known as green onions or spring onions, are fast-growing, versatile, and ideal for growing in small spaces. Even if you don’t have a garden or much experience, you can cultivate a constant supply of fresh scallions right at home using nothing more than old plastic bottles. This eco-friendly method is perfect for balconies, windowsills, or any sunny spot indoors or out.
Recycling bottles into mini scallion farms is simple, space-saving, and sustainable. It’s a great way to reduce waste while growing your own ingredients for soups, salads, stir-fries, and more.
Why Grow Scallions in Plastic Bottles?
Plastic bottles are lightweight, waterproof, and easy to work with. They’re also widely available in most households. Turning them into planters keeps them out of landfills and gives them new purpose. Scallions are shallow-rooted, making them a perfect match for small containers like bottles.
Benefits include:
-
Cost-effective and accessible
-
Great for beginners and kids
-
Requires very little space
-
Harvest-ready in just 2–3 weeks
-
Grows indoors or outdoors year-round
-
Encourages recycling and sustainable living
What You’ll Need
To start your mini scallion farm, gather the following:
-
Clean 1.5–2-liter plastic bottles
-
Sharp scissors or a utility knife
-
Nail or screwdriver for poking holes
-
Potting soil mixed with compost or organic matter
-
Scallion seeds or scallion ends from your kitchen
-
Garden twine or string (if hanging)
-
A sunny location (minimum 4–6 hours of light daily)
-
Watering can or spray bottle
Step-by-Step Guide to Creating Your Scallion Bottle Garden
1. Prepare the Bottle
Wash and dry the bottle thoroughly. Remove any labels for a cleaner appearance.
-
Cut a large rectangular opening on one side of the bottle (about 4–6 inches wide). This will be the planting window.
-
Poke 4–6 drainage holes in the bottom to allow excess water to escape.
-
If you plan to hang the bottle, create two holes near the top to thread string through for hanging support.
2. Fill with Soil
Add potting soil mixed with compost, filling the bottle about three-quarters full. The soil should be light and well-draining, so roots don’t become waterlogged.
3. Plant Your Scallions
Option 1: Use Seeds
-
Sow 6–8 seeds evenly across the planting window.
-
Cover with a thin layer of soil (about ½ inch deep).
-
Mist with water to moisten the soil.
Option 2: Regrow Kitchen Scraps
-
Save the white base of store-bought scallions with roots intact.
-
Push each base about 1 inch into the soil with roots downward and green tips exposed.
-
Water thoroughly and keep in a sunny spot.
Caring for Your Scallion Plants
Scallions are easy to maintain and grow quickly with minimal effort.
-
Sunlight: Place your bottle farm where it gets at least 4–6 hours of sunlight per day. A windowsill, balcony ledge, or outdoor shelf works great.
-
Watering: Keep the soil consistently moist but not soggy. Check daily, especially in warm weather or if hanging in full sun.
-
Fertilizing: Use a mild liquid fertilizer or compost tea every two weeks to encourage fast growth.
Harvesting Your Scallions
You can start harvesting scallions in 2–3 weeks after planting. When the green shoots are about 6–8 inches tall:
-
Use clean scissors to cut the greens just above the white base.
-
Avoid cutting too close to the soil so the plant can regrow.
Scallions can be cut multiple times before they begin to weaken. With good care, each plant can provide several harvests.
Replanting and Expanding
When your scallions stop regrowing vigorously, simply replace them with fresh kitchen scraps or start new seeds.
-
Remove old plants and refresh the soil with compost.
-
Rotate in another batch of scallions, or try growing chives, garlic greens, or herbs in the same setup.
If you enjoy growing this way, you can scale up by using multiple bottles mounted on a board or suspended vertically to create a wall garden.
Tips for Success
-
Use bottles with wider girths for more planting space.
-
Group bottles together to retain moisture and create a microclimate.
-
Rotate the bottles every few days if indoors, to ensure even light exposure.
-
Keep a small tray under bottles if growing indoors to catch drainage.
-
Label each bottle if growing different varieties or in staggered batches.
Final Thoughts
Creating mini scallion farms from old bottles is a smart, low-maintenance way to grow fresh greens in any space. It’s cost-effective, environmentally friendly, and perfect for those who want to start a garden without a yard. Whether you’re placing them on your windowsill, hanging them on your balcony, or lining up a row along your fence, these bottle planters offer a continuous harvest of crisp, flavorful scallions that you grew yourself.
All it takes is a bottle, a few scraps or seeds, and a little sunlight to get started. Happy growing!


