Gourds are not only a wonderful addition to any garden but also a rewarding crop to grow, even for beginners. Whether you want them for their beauty, for crafting, or for their edible fruit, gourds are easy to grow, require minimal care, and produce a bountiful harvest. With just a little attention and the right conditions, you can enjoy growing gourds that are not only visually striking but also delicious to eat. Here’s how you can grow your own beautiful and tasty gourds.
Step 1: Choose the Right Gourd Variety
The first step in growing gourds is selecting the right variety for your garden. There are many types of gourds to choose from, and each one has its unique characteristics, whether for decoration, cooking, or eating. If you want to grow edible gourds, some popular varieties include:
-
Bottle Gourd (Lagenaria siceraria): Known for its light green color, this variety is commonly used in cooking, especially in soups and stews.
-
Winter Squash: Varieties like butternut and acorn squash are technically gourds and are famous for their sweet, rich flavor when cooked.
-
Snake Gourd: A long, slender variety that can be sautéed or used in stir-fries.
-
Bitter Melon: While bitter in taste, this gourd is highly nutritious and used in many Asian dishes.
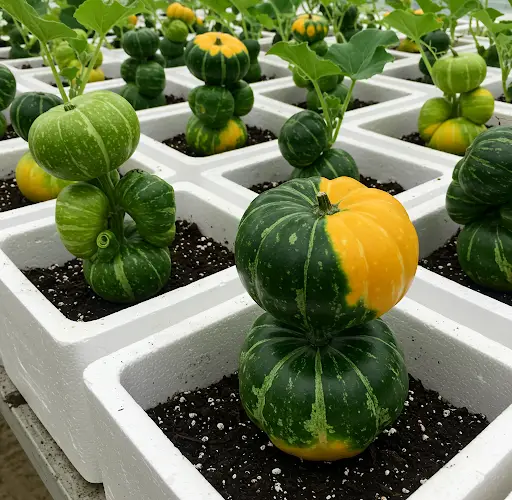
For ornamental purposes, you can grow decorative gourds, which come in various shapes, sizes, and colors. These are great for adding beauty to your garden or for use in fall decorations.
Step 2: Select a Good Growing Location
Gourds need plenty of space to grow, so it’s important to choose the right spot in your garden or on your balcony. Ideally, gourds should be grown in full sun, as they require at least 6 hours of sunlight each day to thrive. A warm, sunny location is essential to encourage strong vine growth and healthy fruit production.
If you don’t have a garden, growing gourds in large containers or raised beds is an excellent alternative. Ensure that your containers are deep enough (at least 12-15 inches) to accommodate the long vines and allow for proper root development. Gourds also need a support structure, such as a trellis or fence, to climb on, which helps save space and improves air circulation around the plants.
Step 3: Prepare the Soil
Gourds thrive in well-draining, fertile soil. Before planting, work the soil by adding plenty of organic compost or manure to enrich it with nutrients. Gourds prefer slightly acidic to neutral soil with a pH level of around 6.0 to 7.5.
If you’re planting gourds in containers, use a high-quality potting mix with good drainage. You can mix in some sand or perlite to enhance drainage and prevent water from accumulating in the soil. Ensure your containers have drainage holes at the bottom to avoid root rot, which can be detrimental to the plant.
Step 4: Planting the Seeds
Gourds are typically started from seeds, as they are easy to grow and grow quickly once planted. Plant the seeds directly in the ground or in your containers once the danger of frost has passed, typically in late spring or early summer when the soil temperature has reached at least 70°F (21°C). If you’re starting seeds indoors, sow them 2-3 weeks before the last expected frost and transplant the seedlings outdoors once they are large enough to handle.
Space your seeds about 3-4 feet apart to give the vines plenty of room to spread. Gourds are vine plants, so they need a lot of space to grow and should not be crowded by other plants. If growing on a trellis or fence, ensure the plants have plenty of room to climb upward.
Step 5: Watering and Fertilizing
Gourds need consistent watering, especially during the hot summer months. Keep the soil moist but not waterlogged, as excessive moisture can lead to rot. Water the plants deeply, ensuring that the water reaches the root zone. Water at the base of the plants to avoid wetting the leaves, which can encourage fungal diseases.
During the growing season, gourds will also benefit from periodic feeding. Use a balanced fertilizer or organic compost every 2-3 weeks to promote healthy growth. Gourds are heavy feeders, and adding compost or organic matter throughout the season can help boost fruit production.
Step 6: Train the Vines and Prune Regularly
As your gourd plants grow, they will begin to produce long vines. Train the vines to climb a trellis, fence, or other support system to save space and keep the fruit off the ground, which helps prevent rot. If growing gourds in containers, providing vertical support is especially important.
It’s also a good idea to prune the vines occasionally to encourage healthy growth. Remove any dead or damaged leaves to prevent disease and allow more sunlight to reach the developing fruits. You can also prune some of the side vines to redirect the plant’s energy toward the main vines and developing gourds.
Step 7: Pollination
Gourds require pollinators such as bees to fertilize the flowers, which will then turn into fruit. Most gourd varieties have both male and female flowers, but you may need to help the process along if pollinators aren’t active in your area.
To encourage pollination, plant a variety of flowering plants around your garden to attract pollinators. If necessary, you can also hand-pollinate by using a small brush to transfer pollen from male flowers to female flowers.
Step 8: Harvesting the Gourds
Gourds are typically ready to harvest 80 to 120 days after planting, depending on the variety. If you’re growing edible gourds, harvest them when they reach full size and their skin has firmed up. The fruit should be easy to cut off the vine, and the stem will start to turn brown and dry.
For decorative gourds, allow the fruit to stay on the vine until the skin hardens and the color deepens. When harvesting, use a sharp knife to cut the gourds from the vine, leaving a short stem attached.
Step 9: Enjoy the Harvest
After harvesting, edible gourds can be enjoyed in a variety of dishes. They can be roasted, stewed, sautéed, or even eaten raw in salads. The flavors are mild yet delicious, and gourds like bottle gourd and squash add a unique texture to your meals.
For decorative gourds, you can display them around your home or garden to add color and charm. They can also be dried and preserved for crafts, such as making vases, birdhouses, or even ornamental decorations.
Final Thoughts
Growing gourds at home is not only simple and low-maintenance, but it also rewards you with both beautiful and delicious fruit. Whether you’re growing them for their ornamental value or for cooking, gourds are an excellent choice for home gardeners with limited space. By following the right steps and providing a little care, you’ll be able to enjoy a vibrant and productive gourd garden right on your balcony or in your backyard.
With the right variety, some space, and a little patience, you’ll soon be able to say, “I never expected this, but I’m so glad I grew gourds!”


