Build a Mini Vegetable Garden on Wheels Using Recycled Plastic
Creating a mobile vegetable garden using recycled plastic is an innovative and sustainable gardening idea that combines creativity, practicality, and environmental consciousness. This project not only promotes recycling but also allows for space-efficient food production—perfect for those with limited garden space or a passion for DIY projects.
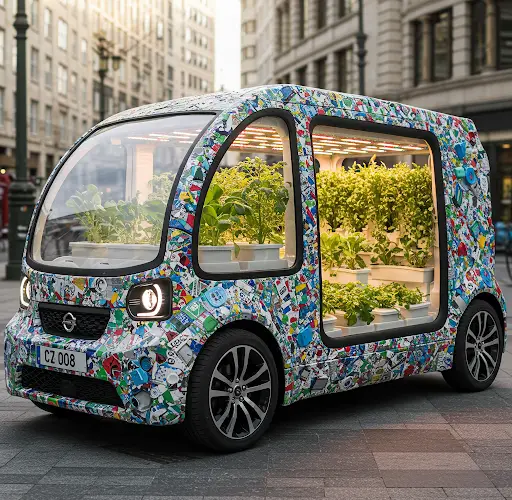
The concept is simple: transform recycled plastic bottles and containers into a movable “vegetable car” that can be wheeled around to catch the sun or tucked away during heavy rain. It’s especially useful for apartment balconies, patios, rooftops, or small yards. The result? A charming and productive mobile garden that grows fresh, healthy vegetables wherever you need them.
Why Make a Vegetable Growing Car?
Urban gardening often comes with space limitations. That’s where the concept of a mobile vegetable garden shines. With wheels attached, your garden becomes portable and versatile. You can move it to chase the sunlight, avoid strong winds, or even just redecorate your space. It also makes watering and harvesting more accessible, especially for the elderly or those with mobility challenges.
And best of all—it’s a sustainable project. Instead of discarding plastic waste, you give it a second life as part of a productive, living garden.
Materials You’ll Need
Here’s what you’ll need to get started:
-
A strong plastic crate, drawer, or storage bin (as the base)
-
Multiple plastic bottles (1L or 1.5L, preferably clear)
-
Small caster wheels or wheels from an old cart/stroller
-
Screws, drill, or strong glue
-
Potting soil or a mix of garden soil, compost, and cocopeat
-
Vegetable seedlings or seeds (lettuce, spinach, herbs, or even small chili plants)
-
A knife or scissors for cutting plastic
-
Optional: wooden frame or PVC pipes for structure
Step 1: Prepare the Base
Start with a large, durable plastic crate or storage container to serve as the car body. This will hold the soil and plants. Make drainage holes in the bottom to allow excess water to escape.
Attach wheels to the bottom of the crate to make your garden mobile. Caster wheels are ideal for smooth movement. Secure them using screws or heavy-duty adhesive, depending on your container’s thickness and material.
If you prefer a more decorative setup, you can attach your plastic crate to a wooden trolley frame or an old wheelbarrow base.
Step 2: Reuse Plastic Bottles for Planters
Clean the plastic bottles and cut out windows along one side to create planters. Lay the bottles horizontally or vertically depending on your design. Poke small holes at the bottom of each bottle for drainage.
These mini planters can be attached to the sides of the main crate or fixed vertically along a frame made of wood or PVC pipes, creating a layered, vertical effect. This maximizes planting space without expanding the base footprint.
Fill each bottle with potting mix and choose small, shallow-rooted vegetables or herbs to plant inside—like basil, coriander, lettuce, or mint.
Step 3: Fill the Garden Car with Soil
Fill the main crate with your prepared soil mix:
-
50% garden soil or loam
-
30% compost (homemade compost or worm castings work well)
-
20% cocopeat or sand for better drainage and moisture retention
Mix well before filling the container. If you’re growing nutrient-hungry plants like tomatoes or eggplants, consider adding crushed eggshells or banana peels as natural fertilizers.
Step 4: Plant Your Vegetables
Now it’s time to plant! Choose compact or shallow-rooted vegetables that thrive in containers. Good choices include:
-
Leafy greens: spinach, kale, arugula
-
Herbs: parsley, thyme, oregano
-
Root crops: radishes or baby carrots
-
Vining vegetables: small cucumbers or peas (add vertical support)
Plant seeds or seedlings at appropriate spacing to avoid overcrowding. Water gently after planting to help them settle in.
Step 5: Maintain and Move as Needed
Place your garden car in a spot with 4–6 hours of sunlight daily. Water regularly to keep the soil moist, especially during dry or hot days.
The benefit of a mobile garden is that it can be moved based on plant needs. If it’s too sunny, shift it to a shadier spot. If rain is forecasted, roll it under shelter to prevent overwatering.
You can also rotate your garden car periodically so all plants get equal light exposure, helping them grow evenly.
Step 6: Harvest and Replant
With proper care, your vegetables will be ready for harvest in a few weeks to a few months, depending on the crop. Use the “cut and come again” method for greens, snipping outer leaves while letting the center grow back.
Once one crop finishes, clear the space and plant a new one. Your vegetable garden on wheels becomes a cycle of continuous food production—all from a repurposed plastic setup.
Conclusion
Creating a mobile vegetable garden using recycled plastic isn’t just a gardening hack—it’s a creative, sustainable lifestyle choice. It allows you to reduce plastic waste, grow your own fresh produce, and bring nature into small spaces.
With a little effort and imagination, your rolling garden can become both a practical solution and a conversation piece—proof that growing food and going green can be beautifully combined.


