Strawberries are one of the most beloved fruits, known for their sweet flavor, bright red color, and versatility in desserts, salads, or simply eaten fresh. While many people assume you need a large garden bed or strawberry patch to grow them successfully, that isn’t the case. With a little creativity and care, you can cultivate strawberries right at home using buckets. This method of container gardening makes it easy to enjoy fresh berries even if you only have a balcony, patio, or small yard.
Growing strawberries in buckets is not only space-efficient but also rewarding, as you can harvest fruit within months of planting. Let’s explore the step-by-step process of creating your own bucket strawberry garden and discover how to keep it thriving.
Why Grow Strawberries in Buckets?
There are several advantages to growing strawberries in buckets compared to traditional garden beds:
-
Space-saving: Buckets allow you to grow strawberries in tight areas, making them perfect for apartment dwellers or homes with limited outdoor space.
-
Mobility: You can move the buckets to catch the best sunlight or protect plants from harsh weather.
-
Pest control: Growing strawberries off the ground reduces their exposure to pests like slugs and snails.
-
Clean fruit: Because the berries don’t rest directly on the soil, they stay cleaner and less prone to rot.
This method also gives you full control over the soil mix, drainage, and watering, ensuring healthier plants.
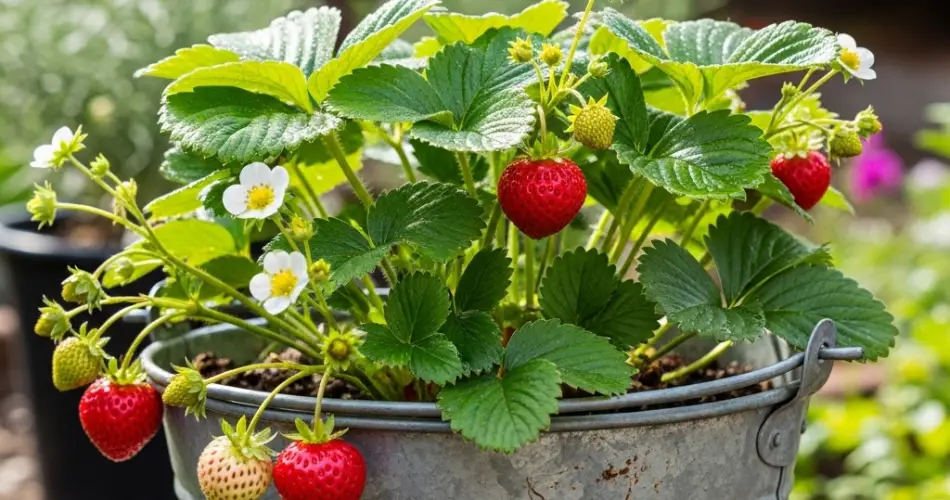
Step 1: Selecting the Right Bucket
The first step is choosing a container suitable for strawberries.
-
Size: Use a bucket at least 10–12 inches deep and wide. Each bucket can hold 2–3 strawberry plants comfortably.
-
Drainage: Drill several holes in the bottom of the bucket to allow excess water to escape. Without drainage, roots can rot.
-
Material: Plastic buckets are lightweight and easy to move, while wooden or ceramic containers offer a rustic appearance.
If you want to maximize space, you can also use vertical bucket towers, stacking several buckets with holes on the sides to plant multiple strawberries in one setup.
Step 2: Preparing the Soil
Strawberries prefer well-drained, slightly acidic soil rich in organic matter. A container mix is ideal, as garden soil alone can be too compact.
-
Soil mix: Use high-quality potting soil blended with compost or organic matter. Adding perlite or sand helps improve aeration.
-
pH level: Aim for 5.5 to 6.8. This range encourages strong root development and sweet fruit production.
-
Fertilization: Before planting, enrich the soil with a balanced organic fertilizer to provide nutrients for growth.
Step 3: Choosing Strawberry Varieties
Not all strawberries perform equally well in containers. Some are better suited for bucket gardening than others.
-
June-bearing: Produce one large harvest in late spring or early summer. Great for bulk harvests.
-
Everbearing: Yield two to three harvests throughout the growing season.
-
Day-neutral: Produce continuously in favorable conditions, making them the best choice for bucket gardening.
Look for compact or trailing varieties if you want to maximize yields in limited space.
Step 4: Planting Strawberries in Buckets
-
Fill your bucket with the prepared soil mix, leaving about two inches of space at the top.
-
Place the strawberry plants so the crown (the point where the roots meet the stem) is level with the soil surface. Planting too deep can cause rot, while planting too shallow exposes roots.
-
Space plants 8–10 inches apart. If your bucket is smaller, stick to two plants per container.
-
Water thoroughly after planting to help the roots settle in.
Step 5: Care and Maintenance
To keep your strawberry plants healthy and productive, focus on consistent care.
-
Sunlight: Strawberries need at least 6–8 hours of direct sunlight daily. Position buckets where they receive plenty of light.
-
Watering: Keep the soil evenly moist but not waterlogged. Strawberries are sensitive to both drought and overwatering. Water at the base of the plants to avoid wetting the leaves.
-
Fertilizing: Use a liquid fertilizer every 3–4 weeks during the growing season to encourage flowering and fruit production.
-
Mulching: Add straw, shredded leaves, or coco coir on the soil surface to retain moisture and protect ripening berries from touching the soil.
-
Pruning: Trim off dead leaves and runners (unless you want to propagate new plants). Removing runners helps the plant focus its energy on producing fruit.
Step 6: Protecting Your Crop
Strawberries are sweet not just to humans but also to birds, insects, and pests.
-
Use netting or mesh covers to keep birds away from ripening fruits.
-
Watch for common pests like aphids or spider mites and treat with organic insecticidal soap if needed.
-
Rotate buckets occasionally to ensure even sunlight exposure and discourage disease buildup.
Step 7: Harvesting Strawberries
The most rewarding moment is picking your homegrown strawberries.
-
Harvest when berries are fully red and firm, as strawberries do not ripen further after being picked.
-
Gently twist or cut the stem just above the fruit to avoid damaging the plant.
-
For the sweetest flavor, pick in the morning after the dew has dried.
With proper care, everbearing and day-neutral varieties can provide strawberries throughout the season, giving you a steady supply of fresh fruit.
Conclusion
Growing strawberries in buckets is a fun, simple, and highly rewarding gardening method for anyone with limited space. With the right container, soil, and care, you can enjoy fresh, sweet strawberries just steps away from your kitchen. Whether you live in an apartment or a home with a small patio, bucket gardening makes it possible to experience the joy of harvesting your own fruit.
Start with just a few plants, and soon you’ll have your own supply of delicious strawberries to enjoy fresh or add to your favorite recipes.


