Tomatoes are one of the most popular vegetables to grow at home, thanks to their versatility, flavor, and high yield. From salads to sauces, they are an essential kitchen staple, and nothing compares to the taste of freshly picked, sun-ripened tomatoes. The good news is that you don’t need a large backyard garden to grow them successfully. With the right techniques, tomatoes can thrive in wooden boxes, making this method ideal for balconies, patios, and other compact spaces. Below is a step-by-step guide to planting and caring for tomatoes in wooden boxes.
Step 1: Choosing the Right Wooden Box
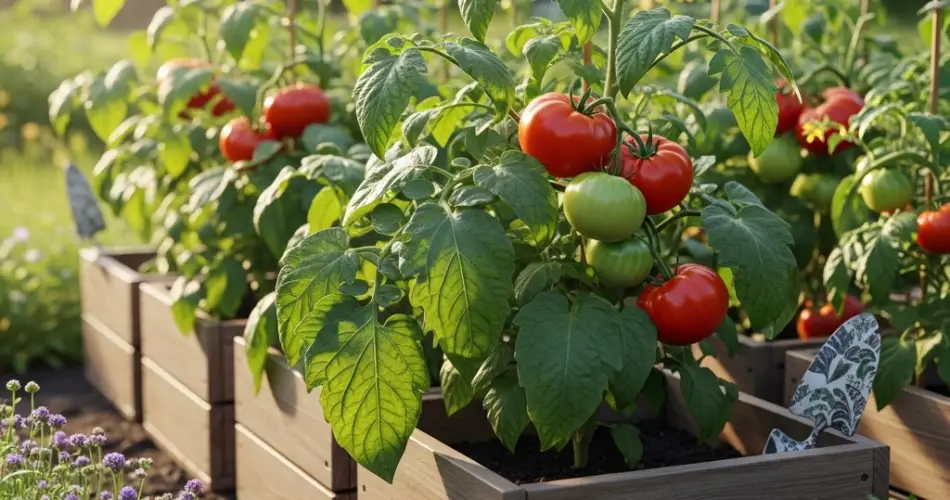
The foundation of successful tomato planting is selecting a suitable container. Wooden boxes are excellent because they provide insulation, are durable, and add a rustic charm to your garden space.
-
Size matters: Choose a box that is at least 18–24 inches deep and 18 inches wide. This ensures enough room for the tomato’s root system.
-
Drainage: Drill several holes in the bottom to allow excess water to escape. Without proper drainage, the soil can become waterlogged, leading to root rot.
-
Lining the box: If using a repurposed crate, line it with landscape fabric or burlap to prevent soil loss while still allowing drainage.
Step 2: Selecting Tomato Varieties
Not all tomato plants are ideal for container growing. For wooden boxes, compact and determinate types are best.
-
Cherry tomatoes: Perfect for snacking and salads.
-
Bush or patio varieties: Specifically bred for container gardening.
-
Roma tomatoes: Excellent for sauces and manageable in size.
Indeterminate varieties, which grow taller and produce throughout the season, can also be planted in wooden boxes, but they require extra support and regular pruning.
Step 3: Preparing the Soil Mix
Tomatoes thrive in nutrient-rich, well-draining soil. Fill your wooden box with a mix designed for healthy root development.
-
Base mix: Use high-quality potting soil instead of garden soil, which may compact too much.
-
Organic matter: Add compost to improve fertility and texture.
-
Aeration: Incorporate perlite or coco coir to enhance drainage and airflow.
Aim for a soil pH between 6.0 and 6.8 for optimal tomato growth.
Step 4: Planting the Seedlings
Once your box and soil are ready, it’s time to plant.
-
Start with healthy seedlings or grow your own indoors 6–8 weeks before the growing season.
-
Dig a deep hole: Tomatoes benefit from deep planting. Bury two-thirds of the seedling stem, leaving only the top sets of leaves above the soil. This allows the buried stem to develop additional roots, creating a stronger plant.
-
Spacing: For determinate varieties, one plant per box works well. Larger boxes may support two plants, but keep them 18–24 inches apart.
Step 5: Supporting Your Tomato Plants
Tomatoes need support as they grow. Insert stakes, cages, or trellises into the soil at planting time to avoid disturbing roots later.
-
Stakes: Drive sturdy stakes into the soil and tie the plant gently as it grows.
-
Cages: Tomato cages are ideal for determinate or bushy varieties.
-
Trellises: Best for indeterminate varieties that grow tall.
Secure stems with soft ties or strips of cloth to prevent damage.
Step 6: Watering and Fertilizing
Tomatoes require consistent moisture but dislike waterlogged conditions. Wooden boxes tend to dry out faster than in-ground beds, so regular watering is essential.
-
Water deeply: Allow water to soak through to the root zone.
-
Check daily in hot weather: The top inch of soil should stay moist.
-
Fertilize regularly: Start with a balanced fertilizer when planting, then switch to a tomato-specific fertilizer high in potassium and phosphorus once flowers appear. Compost tea and fish emulsion are also excellent natural options.
Step 7: Sunlight and Placement
Tomatoes love sunlight and need at least 6–8 hours of direct sun each day. Place your wooden box in the sunniest spot available. If your outdoor space receives partial shade, consider compact tomato varieties that tolerate lower light conditions.
Step 8: Maintenance and Pruning
To maximize yields and keep plants healthy, regular care is required.
-
Prune suckers: Remove small shoots that appear between the main stem and side branches on indeterminate plants. This directs energy toward fruit production.
-
Mulch: Add a layer of straw, shredded leaves, or coconut husk mulch to help retain moisture and regulate soil temperature.
-
Pest management: Keep an eye out for aphids, caterpillars, or fungal issues. Neem oil or insecticidal soap can help with common pests.
Step 9: Harvesting Your Tomatoes
Tomatoes are ready to harvest when they reach their full color and are slightly soft to the touch. Depending on the variety, this may be anywhere from 60 to 85 days after planting. Pick them regularly to encourage continuous production.
If frost arrives before all your tomatoes ripen, you can harvest green ones and allow them to ripen indoors, or use them in recipes that call for green tomatoes.
Final Thoughts
Growing tomatoes in wooden boxes is a rewarding and space-efficient way to enjoy fresh produce at home. With the right container, soil preparation, and consistent care, even small spaces can yield a generous harvest of juicy, flavorful tomatoes. By following these step-by-step instructions, you can create a thriving tomato garden that brings both beauty and nourishment to your living space.


