Scallions, also known as green onions or spring onions, are a kitchen essential prized for their mild flavor and versatility. They add freshness to salads, soups, stir-fries, and countless other dishes. Best of all, scallions are easy to grow, making them perfect for both beginner and experienced gardeners. If you don’t have a traditional garden, don’t worry—wooden boxes provide an excellent solution for growing scallions at home. With proper preparation, care, and a little patience, you can enjoy fresh scallions right outside your door.
This step-by-step guide will walk you through everything you need to know about growing scallions in wooden containers, from selecting the right box to harvesting your first crop.
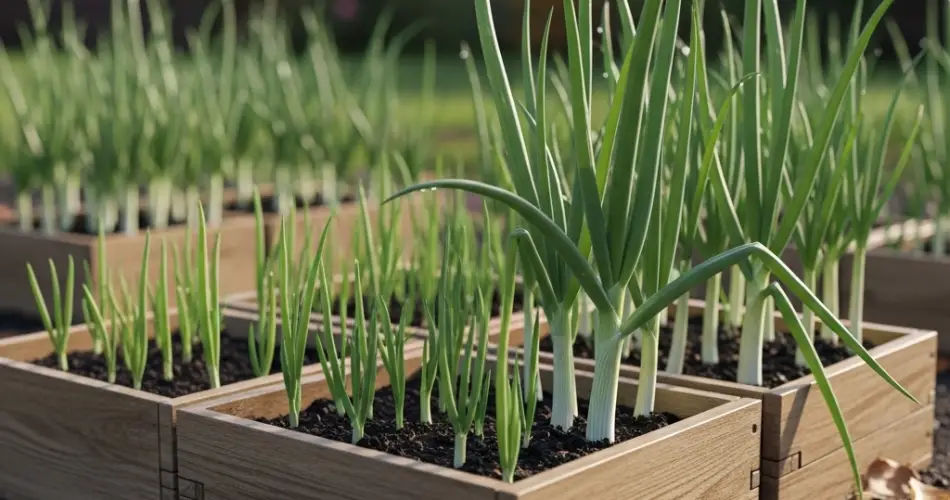
Why Choose Wooden Boxes for Scallions?
Wooden containers are not just practical but also eco-friendly and visually appealing. They provide good insulation, helping maintain a steady soil temperature. Wooden boxes are also customizable—you can build or purchase them in various sizes depending on your available space. Whether placed on a balcony, patio, or backyard corner, these rustic planters blend functionality with charm.
Another key advantage of wooden boxes is soil control. Unlike planting directly in the ground, container gardening allows you to choose the ideal soil mix for scallions, ensuring proper drainage and nutrients. Additionally, raised containers reduce weeds and make tending the plants more convenient.
Step 1: Selecting the Wooden Box
Scallions have shallow root systems, so they don’t require deep containers. A box with a depth of 6 to 8 inches is sufficient. The width and length depend on how many plants you’d like to grow, but even a small box can yield a steady supply of scallions.
Make sure your wooden box has proper drainage holes at the bottom to prevent water from pooling. Cedar and pine are great options because they are naturally resistant to rot. Avoid treated wood, as it may contain chemicals harmful to edible plants.
Step 2: Preparing the Soil
Scallions thrive in well-draining, loose, and nutrient-rich soil. A simple mix includes:
-
One part garden soil or topsoil
-
One part compost for fertility
-
One part sand or perlite to improve drainage
The soil should be slightly acidic to neutral, with a pH between 6.0 and 7.0. Mix in a small amount of organic fertilizer or compost before planting to give the scallions a healthy start.
Step 3: Planting Scallions
There are two popular ways to grow scallions in wooden boxes: from seeds or from sets (small bulbs).
-
Planting from seeds: Sow seeds about ½ inch deep and 1 inch apart. Cover lightly with soil and water gently. Seeds usually sprout within 7–14 days.
-
Planting from sets or cuttings: If you have small onion bulbs or leftover scallion roots, place them directly into the soil with the green tips facing up. This method grows faster, often producing usable greens within weeks.
For a continuous supply, practice succession planting—sow new seeds every two to three weeks.
Step 4: Providing Sunlight and Water
Scallions love sunlight and do best when they receive at least 6 hours of direct sun each day. Wooden boxes can be placed in sunny spots on a balcony, patio, or windowsill.
Because scallions have shallow roots, they need consistent watering to thrive. Keep the soil evenly moist but not waterlogged. Check the soil regularly, especially in warmer months when wooden containers can dry out more quickly. Mulching with dried leaves or straw helps retain moisture and regulate soil temperature.
Step 5: Fertilizing and Maintenance
Scallions are light feeders but will benefit from occasional feeding. Apply a diluted liquid fertilizer, such as compost tea or fish emulsion, every three weeks to encourage healthy growth. If the leaves turn pale, it may signal a nitrogen deficiency, which can be corrected with a small boost of nitrogen-rich fertilizer.
Wooden box gardening minimizes pest problems, but occasionally scallions may attract aphids or thrips. These pests can be managed with natural sprays like neem oil or insecticidal soap. Ensuring good air circulation around plants also helps prevent fungal issues.
Step 6: Harvesting Scallions
One of the best things about scallions is how quickly they mature. From seeds, scallions are usually ready to harvest within 6 to 8 weeks. If grown from sets, the timeline is even shorter.
Harvest scallions when they reach pencil thickness. You can either pull the entire plant from the soil or cut the leaves about an inch above the base, allowing the plant to regrow. With the cut-and-come-again method, you’ll enjoy multiple harvests from the same batch of plants.
Benefits of Growing Scallions in Wooden Boxes
Growing scallions in wooden containers offers many advantages:
-
Space efficiency: Perfect for balconies, patios, or small backyards.
-
Ease of care: Minimal maintenance with quick results.
-
Fast harvests: Enjoy fresh scallions in just weeks.
-
Soil control: Custom soil mixes ensure ideal growing conditions.
-
Aesthetic appeal: Wooden planters add rustic beauty to your space.
Final Thoughts
Scallions are a fantastic crop for container gardening, especially when grown in wooden boxes. They require little space, grow quickly, and provide a steady supply of fresh greens for your kitchen. By following this step-by-step guide—choosing the right box, preparing the soil, planting, watering, and harvesting—you’ll be rewarded with crisp, flavorful scallions all year round.
Wooden box gardening not only makes growing scallions accessible but also adds charm and greenery to any home environment. With just a bit of care, you can enjoy the satisfaction of harvesting fresh scallions whenever you need them.


