How to Use Yeast and Sugar to Grow 1001 Roots and Super Blooms on Orchids
Orchids are one of the most cherished plants, known for their delicate and exotic beauty. However, many orchid growers struggle to encourage strong root development and continuous blooming. What if there was a simple and natural solution that could transform your orchid into a thriving, blooming masterpiece? The secret lies in a powerful mixture of dry yeast, sugar, and water! This combination acts as a natural growth stimulant, boosting root formation and flower production. In this guide, we will explore how to use this method effectively to ensure your orchids flourish like never before.
Why Yeast and Sugar Work for Orchids
Using a mixture of dry yeast and sugar provides orchids with essential nutrients that promote rapid growth and blooming. Here’s why this method is so effective:
- Rich in Beneficial Nutrients: Yeast contains vitamins, amino acids, and enzymes that strengthen plant tissues and encourage root development.
- Stimulates Root Growth: The combination of yeast and sugar nourishes the roots, leading to stronger and healthier plants.
- Encourages Bud and Flower Formation: This mixture helps the orchid produce more flower spikes and extend the blooming period.
- Natural and Safe Fertilizer: Unlike synthetic fertilizers, yeast is an organic option that does not harm the plant.
- Enhances Microbial Activity: It supports beneficial bacteria in the soil, creating a healthy environment for orchids to thrive.
How to Use Yeast and Sugar to Boost Orchid Growth
1. Preparing the Yeast and Sugar Solution
The first step is to create a yeast-infused liquid that will feed and stimulate the orchid’s roots and flowers.
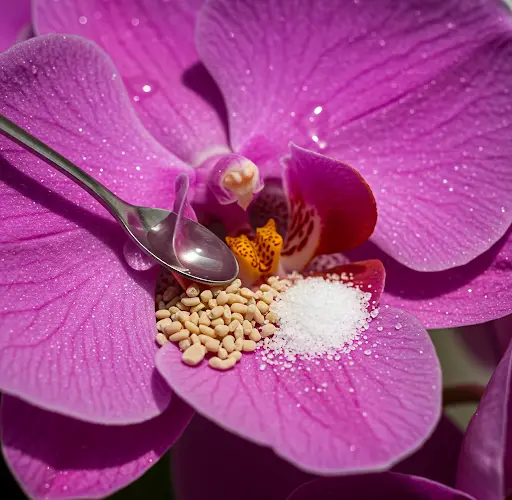
Ingredients:
- 1 teaspoon of dry yeast
- 1 teaspoon of sugar
- 1 liter of lukewarm water
Instructions:
- Dissolve 1 teaspoon of dry yeast in 1 liter of lukewarm water.
- Add 1 teaspoon of sugar and stir well until completely dissolved.
- Let the mixture sit for 10-15 minutes to activate the yeast.
- Once the yeast becomes foamy, it is ready for use.
2. Soaking Orchid Roots in the Yeast Solution
Soaking the roots in the prepared solution encourages explosive root growth, leading to a healthier and more robust plant.
Steps:
- Remove the orchid from its pot and gently clean the roots to remove any debris or old potting material.
- Trim off any dead or rotting roots using sterilized scissors.
- Soak the orchid roots in the yeast solution for 30 minutes.
- After soaking, allow the roots to air-dry for 10-15 minutes before repotting.
This step helps strengthen the roots, making them more capable of absorbing nutrients and water effectively.
3. Watering Orchids with the Yeast Solution
To encourage continuous growth and blooming, you can also water your orchid with the yeast solution once every two weeks.
How to Water with Yeast Solution:
- Pour a small amount of the yeast solution directly onto the orchid’s potting medium.
- Avoid overwatering; use just enough to moisten the medium without causing excess standing water.
- Repeat this process once every two weeks to promote ongoing root and flower development.
4. Spraying Yeast Solution on Leaves and Buds
Spraying the yeast solution directly on the leaves and buds can further boost flowering and strengthen the plant’s immune system.
How to Spray Yeast Solution:
- Pour the prepared yeast mixture into a spray bottle.
- Lightly mist the orchid’s leaves and flower spikes, ensuring the solution is absorbed through the stomata.
- Avoid spraying too much on open flowers, as excess moisture can lead to fungal infections.
- Repeat once every two weeks for best results.
5. Repotting for Maximum Growth
Yeast treatment works best when combined with proper potting techniques. Here are some essential repotting tips:
- Use a well-draining potting mix such as pine bark, coconut husk, and sphagnum moss.
- Choose a pot with good ventilation and drainage holes to prevent root rot.
- Place the orchid in an area with bright, indirect light to support photosynthesis and growth.
- Maintain humidity levels around 50-70% for optimal root and flower development.
Signs That the Yeast Treatment is Working
After applying the yeast and sugar solution consistently, you should begin to notice dramatic improvements in your orchid’s health:
- Stronger and more abundant roots
- Faster leaf and bud development
- Longer and more frequent blooming periods
- Improved resistance to diseases and pests
- Vibrant and lush foliage
Additional Tips for Long-Lasting Orchid Blooms
- Use a Humidity Tray: Placing your orchid pot on a tray filled with pebbles and water can help maintain moisture levels.
- Fertilize Lightly: If desired, complement the yeast treatment with a diluted orchid fertilizer every 2-4 weeks.
- Prune Dead Flower Spikes: Cutting off old, spent flower spikes encourages the plant to produce new ones.
- Ensure Good Air Circulation: Orchids thrive in well-ventilated spaces, so avoid keeping them in stagnant air environments.
Final Thoughts: Grow 1001 Roots and Super Flowers with Yeast
Using a simple combination of dry yeast, sugar, and water can revolutionize the way your orchids grow and bloom. This natural treatment strengthens the roots, boosts immunity, and promotes continuous flowering, making your orchid more vibrant than ever. By incorporating this easy and organic method into your orchid care routine, you can enjoy a flourishing plant with stunning blooms all year round. Try it today and witness the magic of yeast-powered orchid growth!


