Ironing clothes — especially shirts — is one of those household chores that almost no one enjoys. It takes time, patience, and skill to achieve that perfectly smooth, crisp look. For many, it feels like an impossible task no matter how advanced the iron or how much effort they put in.
But if you’ve ever needed a perfectly pressed shirt for an important meeting, a job interview, or a special event and didn’t have time to take it to the dry cleaner, there’s good news. With the right method and a simple homemade solution, you can make ironing faster, easier, and far more effective — without stress or frustration.
Why Ironing Is So Tricky
Ironing seems simple enough — plug in the iron, press down, and smooth out the fabric. In practice, though, it’s much more complicated. Every material behaves differently, some are more delicate than others, and even a tiny mistake can leave shiny marks, scorch lines, or new wrinkles where there weren’t any before.
Even with the best equipment — steam irons, ironing boards, or wrinkle-release sprays — it’s not always easy to get that professional finish. And for busy people or those who simply dislike ironing, it’s one of the most dreaded household tasks.
Fortunately, there are ways to simplify the process and make it almost effortless.
How to Iron a Shirt Properly Without Ruining It
Let’s start with the basics. To achieve a perfectly pressed shirt, timing and preparation are everything.
If possible, begin ironing when the shirt is still slightly damp — for example, just after removing it from the dryer. The light moisture makes the fabric softer, more pliable, and easier to smooth out.
Here’s a step-by-step guide:
-
Shake and smooth:
Take your freshly washed shirt and give it a quick shake to release any initial wrinkles. Lay it flat on a bed or surface and smooth it gently with your hands. Then hang it on a hanger and button the top button to keep it in shape. -
Prepare your iron:
Fill the iron with distilled water — not tap water — to avoid limescale buildup and potential stains. Turn it on, set it to the appropriate temperature for the shirt’s fabric (check the care label), and activate the steam function. -
Start with the collar:
Lay the collar flat on the ironing board. Begin from the tips and work your way toward the center. This ensures you remove all wrinkles without creating new folds. -
Move to the shoulders (yoke):
Position one shoulder over the narrow end of the ironing board and press gently. Repeat on the other side. This step helps the shirt sit perfectly on your body once worn. -
Iron the sleeves:
Lay one sleeve flat, making sure the seams are aligned. Press from the shoulder toward the cuff, keeping movements steady and even. If you want a sharp crease, press along the edge; if you prefer a softer look, avoid creasing the edge completely. Repeat on the other sleeve. -
Do the back:
Spread the back of the shirt over the board and iron it from top to bottom. Keep the fabric taut to prevent bunching. -
Finish with the front panels:
These are the most visible parts, so take extra care here. Navigate around the buttons carefully — never iron directly over them. Use the iron’s tip to press between them.
Once finished, hang the shirt on a hanger immediately, buttoning the top and third buttons to maintain its shape and prevent new wrinkles.
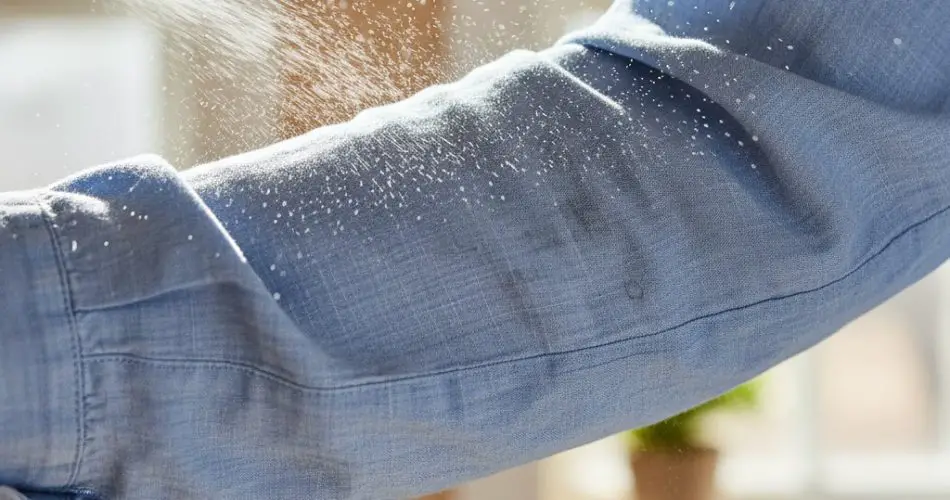
The Miracle Spray That Makes Ironing Easier
Here’s where the real magic happens. A simple homemade spray can make ironing smoother, faster, and much more effective. This solution helps the fabric relax, reduces wrinkles instantly, and prevents the shirt from burning or developing shiny patches.
To make it, you’ll need:
-
1 cup of water
-
1 teaspoon of baking soda
-
A few drops of your favorite essential oil (optional, for fragrance)
Instructions:
-
Pour the ingredients into a spray bottle.
-
Shake well to mix everything thoroughly.
-
Lightly mist the shirt from a distance — you want it slightly damp, not wet.
-
Iron as usual.
The baking soda softens the fabric fibers, making them easier to smooth out, while the essential oil adds a pleasant scent that lingers on your freshly pressed clothes. Lavender, lemon, or eucalyptus are all excellent choices.
You’ll notice the difference immediately — the iron glides effortlessly, wrinkles disappear faster, and your clothes come out looking crisp and professional.
Distilled Water or Tap Water? The Hidden Secret
Many people fill their irons with tap water without realizing the potential damage it can cause. Tap water often contains minerals like calcium and magnesium, which lead to limescale buildup inside the iron. Over time, this can clog the steam vents and leave white stains or even rust marks on clothes.
That’s why experts recommend using distilled water. It’s free from impurities, extends the lifespan of your iron, and ensures a cleaner, more consistent steam output.
Yes, buying distilled water regularly may seem inconvenient, but it’s worth the small investment — especially if you iron frequently. It keeps your iron performing well and prevents the unpleasant surprise of mineral residue on freshly laundered garments.
A Trick for Those Who Hate Ironing Altogether
If you’re truly allergic to ironing (figuratively speaking), here’s a trick that might save you from ever picking up the iron again.
When you use a dryer, remove your clothes immediately after the cycle ends — while they’re still warm. Give each garment a quick shake, smooth it with your hands, and fold or hang it right away.
Clothes left sitting in the dryer tend to wrinkle as they cool, but removing them promptly often leaves them looking perfectly smooth. This method works especially well for cotton shirts, linens, and T-shirts.
Final Thoughts
Ironing may never become your favorite household chore, but with the right approach — and a little help from a DIY wrinkle-release spray — it doesn’t have to be a nightmare either.
By using distilled water, the correct ironing order, and the simple baking soda spray, you can achieve crisp, fresh-looking shirts in half the time and with far less frustration.
Your shirts will look professionally pressed, smell wonderful, and — best of all — you’ll finally be free from the endless battle against wrinkles. Sometimes, the smartest solutions really are the simplest.