If you’re looking to add a bold kick to your cooking and some vibrant color to your container garden, chili peppers are the perfect choice. These compact yet productive plants thrive in pots and containers, making them ideal for balconies, patios, small gardens, and even sunny indoor spaces.
Chili peppers are relatively low-maintenance and come in a wide range of heat levels and flavors. Whether you prefer a mild zing or scorching spice, there’s a chili variety to match your taste and your space.
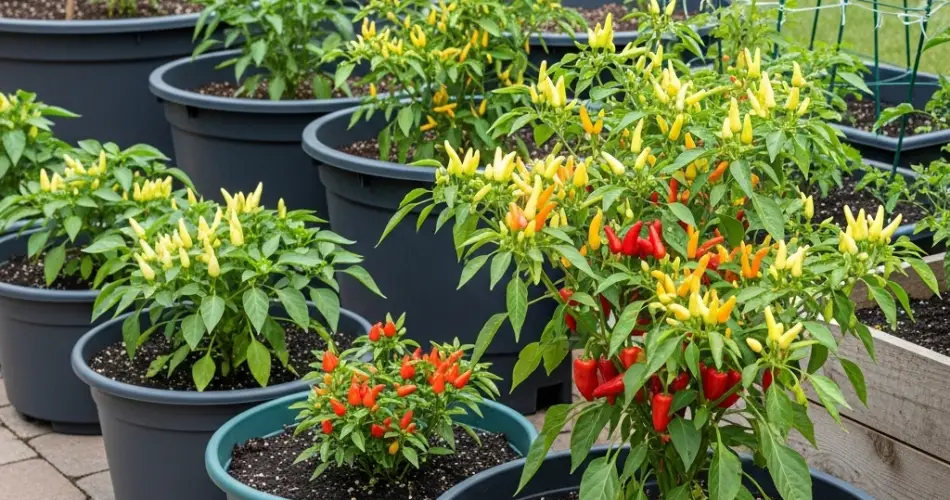
Why Grow Chili Peppers in Containers?
Chili peppers adapt exceptionally well to container gardening. In fact, growing them in pots offers several advantages over traditional garden beds:
-
Space-saving – Perfect for small yards, balconies, or rooftops
-
Mobility – Easily move plants to optimize sun exposure or bring indoors when needed
-
Pest control – Growing in containers reduces soil-borne pests and diseases
-
Temperature control – Warm pots promote faster root growth and plant vigor
-
Aesthetic appeal – Chili plants add greenery and bursts of red, orange, yellow, or purple fruit
Chili peppers can be both ornamental and functional, producing beautiful plants and flavorful fruit in one tidy package.
Best Chili Varieties for Containers
Many chili pepper varieties thrive in pots, especially those with compact growth habits. Here are some popular and container-friendly types:
-
Cayenne – Slim, spicy peppers great for drying and cooking
-
Thai Hot – Small, potent peppers on highly productive plants
-
Jalapeño – Mild to medium heat, perfect for stuffing and salsas
-
Habanero – Very hot and aromatic, best for experienced spice lovers
-
Super Chili – Decorative and productive, with colorful upright pods
-
Bird’s Eye Chili – Tiny, fiery, and highly ornamental
Dwarf or bush varieties work best in smaller containers, while larger types may require bigger pots and some support.
What You’ll Need
Before planting, gather these essential materials:
-
A pot or container at least 10–12 inches deep with good drainage
-
Quality potting mix enriched with compost
-
Chili pepper seeds or starter seedlings
-
Organic fertilizer (slow-release or liquid)
-
Plant labels (optional)
-
Mulch (optional)
-
Watering can or spray nozzle
Step 1: Choosing the Right Container
Select a pot that’s large enough to support the root system. A 3 to 5-gallon container is suitable for most chili pepper varieties. Plastic pots, grow bags, ceramic pots, or recycled containers all work well, provided they have adequate drainage holes.
For multiple plants, use a wider container and space them at least 12 inches apart.
Step 2: Preparing the Soil
Chili peppers prefer loose, well-draining soil with rich organic content. Use a potting mix formulated for vegetables and mix in compost or worm castings for added nutrition.
Avoid garden soil, which may be too heavy and could cause drainage issues in containers.
Step 3: Planting
If starting from seeds, sow them indoors 6–8 weeks before your last frost date. Transplant the seedlings to containers once the weather is consistently warm.
Plant one seedling per pot, placing it slightly deeper than it was in its original container. Gently firm the soil and water thoroughly.
Step 4: Sunlight and Temperature
Chili peppers are heat-loving plants and need at least 6–8 hours of direct sunlight per day. Choose the sunniest location available—south- or west-facing balconies or patios are ideal.
If the temperature drops below 60°F (15°C), move the containers indoors or provide protection. These plants thrive in warmth and struggle in cold conditions.
Step 5: Watering and Fertilizing
Keep the soil evenly moist but not soggy. Water when the top inch of soil feels dry. Container-grown peppers need regular watering, especially in hot weather.
Feed the plants every 2–3 weeks with a balanced liquid fertilizer, or use a slow-release organic fertilizer at planting time. Once the plants begin to flower, switch to a formula higher in potassium to encourage fruiting.
Step 6: Maintenance and Pruning
Pinch off the first few flowers to help the plant establish stronger roots and foliage before fruiting. For taller varieties, use stakes or small cages to support the plants as they grow.
Regularly check for pests like aphids, spider mites, or whiteflies. Remove damaged leaves and spray with organic insecticidal soap if needed.
Step 7: Harvesting Your Chilies
Chili peppers are usually ready to harvest 60 to 90 days after planting, depending on the variety. Pick them when they reach full size and develop their mature color—red, green, yellow, orange, or even purple.
Use scissors or garden snips to cut the peppers, leaving a short stem attached. Harvest regularly to encourage the plant to produce more fruit.
Final Thoughts
Chili peppers are a fun and flavorful addition to any container garden. With their wide range of shapes, colors, and heat levels, they offer variety not just in taste but also in visual appeal.
Whether you’re growing them for fresh salsas, spicy stir-fries, or homemade hot sauce, chili peppers thrive in pots with minimal space and simple care. Start your own chili pepper container garden and enjoy the heat, beauty, and productivity all season long.


