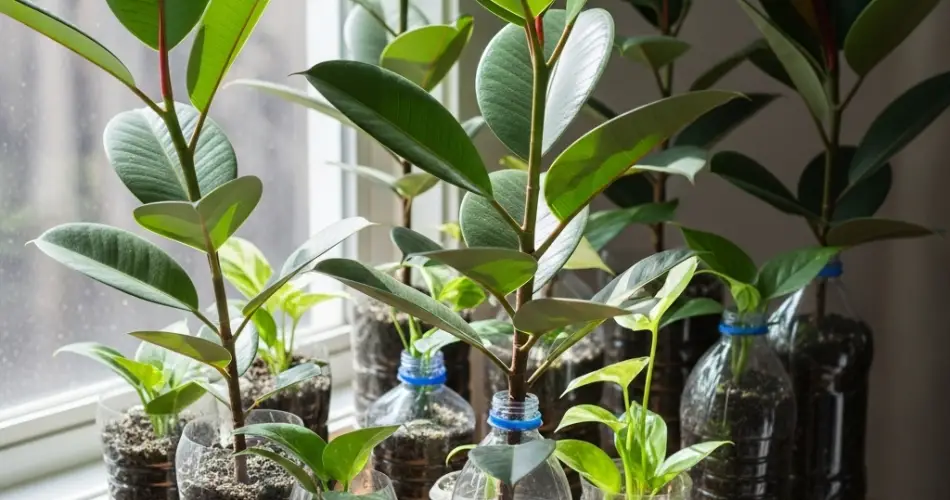
The rubber plant (Ficus elastica) is a striking and hardy indoor plant known for its broad, glossy leaves and upright growth. Perfect for modern interiors, it brings a touch of greenery and a sense of calm to any room. While typically grown in standard pots, you can successfully grow a rubber plant in a recycled plastic bottle—making it a great option for eco-conscious gardeners and those working with limited space.
This guide explains how to grow a rubber plant indoors using upcycled plastic bottles, turning everyday waste into a functional and attractive planter.
Why Choose Rubber Plants?
Rubber plants are ideal for indoor growing because they’re resilient, adaptable, and visually appealing. Their large leaves help purify the air, and their growth habit suits vertical spaces, making them perfect for corners, side tables, or windowsills.
While they can grow quite large over time, rubber plants start small and can be easily managed in compact containers during their early stages. That’s where a recycled bottle planter comes in handy.
Selecting and Preparing a Bottle
Start with a clean, sturdy plastic bottle. One- or two-liter soda bottles work well for young rubber plants or cuttings. Straight-sided bottles are easier to work with and provide enough root space without taking up much room.
Steps to prepare your bottle planter:
-
Cut the bottle: Use a sharp knife or scissors to cut the top third of the bottle off.
-
Create drainage holes: Poke 3–5 small holes in the bottom to ensure proper drainage.
-
Optional design touch: Wrap the outside with fabric, rope, or decorative paper to block light (which can promote algae growth) and improve the look of your planter.
You can also place a few small stones or a thin gravel layer at the bottom for added drainage support.
Ideal Soil for Rubber Plants
Rubber plants prefer loose, well-draining soil. A good mix helps prevent soggy conditions, which can lead to root rot.
Recommended soil mix:
-
2 parts potting soil
-
1 part perlite or coarse sand
-
1 part coco coir or peat moss
This blend retains enough moisture while ensuring air reaches the roots. Avoid heavy garden soil or dense mixes that hold too much water.
Planting a Rubber Plant in the Bottle
Rubber plants can be started from cuttings or small nursery plants. For a bottle planter, it’s best to begin with a cutting or a young plant that hasn’t yet developed a large root system.
Planting steps:
-
Fill the prepared bottle with your soil mix, about two-thirds full.
-
Place the rubber plant cutting or root ball in the center.
-
Add more soil around the base, pressing gently to hold the plant upright.
-
Water lightly to settle the soil and eliminate air pockets.
Place the planter in a spot with bright, indirect light. Rubber plants don’t like intense direct sun, especially when grown in smaller plastic containers that can heat up quickly.
Watering and Humidity
Rubber plants like consistent but moderate moisture. The bottle’s limited drainage makes it important to avoid overwatering.
Watering tips:
-
Water when the top 1–2 inches of soil feel dry.
-
Allow excess water to drain out completely.
-
Avoid letting the plant sit in standing water.
-
Use room-temperature water to prevent shocking the roots.
While rubber plants tolerate average indoor humidity, they appreciate occasional misting, especially in dry climates or air-conditioned rooms.
Light and Temperature Needs
Rubber plants thrive in bright, filtered light. They can adapt to lower light but may grow more slowly or lose some vibrancy in their foliage.
Ideal conditions:
-
Near an east- or north-facing window with indirect sun.
-
Away from cold drafts, heaters, or air vents.
-
Temperatures between 60°F and 80°F (15°C to 27°C).
If your rubber plant starts stretching or leaning, rotate the bottle every few days to encourage balanced growth.
Fertilizing for Healthy Growth
Feed your rubber plant monthly during the growing season (spring through early fall) with a balanced, diluted liquid fertilizer. Avoid overfeeding, which can cause salt buildup in the limited volume of soil within the bottle.
In winter, reduce or stop fertilizing altogether as the plant enters a slower growth phase.
Pruning and Maintenance
Prune the rubber plant occasionally to shape it and encourage bushier growth. You can remove the top portion once it reaches your desired height or clip off leggy stems.
Wipe the leaves regularly with a damp cloth to remove dust and help the plant breathe better. Clean foliage also makes the rubber plant more visually appealing indoors.
When to Repot
Eventually, your rubber plant will outgrow the bottle, especially if it thrives in your care. When you notice roots circling the bottom or soil drying out quickly, it’s time to repot into a larger container.
To repot:
-
Gently remove the plant from the bottle.
-
Loosen the root ball slightly.
-
Transfer to a larger pot with fresh soil mix.
-
Water and place back in its usual location.
Final Thoughts
Growing a rubber plant in a recycled plastic bottle is a rewarding and sustainable way to add greenery to your indoor space. It’s perfect for small apartments, desks, windowsills, or any area where space and resources are limited. With just a little care and creativity, you can turn an ordinary bottle into a thriving home for a beautiful indoor plant.
This approach not only brings a touch of nature into your life but also contributes to environmental awareness by giving new purpose to plastic waste—proving that sustainable gardening starts with simple steps.


