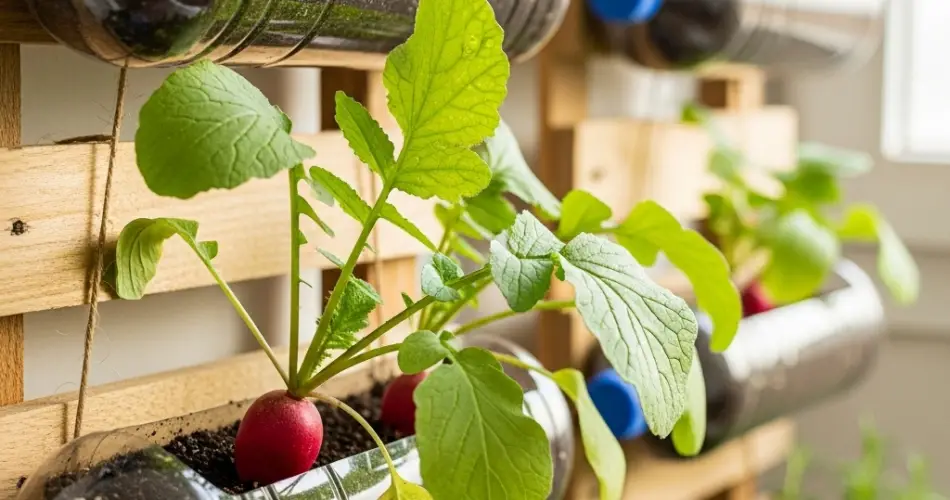
Radishes are a popular choice for home gardeners due to their fast growth, crisp texture, and peppery flavor. If you’re short on garden space or want to try a creative and eco-friendly way to start your radish seedlings, using recycled plastic bottles is a fantastic method. This DIY seedling hack lets you control growing conditions, save space, and give your radish plants a healthy start before transplanting them into larger containers or garden beds.
Why Start Radishes in Bottles?
Starting radish seeds in plastic bottles has several benefits:
-
Space-saving: Bottles are perfect for small apartments, balconies, or limited outdoor areas.
-
Recycling: Reuse plastic bottles to reduce waste and help the environment.
-
Controlled Environment: Bottles create mini-greenhouses, maintaining warmth and moisture to speed up germination.
-
Easy Monitoring: Transparent bottles allow you to observe soil moisture and root development.
-
Mobility: Lightweight and portable, bottles can be moved to optimize sunlight and protect seedlings from harsh weather.
Preparing Your Bottle Planter
To get started, choose a clear plastic bottle of about 1.5 to 2 liters. Clear plastic is ideal because it allows light to reach the soil and makes it easier to monitor moisture.
Steps to prepare the bottle:
-
Cut the bottle: Use a sharp knife or scissors to cut the bottle horizontally about two-thirds from the bottom. The bottom part will be the planter, and the top can be inverted as a lid.
-
Add drainage: Poke several small holes in the bottle’s base to allow excess water to drain and prevent root rot.
-
Ventilation: If you use the bottle top as a cover, keep the cap off or drill a tiny hole in it to allow airflow and avoid excess humidity buildup.
Preparing the Soil Mix
Radishes thrive in light, well-draining soil that retains moisture without becoming soggy. A good soil mix for bottle planting consists of:
-
40% garden soil for structure
-
40% organic compost to provide nutrients
-
20% perlite or coarse sand for drainage
Before planting, moisten the soil lightly to ensure it’s evenly damp but not waterlogged. This balance is essential for radish seed germination.
Planting Radish Seeds in Bottles
Radish seeds are small and easy to work with. Follow these steps for successful planting:
-
Seed spacing: Sow seeds thinly, about one inch apart, to reduce overcrowding and promote healthy root development.
-
Planting depth: Cover the seeds lightly with about ¼ to ½ inch of soil.
-
Water gently: Mist or water carefully to avoid washing seeds away but ensure the soil is moist.
Cover the bottle with the inverted top to maintain humidity and warmth—ideal conditions to encourage quick sprouting.
Providing Ideal Germination Conditions
Radish seeds typically sprout within 3 to 7 days under the right conditions:
-
Temperature: Keep the soil temperature between 60°F and 70°F (15°C to 21°C). Place the bottle planter near a sunny window or under grow lights for consistent warmth.
-
Light: Once seedlings emerge, they require at least 6 hours of bright light daily to avoid becoming leggy.
-
Moisture: Check the soil daily, watering lightly to keep it moist but never saturated.
Caring for Seedlings in Bottles
After germination, care is essential for strong seedling growth:
-
Ventilation: Remove the bottle lid during the day to reduce humidity and prevent fungal growth.
-
Watering: Continue watering moderately, ensuring the soil remains moist but not waterlogged.
-
Thinning: When seedlings reach about 2 inches tall, thin them by snipping weaker plants at soil level to give the strongest seedlings enough space—approximately 2 inches apart.
Transplanting Seedlings from Bottles
Once your seedlings develop 2 to 3 true leaves and have a sturdy root system—usually 2 to 3 weeks after germination—they are ready to move to larger containers or garden beds.
Steps for transplanting:
-
Hardening off: Gradually acclimate seedlings to outdoor conditions by placing them outside for increasing periods over several days.
-
Preparing the soil: Use loose, fertile, well-draining garden soil or potting mix in your planting location.
-
Plant carefully: Gently remove seedlings from the bottle, keeping the root ball intact, and plant them at the same soil depth they had in the bottle.
-
Water well: Water immediately after transplanting to help seedlings settle.
Troubleshooting Common Issues
-
Damping-off: A fungal disease causing seedlings to collapse. Prevent by ensuring good airflow, avoiding overwatering, and using sterilized soil.
-
Poor germination: Check seed freshness, planting depth, and soil temperature to improve results.
-
Leggy seedlings: Insufficient light causes elongated stems; increase exposure to bright light.
Advantages of Bottle-Grown Radishes
-
Fast germination leads to quicker harvests.
-
Bottles fit well in indoor or urban gardening setups.
-
Easy to monitor and manage seedlings during early growth.
-
Portable containers help optimize environmental conditions.
Final Thoughts
Starting radish seeds in bottle planters is an easy, inexpensive, and environmentally friendly way to jump-start your vegetable garden. This DIY seedling hack combines effective space use with sustainable gardening practices, delivering strong seedlings ready for transplant and a fresh, crisp harvest. Whether you have a small balcony, a windowsill, or a backyard, this method can help you grow radishes efficiently and successfully.


