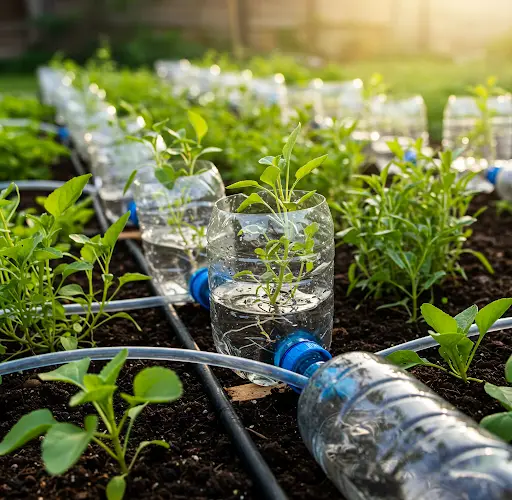
Keeping plants well-watered is one of the biggest challenges for gardeners, especially during the hot months. Traditional watering methods can be time-consuming and wasteful. A great alternative is setting up a quick and easy drip irrigation system using used plastic bottles. This low-cost, eco-friendly solution delivers water directly to plant roots, saving both water and time.
Here’s a step-by-step guide to creating an efficient drip irrigation system with simple materials you likely already have at home.
materials you will need
-
Clean used plastic bottles (1-liter or 2-liter sizes)
-
A sharp knife, scissors, or utility blade
-
A small nail, needle, or pin
-
A lighter or candle (optional, to heat the nail for easier hole-making)
-
String, wire, or garden stakes (optional for added stability)
-
Mulch (optional to improve moisture retention)
By using recycled plastic bottles, you’ll be giving waste materials a second life and helping the environment while taking care of your garden.
step 1: prepare the plastic bottles
First, clean the bottles thoroughly. Remove any labels and rinse out any residues, especially if the bottles previously contained soda or other sugary drinks. A clean bottle ensures you don’t introduce unwanted substances into your soil.
Select bottle sizes based on your plant needs:
-
2-liter bottles are ideal for larger plants like tomatoes, cucumbers, or peppers.
-
1-liter bottles work well for herbs, lettuce, and smaller vegetable plants.
step 2: create the drip holes
Using a small nail, pin, or needle, make small holes in each bottle. Heating the nail over a candle or lighter can make the process smoother, but it’s optional.
There are two main ways to create the holes:
-
Cap method: poke 2 to 5 small holes in the bottle cap. This setup works well when placing the bottle upside-down into the soil.
-
Side method: poke holes near the bottom of the bottle sides if you plan to install the bottle upright in the soil.
Test the hole size by filling a bottle with water and observing the flow. Ideally, you want a slow drip that allows water to seep out steadily over several hours, not minutes. Adjust the size and number of holes as needed.
Tip: the fewer and smaller the holes, the slower and more efficient the watering.
step 3: install the bottles in your garden
Now it’s time to set up the bottles near your plants:
-
Upside-down installation: bury the bottle neck-down next to the plant, leaving the bottle bottom above the soil for easy refilling.
-
Upright installation: bury about one-third of the bottle into the soil with the holes positioned below the surface.
Place the bottles about 10–15 centimeters (4–6 inches) away from the plant base to ensure the water reaches the root zone. Secure the bottles using string, wire, or small stakes if necessary to prevent them from tipping over.
For larger areas, distribute several bottles evenly to cover all plants adequately.
step 4: test and adjust the system
After installation, fill the bottles with water and check how they perform. Watch for:
-
Even dripping over a few hours
-
No sudden emptying
-
Proper soil moisture around each plant
If the water drains too quickly, try using fewer or smaller holes in your next bottles. If it’s too slow, enlarge the holes slightly.
Adjustments might be needed based on your local climate, soil type, and the water requirements of your plants.
step 5: maintenance and improvements
Even though this drip system is very low-maintenance, a few habits can keep it running smoothly:
-
Refill the bottles every few days, depending on weather conditions.
-
Check for clogs caused by soil or debris and clear them as needed.
-
Replace any damaged or brittle bottles over time.
-
Apply mulch around the base of the plants and bottles to further reduce evaporation and help maintain even soil moisture.
benefits of using used plastic bottles for drip irrigation
-
Water efficiency: delivers water directly to plant roots with minimal waste.
-
Cost savings: uses free, recycled materials and eliminates the need for expensive equipment.
-
Eco-friendly: reduces plastic waste by giving old bottles a new purpose.
-
Time savings: reduces the frequency of manual watering.
-
Healthier plants: consistent soil moisture prevents stress and improves growth and yield.
This method is perfect for vegetable gardens, flower beds, raised planters, and even small fruit trees.
additional tips for success
-
Darker-colored bottles can reduce algae growth inside.
-
Use rainwater when available to fill the bottles for even more sustainable gardening.
-
In very hot climates, deeper bottle placement can keep the water cooler and slow the evaporation rate.
-
Combine this method with natural mulching techniques to further improve water conservation.
By setting up a quick and easy drip irrigation system with used plastic bottles, you not only care for your garden but also contribute to a more sustainable way of living. With minimal effort and cost, you’ll have a more efficient watering method and healthier, happier plants throughout the growing season.


