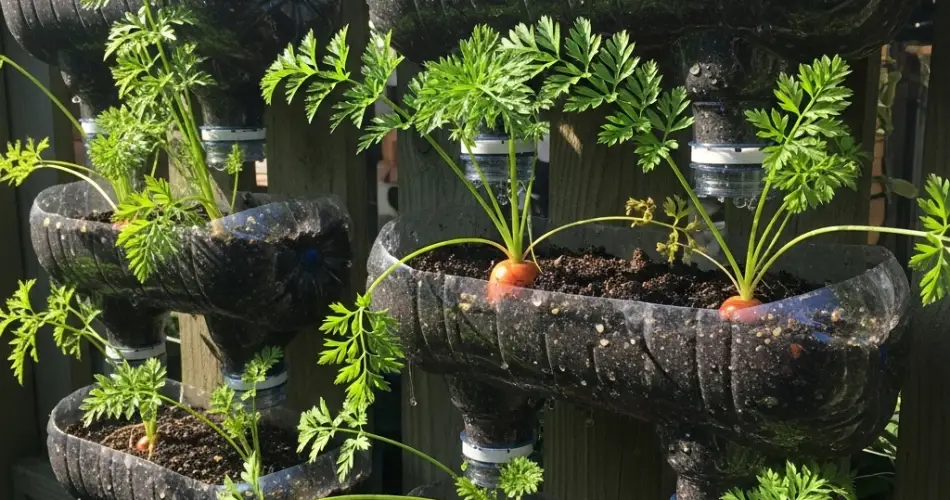
Carrots are a popular root crop for home gardeners, valued for their sweet, crisp flavor and versatility in the kitchen. While many people sow carrot seeds directly into the garden, starting them in bottles before transplanting can offer several advantages. This method creates a protected environment for germination, makes it easier to control soil conditions, and allows you to get a head start on the growing season—even if your outdoor conditions aren’t yet ideal.
Why Start Carrots in Bottles
Carrot seeds are tiny, slow to germinate, and sensitive to soil conditions. By sowing them in bottles, you can control moisture levels, temperature, and soil texture, ensuring that seeds sprout more consistently. Clear plastic bottles also act as mini greenhouses, trapping warmth and humidity while letting in sunlight. This helps seeds germinate faster and reduces the risk of uneven growth.
This method is also great for gardeners with limited space. Even if you don’t have a large garden, you can start multiple bottles on a sunny balcony, patio, or windowsill and transplant them later into a bed or larger container.
Materials You’ll Need
-
Clean, clear plastic bottles (1.5–2 liters work well)
-
A sharp knife or scissors for cutting the bottles
-
Potting mix or fine garden soil with good drainage
-
Carrot seeds (choose a variety suited for your climate)
-
A spray bottle or small watering can
-
A tray or shallow container to hold the bottles
Preparing the Bottles
Start by rinsing the bottles to remove any residue. Using a sharp knife or scissors, cut each bottle horizontally about one-third from the bottom. The lower section will serve as your planting container. Puncture several small drainage holes in the base to prevent water from collecting and causing root rot.
You can also use the top section of the bottle as a lid to create a greenhouse effect. Simply place it upside down over the bottom part after sowing, leaving the cap off for ventilation.
Soil Preparation and Sowing
Carrots grow best in loose, fine-textured soil free from stones and clumps. Fill the bottom portion of the bottle with moist potting mix or sandy loam, leaving a couple of centimeters from the rim. Sprinkle the carrot seeds evenly across the surface. Because the seeds are small, try to avoid overcrowding—they will be easier to thin later. Cover them with a thin layer of soil, about 0.5 cm deep, and gently press the surface to ensure good seed contact.
Creating the Right Conditions
After sowing, place the top half of the bottle back on to help retain warmth and moisture. Set the bottles in a bright spot with at least six hours of sunlight per day. Keep the soil consistently moist by misting it with a spray bottle. Avoid overwatering, as soggy conditions can cause the seeds to rot.
Carrot seeds usually take 10–20 days to germinate. Once the seedlings are about 3–4 cm tall, thin them to leave at least 2–3 cm between each plant, giving the roots enough space to grow.
Transplanting to the Garden or Containers
When the seedlings have at least 3–4 true leaves and the weather is warm enough, they are ready for transplanting. Handle them carefully, as carrot roots are delicate and easily damaged. To make transplanting easier, water the soil in the bottle beforehand to loosen it. Gently remove the seedlings with a small clump of soil around their roots and place them into prepared garden beds or deeper containers.
If moving them outdoors, try to transplant on a cloudy day or in the late afternoon to reduce transplant shock. Keep the soil around the young carrots moist for the first week after transplanting so they can establish quickly.
Benefits of the Bottle Method
-
Controlled germination – Consistent warmth and moisture help improve seed sprouting rates.
-
Protection from pests – Young seedlings are less exposed to slugs, birds, and soil-borne pests.
-
Season extension – You can start carrots earlier in the year, even when outdoor soil is too cold.
-
Space efficiency – Bottles fit easily on windowsills, balconies, and small garden corners.
Harvesting Your Carrots
Depending on the variety, carrots are usually ready to harvest in 60–80 days from germination. You’ll know they’re ready when the tops of the roots are about 1–2 cm wide and have a bright, healthy color. To harvest, loosen the soil gently around each carrot before pulling to avoid breaking the roots.
Final Tips for Success
-
Choose shorter carrot varieties such as ‘Paris Market’ or ‘Thumbelina’ if space is limited.
-
Avoid using heavy, clay-rich soil in bottles—it can cause poor root development.
-
Water regularly but sparingly to prevent splitting.
-
Rotate your crops to avoid pest and disease buildup.
By propagating carrots in bottles before transplanting, you give your plants the best possible start, leading to straighter roots, better yields, and an earlier harvest. This easy, space-saving method is perfect for gardeners of all levels and makes the most of both time and resources.


