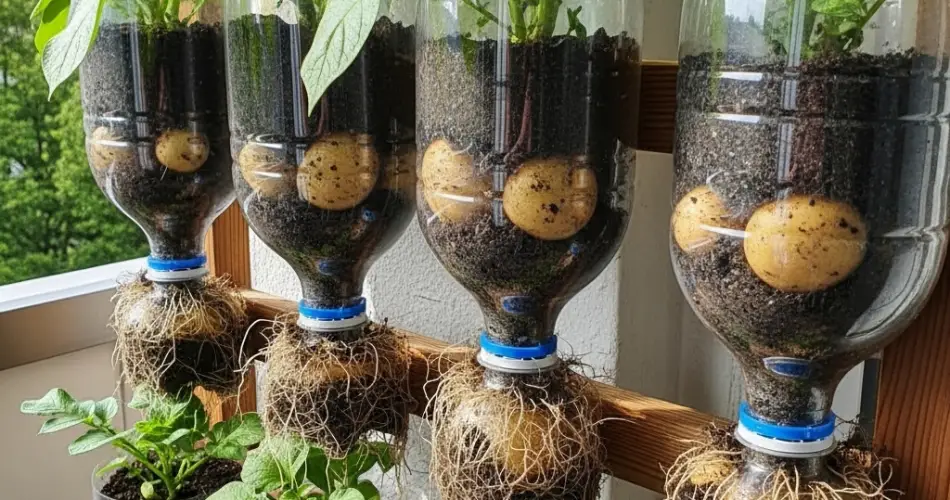
Sprouting seed potatoes before planting is a simple yet essential step for gardeners aiming to maximize yield and ensure healthy potato growth. The DIY bottle method offers a practical, space-saving, and eco-friendly approach to sprout seed potatoes efficiently. By repurposing plastic bottles, gardeners can create a controlled environment that encourages uniform sprouting, reduces waste, and prepares seed potatoes for a successful planting season. This article provides a step-by-step guide on how to use the bottle method to sprout seed potatoes effectively.
Why Sprout Seed Potatoes?
Sprouting seed potatoes—also known as “chitting”—allows gardeners to encourage early shoot development before planting. This process offers several benefits:
-
Faster Growth: Sprouted potatoes produce earlier and more vigorous plants.
-
Higher Yields: Stronger sprouts lead to better tuber development.
-
Disease Control: Pre-sprouting helps identify and discard unhealthy or rotten seed potatoes.
-
Extended Growing Season: Gives plants a head start, especially useful in cooler climates with shorter seasons.
Why Use the Bottle Method?
The bottle method for sprouting seed potatoes is a clever way to:
-
Reuse Plastic Bottles: Environmentally friendly and cost-effective.
-
Provide Controlled Conditions: Bottles create a mini-greenhouse effect, maintaining warmth and humidity.
-
Save Space: Compact and stackable, ideal for small gardens or indoor spaces.
-
Monitor Growth: Transparent bottles make it easy to check sprout development and moisture levels.
Materials Needed
-
Clear plastic bottles (1.5 to 2 liters)
-
Sharp knife or scissors
-
Seed potatoes with healthy eyes
-
Paper towels or newspaper (optional)
-
Water spray bottle
Preparing the Bottles
-
Choose Your Bottles: Clear plastic bottles work best as they allow light penetration, which is important for sprout growth.
-
Cut the Bottles: Use a sharp knife or scissors to cut the bottle horizontally about two-thirds from the bottom. The bottom section will hold the seed potatoes, and the top part acts as a removable lid.
-
Drainage: Poke a few small holes in the bottom of the planter section to allow excess water to escape and prevent rot.
-
Ventilation: Keep the bottle cap off or punch a small hole in it to allow air circulation while maintaining humidity inside the bottle.
Preparing the Seed Potatoes
Before placing seed potatoes in the bottle planter:
-
Select Healthy Tubers: Choose firm potatoes with multiple “eyes” (sprout nodes). Avoid soft, shriveled, or diseased tubers.
-
Pre-treatment (Optional): To reduce the risk of disease, some gardeners dust seed potatoes with fungicide or allow them to dry for a day after washing.
-
Positioning: Place the seed potatoes with the eyes facing upward for optimal sprout development.
Setting Up the Bottle Sprouter
-
Add Moisture Control: Line the bottom of the bottle planter with slightly damp paper towels or newspaper. This helps maintain humidity without soaking the seed potatoes.
-
Place Seed Potatoes: Arrange seed potatoes on top of the damp lining, ensuring they are spaced apart to avoid crowding.
-
Moisture Maintenance: Mist the seed potatoes lightly with water to keep them moist but not wet. Excess moisture can cause rot.
-
Cover the Bottle: Replace the top part of the bottle to create a mini-greenhouse effect, trapping warmth and humidity.
Ideal Conditions for Sprouting
-
Light: Seed potatoes need indirect sunlight or bright, diffused light to promote short, sturdy sprouts. Avoid direct sunlight that can cause overheating.
-
Temperature: Maintain temperatures around 50°F to 70°F (10°C to 21°C). Cooler temperatures slow sprouting; higher temperatures risk soft, elongated sprouts.
-
Humidity: The bottle lid helps retain moisture, but open the lid for a few minutes daily to improve airflow and prevent mold.
Monitoring and Caring for Seed Potatoes
-
Check the seed potatoes every few days for signs of sprouting and moisture levels.
-
Mist lightly if the paper towels or potatoes start to dry out.
-
Remove any tubers that show signs of rot or disease to prevent spread.
-
Depending on the variety and conditions, sprouting can take 2 to 4 weeks. The goal is to grow short, thick sprouts about 1 inch long before planting.
Planting Sprouted Seed Potatoes
Once the seed potatoes have healthy sprouts:
-
Harden Off: If started indoors, gradually expose the sprouted seed potatoes to outdoor conditions for a few days before planting.
-
Prepare Planting Site: Choose loose, well-draining soil enriched with organic matter. Potatoes prefer sunny locations.
-
Planting: Cut larger seed potatoes into pieces ensuring each piece has at least one healthy sprout. Plant pieces 3 to 4 inches deep with sprouts facing upward, spaced 12 inches apart.
-
Water: Keep the soil moist but not saturated to encourage strong root and tuber development.
Advantages of the Bottle Sprouting Method
-
Efficient use of household waste, reducing plastic pollution.
-
Easy to set up and maintain indoors or in limited spaces.
-
Provides a warm, humid microclimate that speeds up sprouting.
-
Allows gardeners to monitor seed health closely and manage moisture levels.
Troubleshooting Common Issues
-
Rotting Seed Potatoes: Usually caused by excess moisture; ensure proper drainage and avoid overwatering.
-
Weak, Leggy Sprouts: Often due to insufficient light; provide indirect bright light to encourage healthy sprout growth.
-
Mold or Fungal Growth: Increase ventilation by opening the bottle lid regularly and remove affected tubers promptly.
Final Thoughts
Using the DIY bottle method for sprouting seed potatoes is an accessible and environmentally friendly way to prepare your crop for planting. This technique maximizes space, creates ideal conditions for sprout development, and helps ensure a healthy, productive potato harvest. Whether you’re a seasoned gardener or a beginner, sprouting your seed potatoes in recycled bottles offers a practical solution that combines sustainability with gardening success.


