Kale is a nutrient-dense leafy green that has gained popularity for its versatility in the kitchen and its impressive health benefits. Rich in vitamins A, C, and K, as well as calcium and antioxidants, kale is considered one of the most powerful superfoods. The good news? You don’t need a large backyard to grow it. With just a pot, some soil, and sunlight, you can cultivate fresh, delicious kale right on your balcony, patio, or windowsill.
Growing kale in containers is an ideal option for urban gardeners or anyone looking to grow food in a compact space. It’s easy to maintain, resilient, and yields multiple harvests with proper care. Whether you’re a beginner or a seasoned grower, kale is a rewarding crop to add to your container garden.
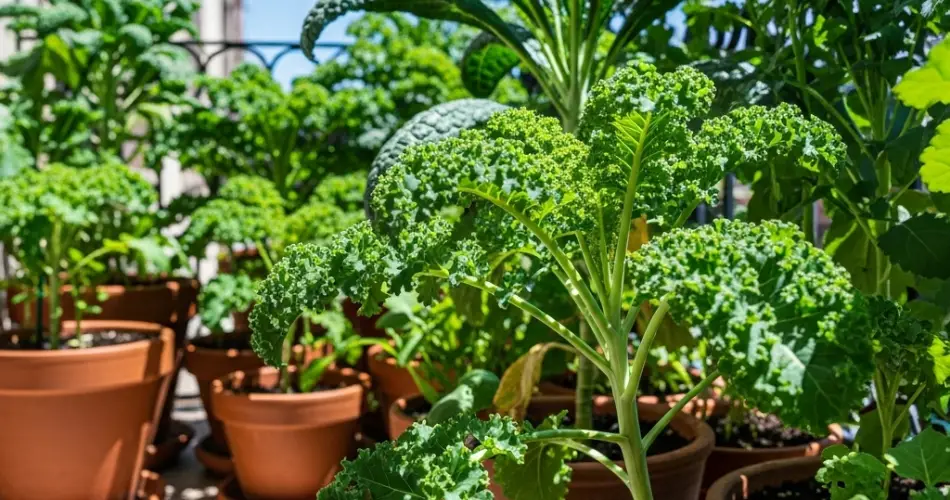
Why Grow Kale in Pots?
Kale adapts well to container gardening thanks to its shallow root system and ability to thrive in cooler temperatures. Growing it in pots offers many benefits:
-
Space-saving: Perfect for small apartments or homes without a garden
-
Portable: You can move the pot to follow the sun or avoid extreme weather
-
Controlled environment: Fewer weeds and better control over soil and moisture
-
Extended harvest: You can pick leaves multiple times from the same plant
With the right setup, you can enjoy kale year-round—even in tight spaces.
Choosing the Right Variety
Several kale varieties are suitable for container growing. Here are a few options:
-
Curly Kale (Scots Kale): Known for its ruffled leaves and vibrant green color, this variety is cold-hardy and productive.
-
Lacinato Kale (Dinosaur or Tuscan Kale): Has dark green, flat, blistered leaves with a slightly sweet flavor.
-
Red Russian Kale: Features tender, flat leaves with purple stems and mild flavor, perfect for stir-fries and salads.
Each variety brings unique taste and texture, so feel free to experiment with a few types in your garden.
Materials Needed
To get started, you’ll need the following:
-
A pot that’s at least 12 inches deep and wide
-
Good-quality potting soil (loamy and well-draining)
-
Compost or organic fertilizer
-
Kale seeds or young transplants
-
A sunny location (ideally 4–6 hours of direct sunlight daily)
-
Watering can or spray bottle
Planting Instructions
-
Prepare the Pot: Choose a container with adequate drainage holes to prevent waterlogging. Fill it with potting soil mixed with compost for added nutrients.
-
Plant the Seeds or Seedlings:
-
From seed: Sow seeds ¼ to ½ inch deep and space them about 8–10 inches apart.
-
From seedlings: Transplant young plants into the container, spacing them properly for airflow and growth.
-
-
Water Gently: Keep the soil consistently moist, especially during germination. Avoid soaking the soil, as kale dislikes soggy roots.
-
Sunlight Needs: Place your container in a spot that gets morning sun and light afternoon shade, especially in warm climates.
Care and Maintenance
-
Watering: Kale prefers moist, not wet, soil. Water when the top inch of soil feels dry. During hot weather, you may need to water daily.
-
Fertilizing: Feed your kale every 3–4 weeks with a diluted organic fertilizer or compost tea to encourage lush growth.
-
Mulching: Apply a thin layer of mulch (like straw or dried leaves) to retain moisture and suppress weeds.
-
Pest Control: Keep an eye out for aphids, cabbage worms, and flea beetles. Use neem oil or insecticidal soap as needed, and remove affected leaves to prevent spread.
-
Airflow: Provide enough space between plants to promote good air circulation and prevent fungal problems.
Harvesting Kale
You can begin harvesting kale around 30–45 days after planting. Start with the outer leaves once they are about the size of your hand. Leave the inner leaves and growing tip intact to allow continuous production.
To harvest, use clean scissors or garden shears to cut the leaves close to the stem. Kale becomes sweeter after a light frost, so if you’re growing in cooler seasons, you’ll notice an improvement in flavor.
Frequent harvesting not only gives you a steady supply of greens but also encourages the plant to produce new leaves.
Tips for Success
-
Succession Planting: Sow seeds every few weeks to maintain a continuous harvest.
-
Rotate the Pot: Turn your pot every few days if light is coming from one direction to promote even growth.
-
Avoid Summer Heat: Kale can bolt in high temperatures, becoming bitter. Provide shade or grow in cooler months for best results.
-
Grow Indoors: If outdoor conditions are too harsh, kale can grow indoors near a sunny window or under grow lights.
Final Thoughts
Kale is one of the easiest and most nutritious crops to grow in a pot. With minimal space and effort, you can enjoy fresh, healthy greens at your fingertips. Container gardening makes it possible for anyone—regardless of space—to experience the joy of growing their own food. From salads and smoothies to sautés and soups, homegrown kale adds both flavor and nutrition to your meals. So grab a pot, plant some seeds, and enjoy the satisfaction of harvesting your own vibrant, garden-fresh kale.


