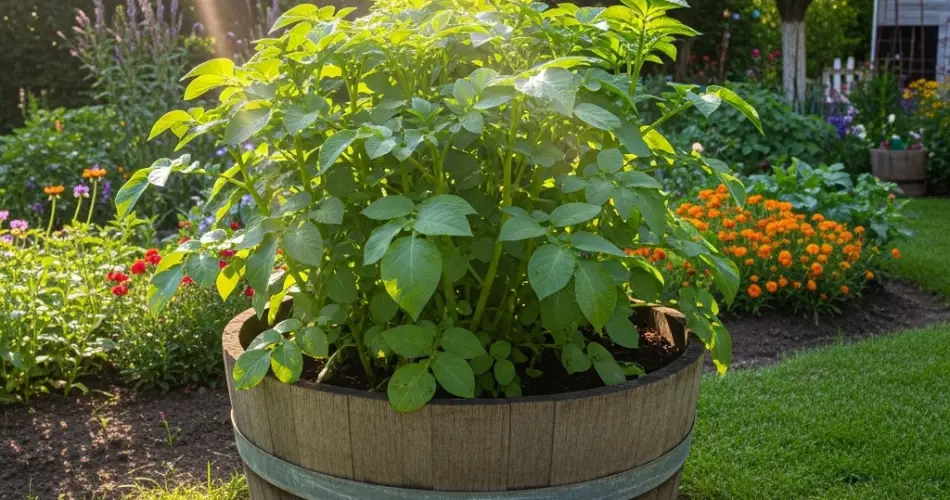
Growing potatoes doesn’t require a large backyard or raised beds. In fact, with the right container—such as a plastic barrel, garbage bin, or a large bucket—you can enjoy an impressive potato harvest even in small spaces. This method is perfect for balconies, patios, and compact gardens, making it an ideal solution for urban growers or anyone looking to maximize space.
Barrel gardening offers convenience, portability, and high yields in a minimal footprint. With proper setup and care, you can grow your own delicious potatoes right at home—no garden plot needed.
Why Grow Potatoes in a Barrel?
Using a barrel or other tall container for growing potatoes has many benefits:
-
Space-saving: Vertical growth takes up far less ground area than traditional rows.
-
Cleaner harvest: Harvesting is easy—just tip over the container.
-
Soil control: You can customize the soil mix to suit potato growth.
-
Pest prevention: Growing in containers reduces exposure to soil-borne pests like wireworms.
-
High yield potential: As the plant grows, more soil is added to encourage tuber formation along the stem, producing more potatoes in a small space.
What You’ll Need
To grow potatoes in a barrel, gather these basic materials:
-
A large container (plastic barrel, garbage can, or sturdy grow bag), ideally 75–100 liters
-
Seed potatoes (certified disease-free)
-
High-quality potting mix or loose, well-draining garden soil
-
Compost or aged manure
-
A sharp knife (for cutting seed potatoes if needed)
-
Water source
-
Drill or knife (to add drainage holes)
Preparing the Barrel
-
Add Drainage Holes: If using a sealed barrel or bin, drill multiple holes in the bottom and sides (about 5–10 cm above the base) to allow excess water to escape.
-
Select the Right Spot: Choose a location that receives 6 to 8 hours of sunlight per day. Potatoes need full sun for healthy growth.
-
Prepare the Soil Mix: Use a blend of:
-
2 parts potting soil or garden loam
-
1 part compost or aged manure
-
Optional: Add sand or perlite for better drainage
-
Planting the Potatoes
-
Prepare Seed Potatoes: Cut large seed potatoes into pieces with at least one “eye” or sprout per piece. Let them sit for 1–2 days to callous over, which prevents rotting.
-
Start with a Soil Base: Fill the bottom of the barrel with 15–20 cm of your prepared soil mix.
-
Plant the Seeds: Place seed potato pieces cut-side down, eye up, spaced about 15 cm apart. You can start with 3–5 pieces depending on barrel size.
-
Cover with Soil: Add another 10–15 cm of soil on top and water thoroughly.
Growing and Hilling Up
As potato plants grow, more soil needs to be added to encourage tubers to form along the buried stem. This is known as “hilling.”
-
Wait for Growth: When the plants reach 15–20 cm tall, gently add 10–15 cm of soil or compost around the base, leaving the top leaves exposed.
-
Repeat as Needed: Continue to hill up soil every time the plants grow another 15 cm, until you’ve nearly filled the barrel.
This vertical layering boosts productivity and ensures the tubers aren’t exposed to light, which can turn them green and toxic.
Watering and Feeding
-
Water consistently: Keep the soil moist but not soggy. Container-grown potatoes dry out more quickly than in-ground crops. Check soil moisture daily, especially in hot weather.
-
Feed regularly: Add a balanced organic fertilizer or compost tea every 2–3 weeks during the growing season to support healthy foliage and tuber development.
Common Pests and Issues
-
Aphids and flea beetles can sometimes attack potato foliage. Use natural remedies like neem oil or insecticidal soap if needed.
-
Blight can occur in wet conditions. Ensure good air circulation, avoid overhead watering, and remove affected leaves promptly.
-
Rot may develop if the container doesn’t drain well, so ensure proper drainage from the start.
Harvesting Your Barrel Potatoes
Potatoes are typically ready to harvest about 10–12 weeks for early varieties, or up to 16 weeks for maincrop varieties. Once the foliage turns yellow and begins to die back, stop watering and wait another 1–2 weeks.
Then, tip over the barrel onto a tarp or directly onto the ground and sift through the soil to collect your potatoes. You’ll find them scattered throughout the soil layers.
For new potatoes, you can gently dig into the soil earlier and harvest a few without disturbing the rest of the plant.
Storing Potatoes
After harvesting:
-
Brush off excess soil (don’t wash).
-
Cure in a cool, dark place for 7–10 days to toughen the skin.
-
Store in a well-ventilated box or bag away from sunlight to avoid sprouting and greening.
Final Thoughts
Growing potatoes in a barrel is a space-efficient, productive method that’s well-suited to urban living and small-space gardening. It requires minimal setup and rewards you with a generous harvest of fresh, flavorful potatoes. Whether you’re new to gardening or looking for a creative way to grow more food at home, this method offers a fun, satisfying way to enjoy one of nature’s most versatile crops.


