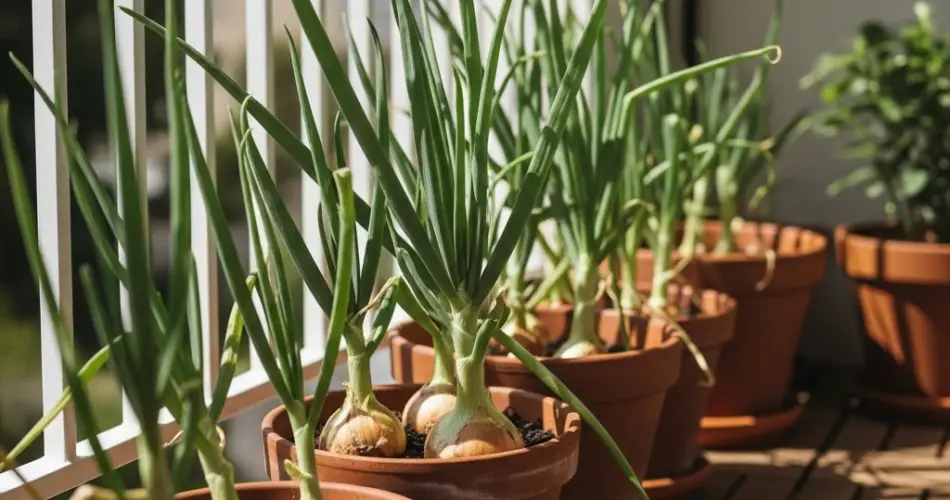
Onions are a staple in kitchens around the world and one of the easiest vegetables to grow—even in small spaces. If you don’t have a backyard or garden, you can still grow fresh, flavorful onions in containers on a balcony, patio, or sunny windowsill. With the right setup and care, pot-grown onions can thrive in urban environments and provide a continuous harvest of bulbs and green tops.
This guide walks you through the simple steps to grow onions in pots—from selecting the right variety to harvesting. Whether you’re a beginner or looking to maximize a limited growing area, container-grown onions are a smart and satisfying choice.
Why Grow Onions in Pots?
Growing onions in containers offers several advantages:
-
Space-efficient: Perfect for balconies, decks, or small patios.
-
Easy to manage: You control the soil quality and moisture levels.
-
Cleaner and neater: No weeding, digging, or bending over garden beds.
-
Pest reduction: Containers help limit exposure to soil-borne diseases and pests.
-
Year-round potential: In mild climates, you can grow onions in containers almost any time of year.
Step 1: Choose the Right Onion Type
Onions come in three basic forms for planting: seeds, sets, and seedlings. For pot gardening, onion sets (small, immature bulbs) and seedlings are the easiest and fastest to grow.
Types of onions:
-
Short-day onions: Require 10–12 hours of sunlight daily. Best for southern regions.
-
Long-day onions: Need 14–16 hours of sunlight. Ideal for northern regions.
-
Day-neutral onions: Adaptable to most regions; a great option for container gardening.
Popular varieties for containers include:
-
‘Evergreen Bunching’ – Fast-growing green onions/scallions.
-
‘Red Baron’ – A compact red onion ideal for pots.
-
‘White Lisbon’ – A reliable spring onion that grows quickly.
Step 2: Select a Suitable Container
Choose a container that suits your space and the type of onions you want to grow. For bulb onions, a deeper pot is necessary.
Recommended container size:
-
At least 8–10 inches deep
-
Wide enough to allow 3–4 inches between plants
-
With multiple drainage holes to prevent soggy soil
Plastic pots, fabric grow bags, window boxes, and recycled tubs all work well. Just ensure they allow for good drainage.
Step 3: Prepare the Soil
Onions prefer loose, fertile, and well-draining soil with plenty of organic matter.
Soil mix recipe:
-
2 parts quality potting mix
-
1 part compost or aged manure
-
1 part perlite or coco coir for improved drainage
Fill the container and leave about an inch of space from the rim to make watering easier. Slightly moisten the mix before planting.
Step 4: Plant the Onions
-
If using sets, plant them with the pointed end up and just the tip showing above the soil surface.
-
For seedlings, dig small holes and plant them at the same depth as they were in the nursery tray.
-
Space each onion 3–4 inches apart for bulb varieties or 1–2 inches if growing green onions.
After planting, water the soil gently but thoroughly.
Step 5: Provide Sunlight and Warmth
Place your container in a location that receives at least 6 hours of direct sunlight daily. Onions are sun-loving plants and require ample light to form good bulbs.
If indoors, use a sunny windowsill or supplement with grow lights for best results.
Ideal temperature range: 60°F to 75°F (15°C to 24°C)
Step 6: Watering and Feeding
Keep the soil consistently moist but never soggy. Container soil tends to dry out faster than garden beds, so check moisture regularly.
Tips:
-
Water when the top inch of soil feels dry.
-
Avoid wetting the leaves to reduce the risk of fungal disease.
Feed onions every 2–3 weeks with a balanced organic fertilizer or compost tea. Once bulbs begin forming, switch to a fertilizer higher in potassium to encourage development.
Step 7: Maintain and Monitor
-
Mulch the top of the soil with dry leaves or straw to retain moisture and reduce weeds.
-
Remove any yellow or damaged leaves.
-
Check for common pests like thrips or aphids and treat them with neem oil or insecticidal soap if necessary.
Step 8: Harvesting Onions
Green onions (scallions) can be harvested as soon as they are pencil-thick, usually within 4–6 weeks.
Bulb onions are ready when:
-
The tops begin to yellow and fall over naturally.
-
The necks feel soft when squeezed.
To harvest, gently pull the onions from the soil. Let them dry (cure) in a shaded, well-ventilated area for 1–2 weeks before storing. Cured onions can last for months in a cool, dry place.
Bonus Tip: Regrow Kitchen Scraps
You can also regrow onions from kitchen scraps. Simply place a trimmed onion bottom (the root end) in moist soil, root side down. In time, it will sprout new green growth—and possibly form a bulb again.
Final Thoughts
Growing onions in containers is a straightforward way to enjoy fresh, flavorful produce in any urban setting. With just a pot, some soil, and sunlight, you can cultivate your own supply of onions for cooking, garnishing, or snacking.
It’s a satisfying and sustainable project that fits even the smallest living spaces—proving that you don’t need a garden to grow your own food. Give it a try and bring a bit of nature (and flavor) right to your doorstep.


