Green beans are among the easiest and most rewarding vegetables to grow, especially in containers. Whether you’re gardening on a sunny balcony, a small patio, or a rooftop space, container-grown green beans thrive with minimal effort and reward you with fresh, crunchy pods throughout the growing season. Their quick growth and compact habits make them ideal for gardeners with limited space.
This step-by-step guide will walk you through everything you need to grow green beans successfully in containers—no backyard required.
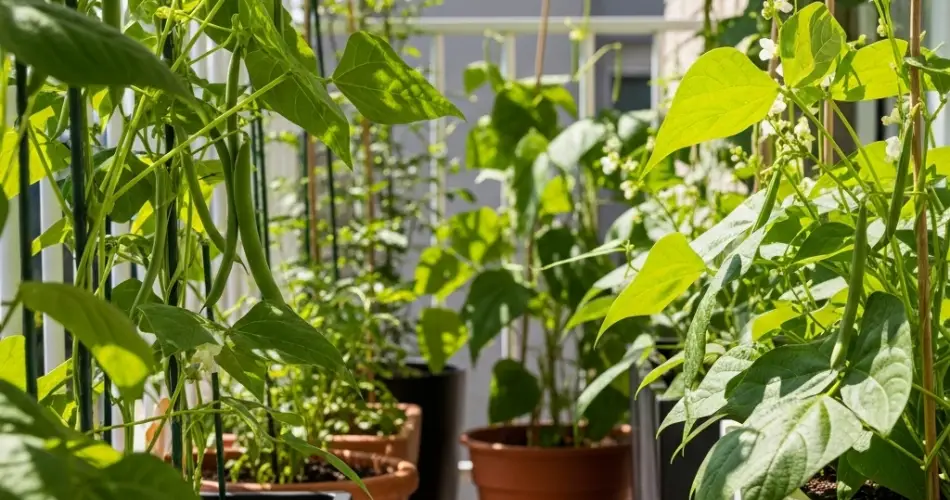
Why Grow Green Beans in Containers?
Growing green beans in pots has many advantages:
-
Space-saving: Ideal for small-space gardening, including balconies and patios.
-
Portable: Move containers to optimize sunlight or protect from harsh weather.
-
Pest management: Easier to monitor for pests and diseases.
-
Quick growth: Green beans mature in as little as 50–60 days.
-
Continuous harvest: Regular picking encourages more bean production.
Step 1: Choose the Right Variety
There are two main types of green beans to choose from:
-
Bush beans: Compact, self-supporting plants that grow 1 to 2 feet tall. Perfect for smaller containers and easier to manage.
-
Pole beans: Climbing vines that can reach 6 to 10 feet tall. They need support such as trellises or stakes but produce beans over a longer period.
Best container varieties:
-
Bush Beans: ‘Provider,’ ‘Contender,’ ‘Blue Lake 274’
-
Pole Beans: ‘Kentucky Blue,’ ‘Blue Lake Pole,’ ‘Scarlet Runner’
Choose a variety based on the container space and support structure available.
Step 2: Select a Suitable Container
Green beans require containers that provide ample room for root development and good drainage.
Container guidelines:
-
Depth: At least 8–12 inches
-
Width: 12–18 inches for bush beans; larger if planting multiple
-
Material: Plastic pots, fabric grow bags, wooden boxes, or recycled tubs
-
Drainage: Essential—make sure the pot has holes at the bottom
For pole beans, choose deeper containers and install stakes or a trellis at planting time.
Step 3: Prepare the Soil
Beans prefer loose, well-draining soil rich in organic matter.
DIY potting mix:
-
2 parts all-purpose potting mix
-
1 part compost or aged manure
-
1 part perlite or coarse sand (for drainage)
Avoid using garden soil alone, as it can compact and hold too much water in pots.
Step 4: Planting Green Beans
Green beans are best grown from seed directly in the container. They don’t transplant well due to their delicate roots.
How to plant:
-
Sow seeds 1 inch deep in moist soil.
-
Space bush bean seeds 3–4 inches apart; thin to 6 inches once seedlings emerge.
-
For pole beans, plant near the base of a trellis or stakes, spacing 4–6 inches apart.
-
Water gently to settle the soil.
Keep the soil evenly moist during germination, which usually takes 7–10 days.
Step 5: Sunlight and Temperature
Green beans need full sun to grow well—at least 6–8 hours of direct sunlight daily.
They thrive in warm temperatures between 65°F and 85°F (18°C–29°C). Protect young plants from cold drafts and unexpected frost.
For indoor growing, place containers near a south-facing window or use grow lights to ensure adequate light.
Step 6: Watering and Feeding
Beans need consistent moisture, especially while flowering and forming pods.
Watering tips:
-
Water when the top inch of soil feels dry.
-
Avoid overhead watering to reduce the risk of fungal disease.
-
Ensure water drains freely from the bottom of the container.
Fertilizing:
-
Mix compost into the soil before planting.
-
Beans don’t need heavy feeding—too much nitrogen can reduce pod production.
-
Use a diluted liquid fertilizer every 3–4 weeks during growth, focusing on phosphorus and potassium.
Step 7: Support for Pole Beans
Pole beans require support to climb. Install supports at planting time to avoid disturbing roots later.
Options include:
-
Bamboo stakes arranged in a teepee
-
Wire trellises
-
Vertical strings tied to a frame
Train the vines by gently wrapping them around the support as they grow.
Step 8: Pests and Maintenance
Common pests that affect green beans include:
-
Aphids
-
Spider mites
-
Leaf miners
-
Bean beetles
Check leaves regularly. Remove pests by hand or spray with neem oil or insecticidal soap if needed. Encourage air circulation and avoid overcrowding to prevent fungal problems like powdery mildew.
Mulching with straw or dry leaves can help retain moisture and suppress weeds.
Step 9: Harvesting Green Beans
Green beans are usually ready to harvest 50–60 days after planting, depending on the variety.
Harvest tips:
-
Pick beans when they’re 4–6 inches long and before the seeds inside fully develop.
-
Use scissors or pinch the beans off gently to avoid damaging the plant.
-
Harvest every couple of days to encourage continuous production.
Step 10: Replanting for Ongoing Harvests
To enjoy green beans throughout the growing season, practice succession planting. Sow new seeds every 3–4 weeks in fresh containers or alternate sections of a large pot.
This approach ensures a continuous supply of fresh pods for months.
Final Thoughts
Green beans are an ideal crop for beginner gardeners and those with limited space. With just a container, quality soil, a sunny spot, and regular watering, you can grow a productive bean crop almost anywhere.
Whether you’re sprucing up a balcony or adding life to a patio, container-grown green beans offer beauty, nutrition, and a satisfying harvest—all without needing a garden bed. Try it yourself and enjoy the taste of fresh-picked beans from your own mini garden.


