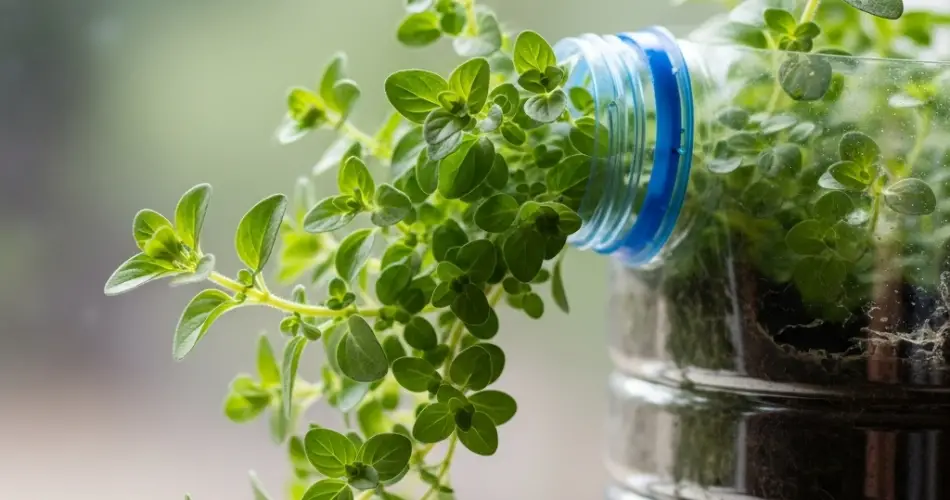
Oregano (Origanum vulgare) is a flavorful, aromatic herb that’s easy to grow at home and perfect for adding a savory touch to pasta sauces, roasted vegetables, and meat dishes. Its compact growth habit and drought tolerance make it an excellent candidate for container gardening. And for those with limited space, especially in apartments or homes with small kitchens, an upcycled plastic bottle can become the ideal planter.
Creating a bottle garden for oregano isn’t just a space-saving solution—it’s also a sustainable, budget-friendly way to enjoy fresh herbs year-round. With a few simple materials and a sunny windowsill, you can cultivate this Mediterranean herb right in your kitchen.
Why Grow Oregano in a Plastic Bottle?
Repurposing plastic bottles for herb gardening offers both environmental and practical benefits:
-
Eco-conscious: Reduces plastic waste by giving bottles a new use.
-
Space-efficient: Perfect for kitchens, windowsills, or small balconies.
-
Affordable: Avoids the cost of traditional pots or garden beds.
-
Easy to maintain: Lightweight and portable—great for chasing the sun indoors.
-
Ideal for oregano: This herb thrives in containers and doesn’t require deep soil to flourish.
Whether you’re a seasoned gardener or just starting out, growing oregano in bottles is a simple and rewarding project.
Materials You’ll Need
To start your oregano bottle garden, you’ll need:
-
A clean plastic bottle (1.5–2 liters is ideal)
-
Potting mix suitable for herbs
-
Perlite or coarse sand (optional, for better drainage)
-
Oregano seeds or starter cuttings
-
Sharp scissors or craft knife
-
Nail or skewer (to create drainage holes)
-
Coffee filter, mesh, or breathable fabric scrap
-
Marker (for cutting guide)
-
Spray bottle or small watering can
Step-by-Step Instructions
Step 1: Prepare the Bottle
Start by washing the bottle thoroughly and removing any labels. Once dry, use a marker to draw a line about one-third from the bottom and cut along that line. This lower section will be used as the planter.
Alternatively, you can cut a horizontal window on the side of the bottle, then lay it on its side for a trough-style planter.
Step 2: Create Drainage
Use a nail, skewer, or heated tool to poke 5–6 small holes in the bottom of the bottle. Good drainage is essential to prevent root rot, especially since oregano prefers slightly dry conditions.
Line the inside with a coffee filter or a piece of mesh to keep the soil in while still allowing excess water to drain.
Step 3: Prepare the Soil
Oregano thrives in slightly dry, well-draining soil. Combine:
-
2 parts potting soil
-
1 part perlite or coarse sand
-
Optional: a handful of compost for added nutrients
Fill the bottle with this mix, leaving about an inch of space from the top for watering.
Step 4: Plant the Oregano
You can grow oregano from seeds or use cuttings if you already have a mature plant.
If using seeds:
-
Sprinkle a few seeds over the soil surface.
-
Lightly cover with a thin layer of soil or press gently into the soil.
-
Mist with water.
If using cuttings:
-
Take a 3–4 inch stem cutting just below a leaf node.
-
Remove the lower leaves.
-
Place the cutting in water for a few days until roots develop.
-
Once rooted, plant the cutting directly into the soil.
Place the bottle planter in a warm, sunny location immediately after planting.
Light and Watering Needs
Oregano loves the sun and thrives in 6–8 hours of sunlight per day. A bright windowsill or kitchen counter near a sunny window is perfect.
Water only when the top inch of soil feels dry. Oregano is drought-tolerant and prefers slightly dry conditions over soggy soil.
Ongoing Care and Maintenance
-
Pruning: Regularly trim back the top leaves to encourage bushier growth. Avoid letting the plant flower if you want to keep harvesting leaves.
-
Feeding: Use a diluted organic liquid fertilizer every 4–6 weeks during the growing season.
-
Pests: Oregano is fairly pest-resistant, but you can occasionally check for aphids or spider mites. Wipe leaves or rinse with water if needed.
-
Airflow: Good air circulation helps prevent fungal diseases. Avoid placing the bottle too close to walls or other objects.
Harvesting Oregano
Once the plant is 4–6 inches tall, you can begin harvesting:
-
Use clean scissors to snip off stems just above a pair of leaves.
-
Always harvest in the morning for the best flavor and oil content.
-
Regular trimming keeps the plant healthy and prevents legginess.
To preserve oregano, you can dry the leaves in a cool, dry area and store them in airtight jars for months.
Decorate Your Bottle Planter
Even a recycled plastic bottle can be turned into an attractive kitchen accent. Try these decoration tips:
-
Paint the outside in earthy tones or vibrant colors.
-
Wrap with twine or jute for a rustic herb garden look.
-
Add labels or tags to identify each herb.
-
Mount the bottle planter on a wall or window frame for vertical gardening.
Final Thoughts
Growing oregano in an upcycled plastic bottle is a simple, sustainable way to bring flavor and freshness into even the tiniest kitchen. This project proves that you don’t need a garden or a lot of money to grow herbs—just a little creativity, a sunny spot, and a desire to reduce waste.
Your oregano bottle garden will not only supply you with a steady stream of aromatic leaves but also serve as a beautiful and functional addition to your living space. With a little care, you’ll have a thriving mini herb garden right at your fingertips, perfect for cooking, garnishing, or making herbal tea any time.


