Garlic is a flavorful staple in kitchens around the world, and the good news is—you don’t need a garden bed to grow it. With the right container, good soil, and a sunny spot, you can grow your own garlic at home, whether you live in an apartment or have limited outdoor space. Container gardening makes it possible to enjoy fresh garlic bulbs and even tender garlic greens without digging up a single patch of ground.
In this guide, you’ll learn how to successfully grow garlic in containers from start to harvest. It’s simpler than you might think, and with just a little effort, you’ll have your own supply of homegrown garlic to use in your cooking.
Why Grow Garlic in Containers?
There are many reasons to grow garlic in containers, especially if you’re working with limited space:
-
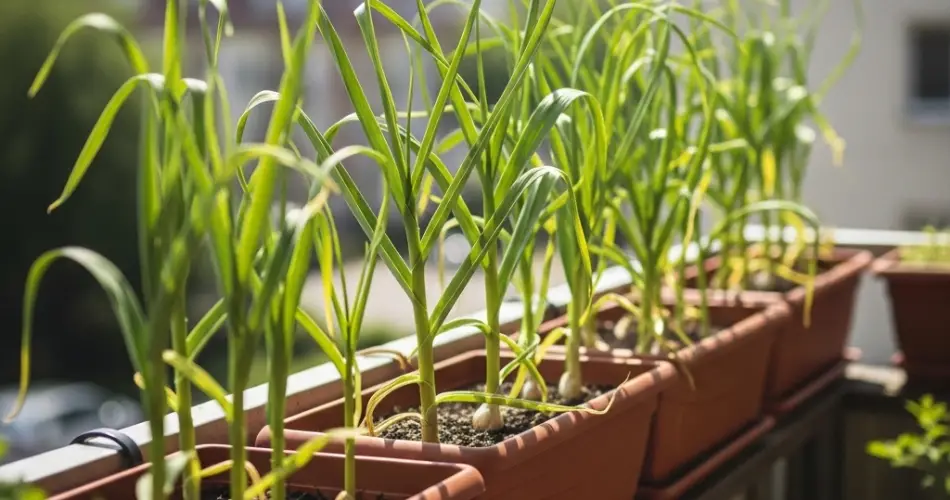
No yard or garden needed: Great for balconies, patios, or sunny windowsills.
-
Easier pest control: Containers help reduce exposure to soil-borne diseases and pests.
-
Better drainage: With the right setup, container soil drains well and prevents rot.
-
Portable: You can move containers to chase the sun or protect from harsh weather.
-
Fresh greens and bulbs: Garlic gives you not only cloves but also tender greens early in its growth cycle.
When to Plant Garlic
Garlic has a long growing season, so proper timing is key. For the biggest bulbs, plant garlic in fall (typically October to November in most climates). This allows the cloves to develop roots before winter, and then grow quickly in spring.
If fall planting isn’t possible, early spring is the next best option. While spring-planted garlic may not yield bulbs as large as those planted in fall, it still produces usable cloves and plenty of greens.
Choosing the Right Garlic Variety
There are two main types of garlic:
-
Hardneck garlic: More cold-tolerant and produces edible flower stalks called scapes. Best for colder climates.
-
Softneck garlic: Adapts well to warmer climates and typically stores longer after harvest.
You can purchase seed garlic from garden centers or order online. Avoid grocery store garlic, which may be treated to prevent sprouting or unsuitable for your local climate.
Materials You’ll Need
Here’s what you need to grow garlic in containers:
-
A container at least 10–12 inches deep with drainage holes
-
Potting mix or well-draining soil enriched with compost
-
Garlic cloves (for planting, not peeled)
-
Watering can
-
Sunny location (balcony, patio, or near a bright window)
Optional: Organic fertilizer and mulch (like straw or dry leaves)
Step-by-Step: How to Plant Garlic in Containers
1. Prepare the Container
Choose a wide container that’s at least 10 inches deep. Each clove needs 4 to 6 inches of space. Ensure the container has multiple drainage holes to avoid water accumulation, which can rot the bulbs.
2. Prepare the Soil
Use a rich, loose potting mix that drains well. A good blend might include:
-
2 parts compost
-
1 part potting soil or garden soil
-
1 part sand or perlite for drainage
Mix thoroughly before filling the container.
3. Plant the Cloves
-
Break apart the garlic bulb into individual cloves—leave the papery skin intact.
-
Plant each clove with the pointy end up and the flat end down, about 2 inches deep.
-
Space cloves 4 to 6 inches apart.
-
Cover with soil and gently pat it down.
-
Water lightly but thoroughly.
4. Find a Sunny Spot
Garlic needs at least 6 hours of direct sunlight daily. Place your container in a spot where it will receive consistent sunlight—an outdoor balcony or a sunny south-facing window is ideal.
Caring for Container Garlic
Watering: Keep the soil consistently moist, but not soggy. Let the top inch of soil dry out slightly between waterings. Overwatering can lead to bulb rot, while underwatering can reduce growth.
Fertilizing: Garlic is a slow grower and benefits from feeding. Use an organic liquid fertilizer or compost tea every 2 to 3 weeks during active growth (especially in spring).
Mulching: Add a thin layer of mulch over the soil to help retain moisture, regulate soil temperature, and reduce weed growth.
Harvesting Garlic Greens
If you planted extra cloves close together, you can snip the green tops once they reach about 6–8 inches tall. These garlic greens are tender and flavorful, perfect for adding to eggs, soups, or salads. Just don’t harvest the greens from the cloves you’re growing for bulbs, as it will slow bulb development.
Harvesting Garlic Bulbs
Depending on when you planted, garlic is typically ready to harvest 7–9 months later. You’ll know it’s time when:
-
The lower leaves start turning yellow or brown.
-
The top leaves remain green.
Stop watering a week before harvesting to help the bulbs dry out. Gently loosen the soil and pull the bulbs from the container.
Curing and Storing Garlic
After harvest, lay the garlic bulbs in a dry, well-ventilated, shady area to cure for 2–3 weeks. Once the outer layers are dry and papery, you can trim the roots and stalks. Store the garlic in a cool, dry place with good air circulation.
Properly cured garlic can last for several months.
Final Thoughts
Growing garlic in containers is a simple and rewarding project for gardeners of all skill levels. Even if you don’t have access to a yard, you can enjoy the taste and satisfaction of harvesting your own garlic. With just a few cloves, a sunny spot, and regular care, you’ll have a bountiful container crop of this kitchen essential.
No ground? No problem—just plant garlic in a pot and start growing.


