Melons are a delicious, refreshing fruit that can easily be grown at home from seeds, even those bought from the supermarket. If you love gardening or want to try growing your own fruits, germinating melon seeds is a rewarding and surprisingly fast process. With just a few simple steps, you can grow millions of melon plants in your garden or urban farm in as little as five days.
This article explains how to successfully germinate melon seeds purchased at the supermarket, prepare them for planting, and care for them through the early stages of growth.
Why Grow Melons from Supermarket Seeds?
Using melon seeds from supermarket fruit is an accessible and cost-effective way to start your melon garden. You don’t need to buy expensive seed packets — the seeds inside ripe, fresh melons are viable and ready to grow with proper preparation.
Growing melons from supermarket seeds also gives you the chance to experiment with different melon varieties. Each seed has the potential to sprout into a healthy, fruit-bearing plant, producing sweet melons to enjoy fresh or share with family and friends.
Step 1: Selecting and Preparing Melon Seeds
Start by choosing a ripe melon from the supermarket. Watermelon, cantaloupe, or honeydew melons all contain seeds suitable for germination.
-
Cut open the melon and carefully scoop out the seeds.
-
Place the seeds in a bowl and rinse them thoroughly to remove any pulp or fruit residue, as leftover pulp can cause mold during germination.
-
Spread the seeds out on a paper towel and allow them to dry for a day or two in a warm, shaded spot.
Drying helps prevent mold and prepares the seeds for the next stage.
Step 2: Germinating Melon Seeds Quickly (In 5 Days)
Melon seeds can germinate rapidly under the right conditions, often sprouting within 3 to 5 days.
Materials you’ll need:
-
Paper towels or cotton pads
-
A shallow tray or plate
-
Plastic wrap or a clear plastic bag
-
Warm environment (around 25–30°C / 77–86°F)
How to do it:
-
Moisten the paper towels or cotton pads with water, making sure they’re damp but not soaking wet.
-
Place the melon seeds evenly spaced on the moist paper towels.
-
Cover the seeds with another damp paper towel.
-
Put the towels with seeds inside a tray or plate and cover them with plastic wrap or place them inside a clear plastic bag to keep humidity high.
-
Keep the tray in a warm location with indirect sunlight or warmth. Avoid direct sun that can dry out the seeds.
Within 3 to 5 days, you should see tiny roots emerging from the seeds — a clear sign of successful germination.
Step 3: Preparing to Plant the Germinated Seeds
Once the seeds have sprouted, they are ready to be planted in soil.
-
Prepare seedling trays, small pots, or a garden bed with well-draining soil rich in organic matter.
-
Make small holes about 1-2 cm deep to plant each sprouted seed gently, root downwards, and cover lightly with soil.
-
Water the soil carefully to keep it moist but not waterlogged.
Melons require plenty of sunlight and warmth to thrive, so place the pots or trays in a sunny location where they can receive at least 6 to 8 hours of direct sunlight daily.
Step 4: Caring for Your Young Melon Plants
During the first few weeks, young melon plants need attentive care:
-
Watering: Keep the soil consistently moist, especially during hot days, but avoid overwatering to prevent root rot.
-
Temperature: Maintain warm temperatures; melon seedlings grow best between 21–30°C (70–86°F).
-
Thinning: When seedlings grow, thin them to avoid overcrowding, leaving only the strongest plants to develop fully.
-
Fertilizing: After the first true leaves appear, feed your melon plants with a balanced fertilizer to encourage healthy growth.
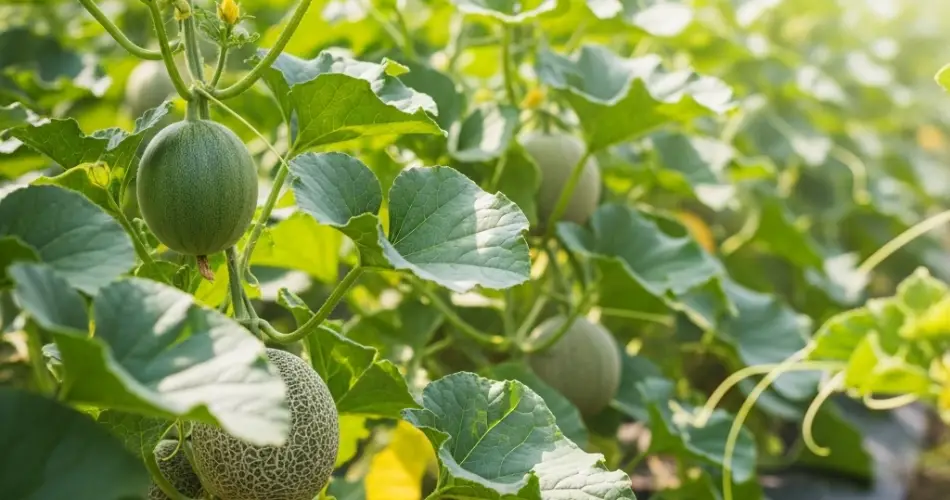
Step 5: Transplanting and Growing Melons
When seedlings reach about 10–15 cm tall and have a strong root system, they can be transplanted into larger pots or directly into your garden.
-
Choose a sunny spot with fertile, well-drained soil.
-
Space melon plants at least 60–90 cm apart to give them room to spread and grow.
-
Water regularly and mulch around the plants to conserve moisture and control weeds.
As the plants mature, they will develop vines and flowers, which eventually turn into sweet, juicy melons.
Tips for Success Growing Melons from Supermarket Seeds
-
Always use fresh, healthy seeds from ripe melons for best germination rates.
-
Avoid planting seeds that are shriveled or damaged.
-
Keep a consistent watering schedule to prevent stress on young plants.
-
Protect seedlings from pests such as aphids and beetles with natural remedies or organic pesticides.
-
Support vines as they grow to prevent fruit from touching the ground and rotting.
Conclusion
Growing melon plants from supermarket seeds is easier than many think, and within just five days you can see your efforts come to life as seedlings sprout. By following these simple steps—from seed preparation to planting and care—you can enjoy fresh, homegrown melons right from your garden.
This rewarding project not only saves money but also gives you the satisfaction of nurturing plants from seed to fruit. Try it yourself and experience the joy of harvesting your own sweet melons!


