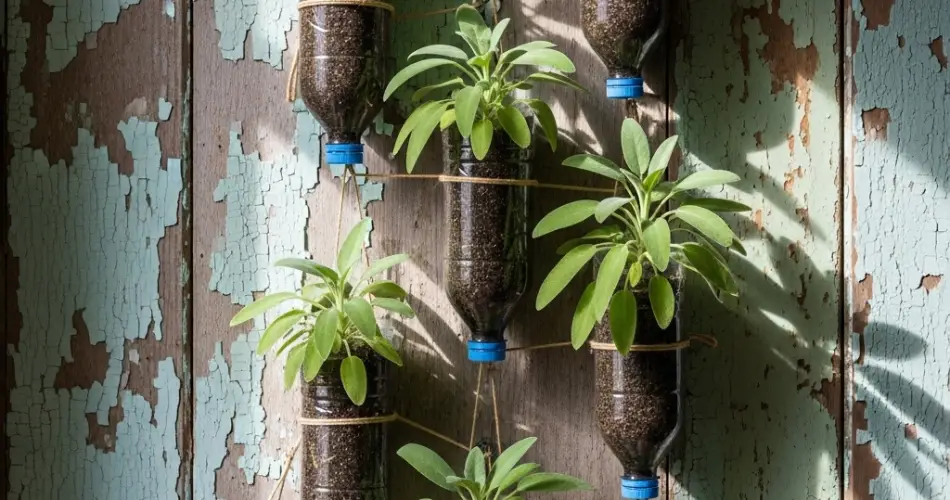
Sage is a hardy, aromatic herb cherished for its earthy flavor, velvety leaves, and culinary versatility. From roasted meats to herbal teas, it adds a distinctive taste to dishes and offers medicinal benefits as well. While it traditionally grows in garden beds, sage adapts well to container gardening—making it perfect for vertical wall planters created from recycled plastic bottles.
This method saves space, reduces waste, and transforms plain walls into living, fragrant displays. Whether you live in a city apartment or a home with limited yard space, a bottle garden wall allows you to grow fresh sage within arm’s reach.
Why Grow Sage Vertically?
Vertical herb gardens offer both practical and aesthetic benefits:
-
Space-Saving – Ideal for small balconies, patios, or kitchen walls.
-
Easy Access – Herbs are always within reach for cooking or drying.
-
Improved Airflow – Reduces the risk of fungal problems.
-
Sustainability – Reuses plastic bottles that would otherwise end up as waste.
-
Visual Appeal – Adds greenery and texture to bare walls or fences.
Sage, with its compact growth and drought tolerance, is particularly suited to vertical planting.
Choosing the Best Location
Sage thrives in full sun, needing at least 6–8 hours of direct light daily. Choose a wall facing south or west for maximum exposure. In very hot climates, provide light afternoon shade to prevent leaf scorching.
Vertical planters dry out faster than garden beds, so position your bottle garden where watering is convenient. Also, consider wind protection, as strong gusts can stress container plants.
Preparing Your Bottle Planters
You’ll need sturdy 1.5-liter or 2-liter plastic bottles for each sage plant. Follow these steps:
-
Cut the Opening – Lay the bottle horizontally and cut a rectangular opening along one side for planting.
-
Add Drainage Holes – Puncture 3–4 holes in the base to allow excess water to escape.
-
Secure the Bottles – Attach bottles to your wall or fence using nails, screws, or cable ties. Arrange them in rows or staggered patterns for better visual effect and easier watering.
-
Optional Insulation – Wrap bottles in burlap or paint them to protect roots from direct sunlight and add decorative charm.
Soil Preparation
Sage prefers well-draining soil to avoid root rot. Create a mix of:
-
2 parts quality potting soil
-
1 part compost
-
1 part coarse sand or perlite
This blend ensures the right balance of nutrients, moisture retention, and aeration.
Planting Sage
You can grow sage from seeds, cuttings, or nursery seedlings:
-
Seeds – Sow directly into the prepared bottles about 0.5 cm deep. Germination usually takes 10–21 days, but sage grows slowly from seed, so patience is required.
-
Cuttings – Root 10 cm stems in water or moist potting mix before transferring to bottles.
-
Seedlings – Transplant carefully, filling soil around the root ball and firming gently to remove air pockets.
For a fuller wall, plant one sage per bottle to give it room to spread.
Watering and Sunlight Care
Sage prefers moderately dry conditions once established. Water deeply but only when the top 2–3 cm of soil is dry. Overwatering can cause root problems, especially in plastic bottles.
Ensure your garden wall gets plenty of sun. In shaded spots, sage may grow leggy and produce fewer aromatic oils, reducing flavor intensity.
Feeding Your Plants
Fertilize lightly every 4–6 weeks with a balanced organic fertilizer or compost tea. Too much nitrogen will encourage leafy growth but reduce the concentration of essential oils, making the leaves less fragrant.
Pruning lightly throughout the growing season encourages bushier plants and prevents woody stems.
Pests and Diseases
Sage is generally pest-resistant but may occasionally attract aphids, spider mites, or whiteflies. Manage them naturally by:
-
Spraying with a mild soapy water solution.
-
Removing infested leaves.
-
Ensuring good airflow to reduce humidity.
Avoid powdery mildew by watering at the base of plants rather than overhead and by spacing bottles to allow light and air to circulate.
Harvesting Sage
Begin harvesting once plants are well-established, usually after a few months. Pick the larger outer leaves first, leaving younger growth to continue developing. Regular harvesting keeps plants productive and prevents them from becoming too woody.
For drying, harvest stems before flowering, when oil concentration is highest. Bundle them and hang in a warm, dry, shaded place until crisp. Store dried leaves in airtight containers away from light.
Benefits of a Sage Bottle Garden Wall
-
Fresh Flavor at Your Fingertips – Perfect for quick culinary use.
-
Year-Round Beauty – Sage’s gray-green foliage adds texture to your home decor.
-
Low Maintenance – Once established, sage requires minimal care.
-
Eco-Friendly Gardening – Gives new life to discarded bottles while reducing grocery waste.
Final Thoughts
A fragrant sage bottle garden wall is a simple, affordable, and attractive way to enjoy fresh herbs while conserving space. With a sunny wall, a few recycled bottles, and minimal upkeep, you can grow healthy sage plants that provide both culinary delights and visual charm.
By blending functionality with sustainability, this method turns unused vertical surfaces into living green walls that enhance your home environment—proving that even in small spaces, there’s always room for a thriving herb garden.


