Oregano is one of the most popular herbs in home kitchens and gardens, valued for its strong aroma and flavor that enhances a wide range of dishes. While many gardeners start oregano from seeds, growing it from cuttings is an easier and faster method. Cuttings allow you to clone a healthy, established plant, ensuring that your new oregano shares the same vigor and flavor quality as the original.
Starting oregano from cuttings in a pot is especially convenient for those with limited outdoor space or who want to grow herbs on a balcony, patio, or windowsill. With the right steps, you can establish a thriving oregano plant that provides fresh leaves year-round.
Why Choose Cuttings Over Seeds?
Oregano seeds are tiny, and germination can be inconsistent. Starting from seeds often requires more patience, and seedlings may take weeks to grow strong enough for regular use. On the other hand, cuttings are faster to root and establish. They also ensure that your new plants are identical to the parent plant, preserving the same flavor profile. This makes cuttings the preferred choice for many home gardeners.
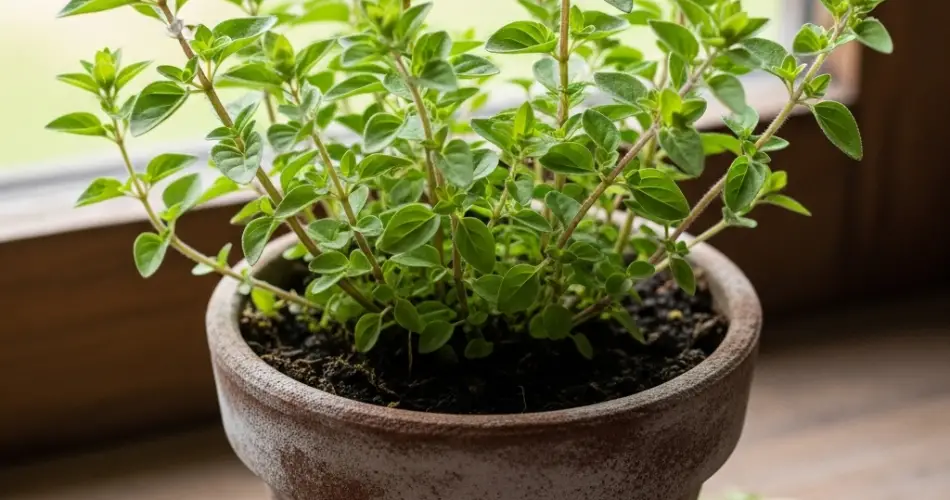
Choosing the Right Pot
When starting oregano in a pot, choose one that allows for healthy root development. A container that is 8–10 inches deep and has adequate drainage holes is ideal. Oregano does not tolerate soggy soil, so a pot with good drainage is essential.
Terracotta pots are an excellent option since they allow soil to breathe and help prevent excess moisture. However, lightweight plastic pots work well too, particularly if you plan to move them indoors during cooler months.
Preparing the Potting Soil
The right soil mix plays a crucial role in successful oregano growth. Oregano thrives in well-draining, moderately fertile soil. A good potting mix includes:
-
Peat moss or coconut coir to retain moisture without waterlogging.
-
Perlite or sand for better drainage and aeration.
-
Compost or organic matter to provide balanced nutrients.
Oregano prefers a slightly alkaline to neutral pH (6.0–8.0). Avoid overly rich soil, as it can produce lush growth with weaker flavor. A leaner soil mix encourages stronger essential oil development in the leaves, which enhances the herb’s signature taste.
Taking and Preparing Oregano Cuttings
The first step is sourcing healthy cuttings. Select a mature oregano plant that is free from pests and diseases. Using clean, sharp scissors or pruning shears, snip a stem that is about 4–6 inches long. Choose a stem that is green and flexible rather than woody, as younger stems root more easily.
Once you have your cutting:
-
Remove the leaves from the bottom two inches of the stem.
-
Keep a few leaves at the top to continue photosynthesis.
-
(Optional) Dip the cut end in a rooting hormone to encourage quicker root development, though oregano often roots successfully without it.
Rooting the Cuttings
There are two common methods for rooting oregano cuttings before potting them:
-
Water Rooting – Place the cuttings in a glass of water, ensuring that only the stripped portion of the stem is submerged. Change the water every few days to keep it fresh. Within one to two weeks, small white roots should begin to appear. Once roots reach about an inch long, the cuttings are ready for transplanting into soil.
-
Direct Soil Rooting – Plant the cuttings directly into a prepared pot filled with moist potting mix. Insert the cut end about two inches deep and press the soil gently around it for stability. Keep the soil evenly moist but not soggy while the roots establish.
Both methods are effective, but water rooting allows you to see the root progress, while direct soil rooting eliminates transplant shock.
Planting and Caring for Rooted Cuttings
Once your oregano cutting has developed roots, plant it in the chosen pot filled with the prepared soil mix. Water thoroughly after planting to help the roots settle in.
Place the pot in a location where the plant will receive at least 6–8 hours of sunlight daily. Oregano thrives in bright, direct light, and this ensures strong growth and flavorful leaves. Indoors, a sunny south-facing window or supplemental grow light works well.
Water only when the top inch of soil feels dry. Oregano prefers slightly dry conditions and will not thrive in consistently wet soil. Too much water can lead to root rot.
Ongoing Maintenance
Once your oregano plant is established, maintenance is simple:
-
Pruning: Regularly pinch back the growing tips to encourage bushier growth and prevent the plant from becoming leggy.
-
Harvesting: Once the plant is about 6 inches tall, begin harvesting leaves as needed. Cut stems just above a leaf node, which encourages new branches.
-
Feeding: Oregano is not a heavy feeder. A light application of a balanced, all-purpose fertilizer once a month during the growing season is sufficient. Avoid over-fertilizing, as this can reduce the intensity of the flavor.
-
Flower Control: To maintain strong leaf flavor, pinch off flower buds as they appear. Flowering diverts energy from leaf production and can make the taste milder.
Final Thoughts
Growing oregano from cuttings in a pot is an efficient way to enjoy this flavorful herb without waiting weeks for seeds to mature. With the right container, soil, and care, your oregano will establish quickly and provide a steady supply of fresh leaves for cooking. Regular pruning, careful watering, and plenty of sunlight are the keys to keeping your plant thriving.
By starting oregano from cuttings, you not only save time but also ensure strong, healthy plants that mirror the quality of the parent plant. Whether on your kitchen windowsill, balcony, or patio, a pot of oregano will bring both beauty and flavor into your daily life.


