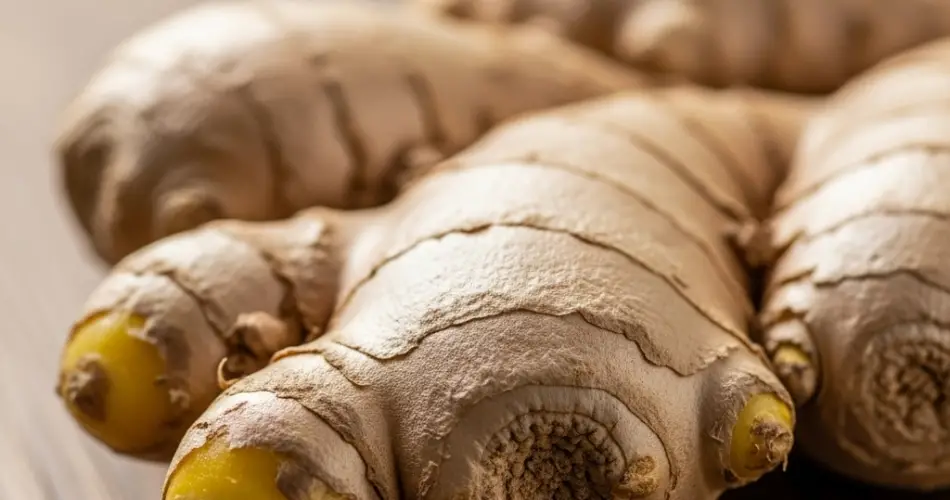
Growing ginger at home is a rewarding and simple process, especially when starting from rhizomes you can buy at your local grocery store. Ginger (Zingiber officinale) is a tropical plant prized for its aromatic roots used in cooking, teas, and natural remedies. With the right care, you can cultivate it successfully even in a home garden or container. Here’s a step-by-step guide on how to grow ginger from store-bought rhizomes and enjoy a steady supply of fresh, flavorful roots.
Why Grow Ginger at Home?
Ginger is not only delicious, but it also has powerful anti-inflammatory and digestive benefits. Store-bought ginger may travel long distances and lose potency over time. By growing it yourself, you ensure a fresher, pesticide-free supply. Homegrown ginger can be harvested partially, meaning you don’t have to uproot the entire plant—you can simply trim off what you need.
Step 1: Choose the Right Ginger Rhizomes
Start with fresh, firm ginger rhizomes that have well-developed “eyes” or growth buds—these are small, slightly raised points on the surface, similar to eyes on a potato. Avoid pieces that are too dry, shriveled, or moldy.
If possible, choose organic ginger. Conventionally grown ginger is sometimes treated with growth inhibitors to prevent sprouting in stores. Organic rhizomes are more likely to sprout successfully.
Step 2: Prepare the Rhizomes for Planting
Once you’ve selected healthy rhizomes, soak them in warm water overnight. This helps rehydrate them and encourages sprouting. If the piece is large, you can cut it into smaller sections—each about 1 to 2 inches long—making sure each piece has at least one viable eye.
Let the cut pieces air-dry for 24–48 hours before planting. This helps prevent rot and allows the cut surfaces to heal and form a protective callus.
Step 3: Choose the Right Container or Planting Location
Ginger thrives in warm, humid conditions with filtered sunlight. It does best in loose, rich soil that drains well. If you live in a colder climate, grow ginger in containers so you can move them indoors during cooler months.
Container tips:
-
Choose a wide, shallow pot—ginger grows horizontally, not deep
-
Make sure the container has drainage holes to prevent waterlogging
-
Use high-quality potting mix enriched with compost or aged manure
If you’re planting directly into a garden bed, pick a location with partial shade and amend the soil with organic matter.
Step 4: Plant the Ginger Rhizomes
Place each rhizome section with the eye facing upward, about 1–2 inches below the surface of the soil. Space them at least 6–8 inches apart if planting more than one.
Cover lightly with soil and water gently but thoroughly. Keep the soil consistently moist but not soggy. Ginger prefers a slightly humid environment, so misting the surface can help, especially in dry climates or during indoor growing.
Step 5: Provide Warmth and Moisture
Ginger is a slow grower and requires warm temperatures to sprout—ideally between 70–85°F (21–29°C). Sprouting can take anywhere from 2 to 4 weeks. During this period, keep the soil moist and maintain warmth by placing the pot in a bright, sheltered area.
Once the shoots emerge, water regularly to keep the soil evenly moist, but be careful not to overwater. Yellowing leaves or soggy soil may indicate water stress or poor drainage.
Step 6: Care and Maintenance
As the plant grows, feed it monthly with a balanced organic fertilizer or compost tea. Ginger doesn’t require much maintenance, but keeping weeds down and ensuring good airflow around the plant helps prevent disease.
If growing in containers, rotate them occasionally to ensure even sun exposure. In colder climates, bring containers indoors once temperatures start dropping below 50°F (10°C).
Step 7: Harvesting Ginger
Ginger takes about 8 to 10 months to reach full maturity. However, you can begin harvesting small pieces of young ginger as early as 4 to 5 months after planting. This younger ginger is milder in flavor and has a tender skin.
To harvest, gently dig around the base of the plant and cut off a section of rhizome, then re-cover the remaining plant to let it continue growing.
For a full harvest, wait until the leaves begin to yellow and die back, usually around 10 months. At this stage, dig up the entire root system, clean it, and store the rhizomes in a cool, dry place or in the refrigerator.
Final Thoughts
Starting ginger from store-bought rhizomes is a simple, low-cost way to enjoy a continuous supply of fresh ginger at home. With the right preparation, container choice, and care, you can grow this tropical root even in non-tropical environments. Whether you use it in teas, stir-fries, or natural remedies, homegrown ginger will reward you with superior flavor and freshness. Give it a try—you might find that growing ginger is easier and more satisfying than you ever imagined.


