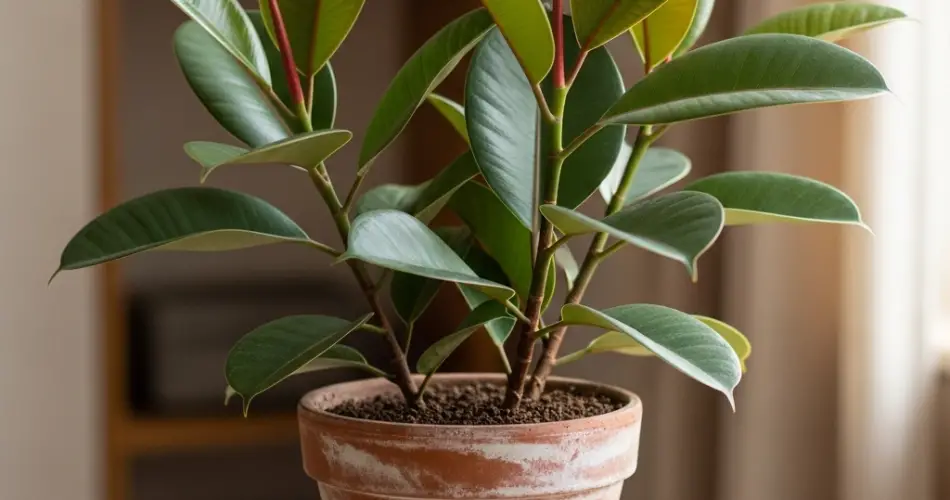
Rubber plants (Ficus elastica) are popular houseplants known for their large, glossy leaves and ability to adapt to indoor spaces. Their striking appearance makes them a favorite for living rooms, offices, and entryways. While many people buy them from nurseries, propagating your own rubber plant from cuttings is a rewarding and cost-effective way to expand your collection or share plants with friends.
Propagating rubber plants requires patience, as they grow more slowly compared to some other indoor plants, but with the right techniques, success is within reach. This guide explains how to take cuttings, prepare them properly, and encourage strong root development for healthy new plants.
Why Propagate Rubber Plants?
There are several reasons plant lovers choose to propagate rubber plants:
-
Cost savings: Instead of buying a new plant, you can create more from a healthy parent plant.
-
Plant health: Pruning and propagating keeps the original plant from becoming too tall or leggy.
-
Sharing: Propagated cuttings make thoughtful gifts for friends and family.
-
Experimentation: It’s a great way to learn more about plant growth and care.
The Best Time for Propagation
The ideal time to propagate rubber plants is during their active growing season—spring and early summer. Warmer temperatures and longer daylight hours encourage quicker root development. Avoid attempting propagation in winter, as the plant is usually dormant and rooting will be much slower.
Tools and Materials You’ll Need
Before starting, gather the following items:
-
A healthy rubber plant
-
Sharp, sterilized pruning shears or scissors
-
A small pot with drainage holes
-
Well-draining potting mix (peat moss and perlite or coco coir blend)
-
Rooting hormone (optional but helpful)
-
Clean water
-
Clear plastic bag or humidity dome (for creating a greenhouse effect)
Having everything ready will make the process smooth and reduce stress on the cutting.
Taking the Cutting
-
Choose a healthy stem: Select a stem that is at least 6 inches long with several leaves. Avoid weak or damaged stems.
-
Make a clean cut: Using sterilized shears, cut just below a leaf node (the area where a leaf attaches to the stem). Nodes are where new roots will form.
-
Remove lower leaves: Strip off the leaves from the bottom half of the cutting, leaving two to three leaves at the top. This reduces water loss through transpiration.
-
Handle the sap carefully: Rubber plants release a milky latex sap when cut. It can be irritating to skin, so wear gloves and avoid contact with eyes or mouth.
Rooting the Cutting in Soil
-
Prepare the pot: Fill a small container with well-draining potting mix. Lightly moisten the soil.
-
Dip in rooting hormone: While optional, applying rooting hormone to the cut end encourages faster and stronger root growth.
-
Plant the cutting: Insert the stem into the soil so that at least one node is buried beneath the surface. Firm the soil around the stem to hold it upright.
-
Create humidity: Cover the pot with a clear plastic bag or humidity dome to maintain moisture. Make sure the plastic doesn’t touch the leaves.
-
Provide light and warmth: Place the pot in bright, indirect light. A temperature between 70–80°F (21–27°C) is ideal.
Roots usually begin to form within four to six weeks. During this period, keep the soil lightly moist but never soggy.
Rooting the Cutting in Water
Some gardeners prefer rooting cuttings in water before transplanting them to soil.
-
Place the cutting in water: Submerge the cut end in a glass of clean water, ensuring at least one node is underwater.
-
Change the water regularly: Refresh it every few days to prevent bacterial growth.
-
Wait for roots to develop: Roots typically appear within four to eight weeks. Once they are about 2 inches long, transplant the cutting into soil.
While this method allows you to monitor root growth, transitioning from water to soil can sometimes stress the cutting.
Caring for New Plants
Once roots are established and the cutting is potted in soil, continue to care for the young rubber plant as you would a mature one:
-
Place in bright, indirect light.
-
Keep the soil evenly moist but not waterlogged.
-
Increase humidity around the plant if possible.
-
Fertilize lightly during the growing season to encourage strong growth.
Be patient—new growth may take a few weeks to appear.
Common Mistakes to Avoid
-
Overwatering: Soggy soil can quickly lead to rot. Keep moisture balanced.
-
Too little light: Rubber plants need bright, indirect light for healthy growth. Avoid dark corners.
-
Skipping sterilization: Using unclean tools increases the risk of disease.
-
Impatience: Rooting is a slow process, and disturbing the cutting too often can hinder progress.
Final Thoughts
Propagating rubber plants from cuttings is a simple yet rewarding way to grow new houseplants. With the right tools, proper technique, and a little patience, you can successfully root cuttings in soil or water. By maintaining the right balance of light, warmth, and moisture, your new rubber plant will thrive and bring a touch of tropical greenery to your home.