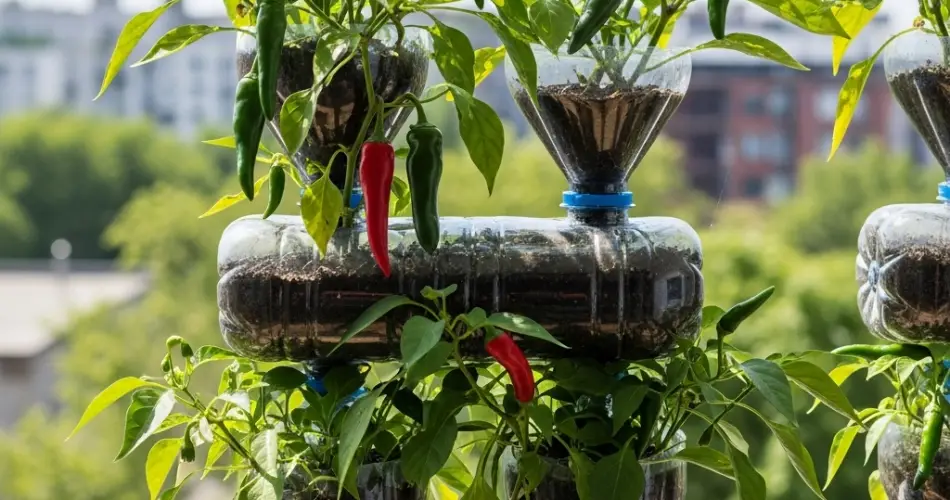
Chili peppers are among the most rewarding crops for home gardeners. They add spice and color to meals, adapt well to container growing, and thrive in both small balconies and backyard gardens. While most people start chilies from seeds in soil, there is a faster, cleaner, and surprisingly simple alternative—propagating chilies in bottles without soil.
This method uses water-based propagation, sometimes referred to as hydroponic starting. By rooting cuttings directly in bottles filled with water, you can create new chili plants without messy potting mixes. It’s a space-saving and low-cost way to expand your chili crop, especially if you want multiple plants from one healthy parent plant.
Why Choose Soil-Free Bottle Propagation?
Using bottles for water-based propagation comes with several unique advantages:
-
Clean and Mess-Free – No soil means no muddy tools, no spillage, and no chance of soil-borne diseases.
-
Visible Root Growth – Transparent bottles allow you to watch roots develop, so you know exactly when cuttings are ready for transplanting.
-
Eco-Friendly Recycling – Old plastic bottles get a new purpose as plant propagation containers.
-
Space Saving – Ideal for urban gardeners with limited outdoor space. A sunny windowsill is all you need.
-
Fast Rooting – Water keeps cuttings consistently hydrated, often speeding up the root development process.
Materials You’ll Need
To get started with chili propagation in bottles, gather these simple materials:
-
A healthy chili plant for cuttings
-
Clear plastic bottles (500 ml–1 liter)
-
Sharp scissors or pruning shears
-
Clean water (filtered or dechlorinated is best)
-
A small piece of paper or cardboard (optional, for light control)
Step-by-Step Guide to Propagating Chilies Without Soil
1. Select the Parent Plant
Start with a vigorous, pest-free chili plant. Look for non-flowering branches that are 10–15 cm long. These cuttings focus energy on root development rather than fruit production.
2. Take the Cuttings
Using clean scissors or shears, snip the branch just below a node (the area where leaves grow from the stem). Remove the lower leaves, leaving only 2–3 at the top. This reduces water loss through transpiration.
3. Prepare the Bottle
Cut the bottle about one-third from the top, or simply remove the cap and fill it with water to about halfway. If you prefer, you can wrap the lower half of the bottle with paper or cardboard to block light and prevent algae growth.
4. Place the Cutting in Water
Insert the chili cutting into the bottle so that the node sits below the waterline. Roots will begin to emerge from these submerged nodes. Make sure no leaves touch the water, as this can cause rotting.
5. Provide the Right Conditions
Place the bottle in a bright location with indirect sunlight. Too much direct heat may warm the water excessively, while too little light slows rooting. A windowsill or balcony ledge is ideal.
Caring for Chili Cuttings in Water
-
Change Water Regularly – Replace the water every 3–4 days to keep it fresh and oxygenated.
-
Watch for Root Growth – Small white roots usually appear within 1–2 weeks. By week 3 or 4, you should see a stronger root system.
-
Avoid Stagnant Conditions – If the water smells bad or turns green with algae, rinse the bottle and refresh it.
-
Patience Is Key – Not every cutting will root successfully, but most will if given proper care.
Transplanting Chili Cuttings to Soil
Once roots are about 5–7 cm long, your chili cuttings are ready to move into soil or a hydroponic setup. Here’s how:
-
Prepare the Soil – Choose well-draining soil enriched with compost. If growing in containers, make sure pots are at least 20 cm deep.
-
Handle Roots Gently – Transfer the cuttings carefully, making sure fragile new roots stay intact.
-
Plant at the Same Depth – Place the rooted cutting into the soil and cover lightly. Water thoroughly after planting.
-
Acclimate the Plant – For the first few days, keep the new plant in partial shade before transitioning to full sun.
Tips for Success with Bottle Propagation
-
Use Multiple Cuttings – Not all cuttings will root, so prepare a few extra to increase your chances.
-
Add Natural Boosters – Some gardeners dip cuttings in honey, aloe vera gel, or willow water before placing them in bottles to encourage faster rooting.
-
Monitor Light and Heat – Cuttings prefer steady warmth but not scorching sun.
-
Move Before Roots Tangle – If using multiple cuttings in one bottle, separate them before roots intertwine.
Benefits Beyond Gardening
This method is not only practical but also sustainable. Reusing bottles reduces plastic waste while producing new food-bearing plants. It’s also a wonderful way to introduce children or beginners to gardening, as they can observe root growth up close without waiting weeks in soil.
Final Thoughts
Propagating chilies in bottles without soil is a clever gardening hack that combines simplicity, sustainability, and effectiveness. By rooting cuttings directly in water, you can multiply your chili plants with minimal effort, all while reusing everyday materials. Whether you live in an apartment with a small balcony or have a full garden, this method ensures a steady supply of healthy chili plants ready to spice up your meals.
With just a few bottles, some patience, and a little care, you can transform one chili plant into many and enjoy an endless harvest season after season.


