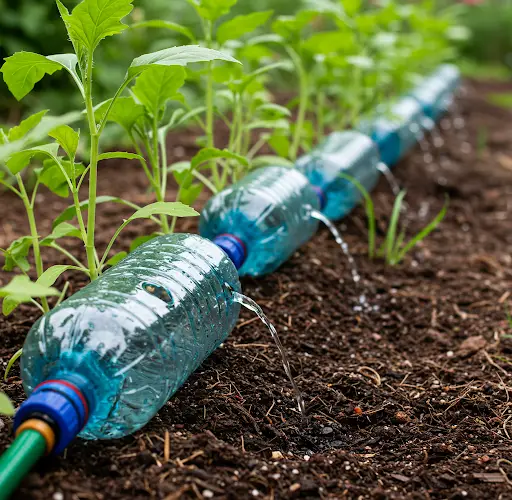
How to Make a Drip Irrigation System with Plastic Bottles
Watering plants regularly is crucial for a healthy garden, but it can be time-consuming and sometimes inefficient, especially during hot or dry seasons. A simple and eco-friendly solution is to create a homemade drip irrigation system using plastic bottles. This method not only saves water but also gives plants a steady, consistent supply of moisture right at the roots.
Reusing plastic bottles for irrigation is a cost-effective and sustainable practice, making it ideal for home gardeners who want an easy, low-maintenance way to care for their plants.
Here’s a step-by-step guide to creating your own plastic bottle drip irrigation system.
Materials You Will Need
-
Plastic bottles (1 to 2-liter bottles work best)
-
A sharp knife or scissors
-
A small nail or needle
-
A lighter or candle (optional, for heating the nail)
-
String, wire, or stakes (if needed for support)
-
Mulch (optional, to cover the bottle for better water retention)
Most of these items are already available at home, making this project virtually free.
Step 1: Choose the Right Bottles
Start by selecting plastic bottles based on the size of your plants and how much water they need. A 1-liter bottle works well for small plants, while a 2-liter bottle is better for larger ones like tomatoes, avocados, or shrubs.
Make sure the bottles are clean and free from any residue or chemicals that could harm your plants.
Step 2: Create the Watering Holes
Using a heated nail or a sharp needle, carefully poke small holes into the bottle:
-
Option 1: Poke 2–5 small holes in the cap.
-
Option 2: Poke small holes along the sides of the bottle near the bottom.
The size and number of holes will determine the drip rate. Smaller holes or fewer holes will slow the drip, while larger or more holes will increase the flow.
Tip: Always test one bottle first to see how fast the water drains before preparing the rest.
Step 3: Prepare the Bottles for Installation
You have two main ways to set up the bottles:
-
Buried Bottle Method: Bury the bottle upside down with the cap facing downward near the plant roots. Leave the bottom of the bottle exposed above the soil for easy refilling.
-
Standing Bottle Method: Bury the bottle upright, with holes poked along the sides underground. Leave the cap open or closed depending on how much air you want to allow in (which affects the dripping speed).
Both methods work well; it depends on what suits your garden layout and the type of plants you are growing.
Step 4: Install the Bottles
Dig a small hole near the base of each plant, about 10 to 15 cm (4 to 6 inches) away from the main stem.
Place the prepared bottle into the hole:
-
For the upside-down method, insert the bottle cap-first.
-
For the upright method, bury the bottom part with the side holes covered by soil.
Fill the bottles with water and check how the water drips into the soil. Adjust the hole size if necessary.
If the bottle feels unstable, secure it with stakes or tie it to a nearby support.
Step 5: Mulch Around the Bottles (Optional)
Adding a layer of mulch around the bottle and plant base helps retain soil moisture and protect the system from sun exposure. It also reduces evaporation, making your watering even more efficient.
Step 6: Maintain Your System
While this bottle irrigation system is low maintenance, regular checks are important:
-
Refill the bottles as needed, usually every few days depending on the weather.
-
Clear the holes if they become clogged with soil or algae.
-
Replace damaged bottles if necessary.
If you live in a very dry climate, consider using larger bottles or adding more bottles per plant for better coverage.
Benefits of Using Plastic Bottles for Drip Irrigation
-
Water Conservation: Delivers water directly to the roots, minimizing evaporation and runoff.
-
Recycling: Reuses plastic bottles that would otherwise become waste.
-
Cost-Effective: No need to buy expensive irrigation systems.
-
Time-Saving: Reduces the need for daily manual watering.
-
Healthier Plants: Steady moisture supply reduces plant stress and improves growth.
This DIY drip irrigation system is especially useful for vegetable gardens, potted plants, raised beds, and even small fruit trees.
Final Tips
-
Adjust the number of holes based on the plant’s water needs.
-
Place bottles closer to the roots for thirsty plants like tomatoes and avocados.
-
For larger areas, use multiple bottles distributed evenly across the garden bed.
-
Combine this method with rainwater collection for an even more sustainable watering solution.
Creating a drip irrigation system with plastic bottles is one of the easiest and most eco-friendly ways to care for your garden. With just a few minutes of setup, you can enjoy healthier plants while conserving water and reducing your environmental footprint.


